Update: March 5, 2018
Introduction
This is the first of several labs that are part of the Oracle Public Cloud Security and Management workshop.
First it will walk you through the steps necessary to request an Oracle Cloud Trial account as well as some of the services which will be required for lab exercises which follow.
Then it will walk you through the various capabilities of Oracle Identity Cloud Service.
Objectives
Oracle Cloud - Navigate
- How to request an Oracle Cloud Trial account
- Arrange services on the cloud dashboard for easy navigation
IDCS - overview
- Create user
<--Persona: Administrator - Configure multi-factor authentication
<--Persona: Administrator - Activate account
<--Persona: End-User - Enroll in multi-factor authentication
<--Persona: End-User - Built-in integration with Oracle cloud services
<--Persona: End-User
(Optional) IDCS - advanced
- Onboard users
<--Persona: Administrator - Configure SSO for an app
<--Persona: Administrator - Grant app to group
<--Persona: Administrator - Request group
<--Persona: End-User - Verify SSO
<--Persona: End-User
Pre-requisites
- A valid email address
- Credit card to sign up for your Oracle Cloud Trial account
- Trial accounts are free and are enabled with $300 credit
Your card will not be automatically charged once the $300 credit has been consumed
Request your free Promotional Account ($300 credit)
Proceed as indicated below to request your free Oracle Cloud account. This account comes with $300 credit to try out any cloud service and will be used primarily for the use cases defined in the workshop.
While your credit card is required to sign up, keep in mind that you won’t be charged unless you explicitly decide to extend the services after your $300 credit is fully used.
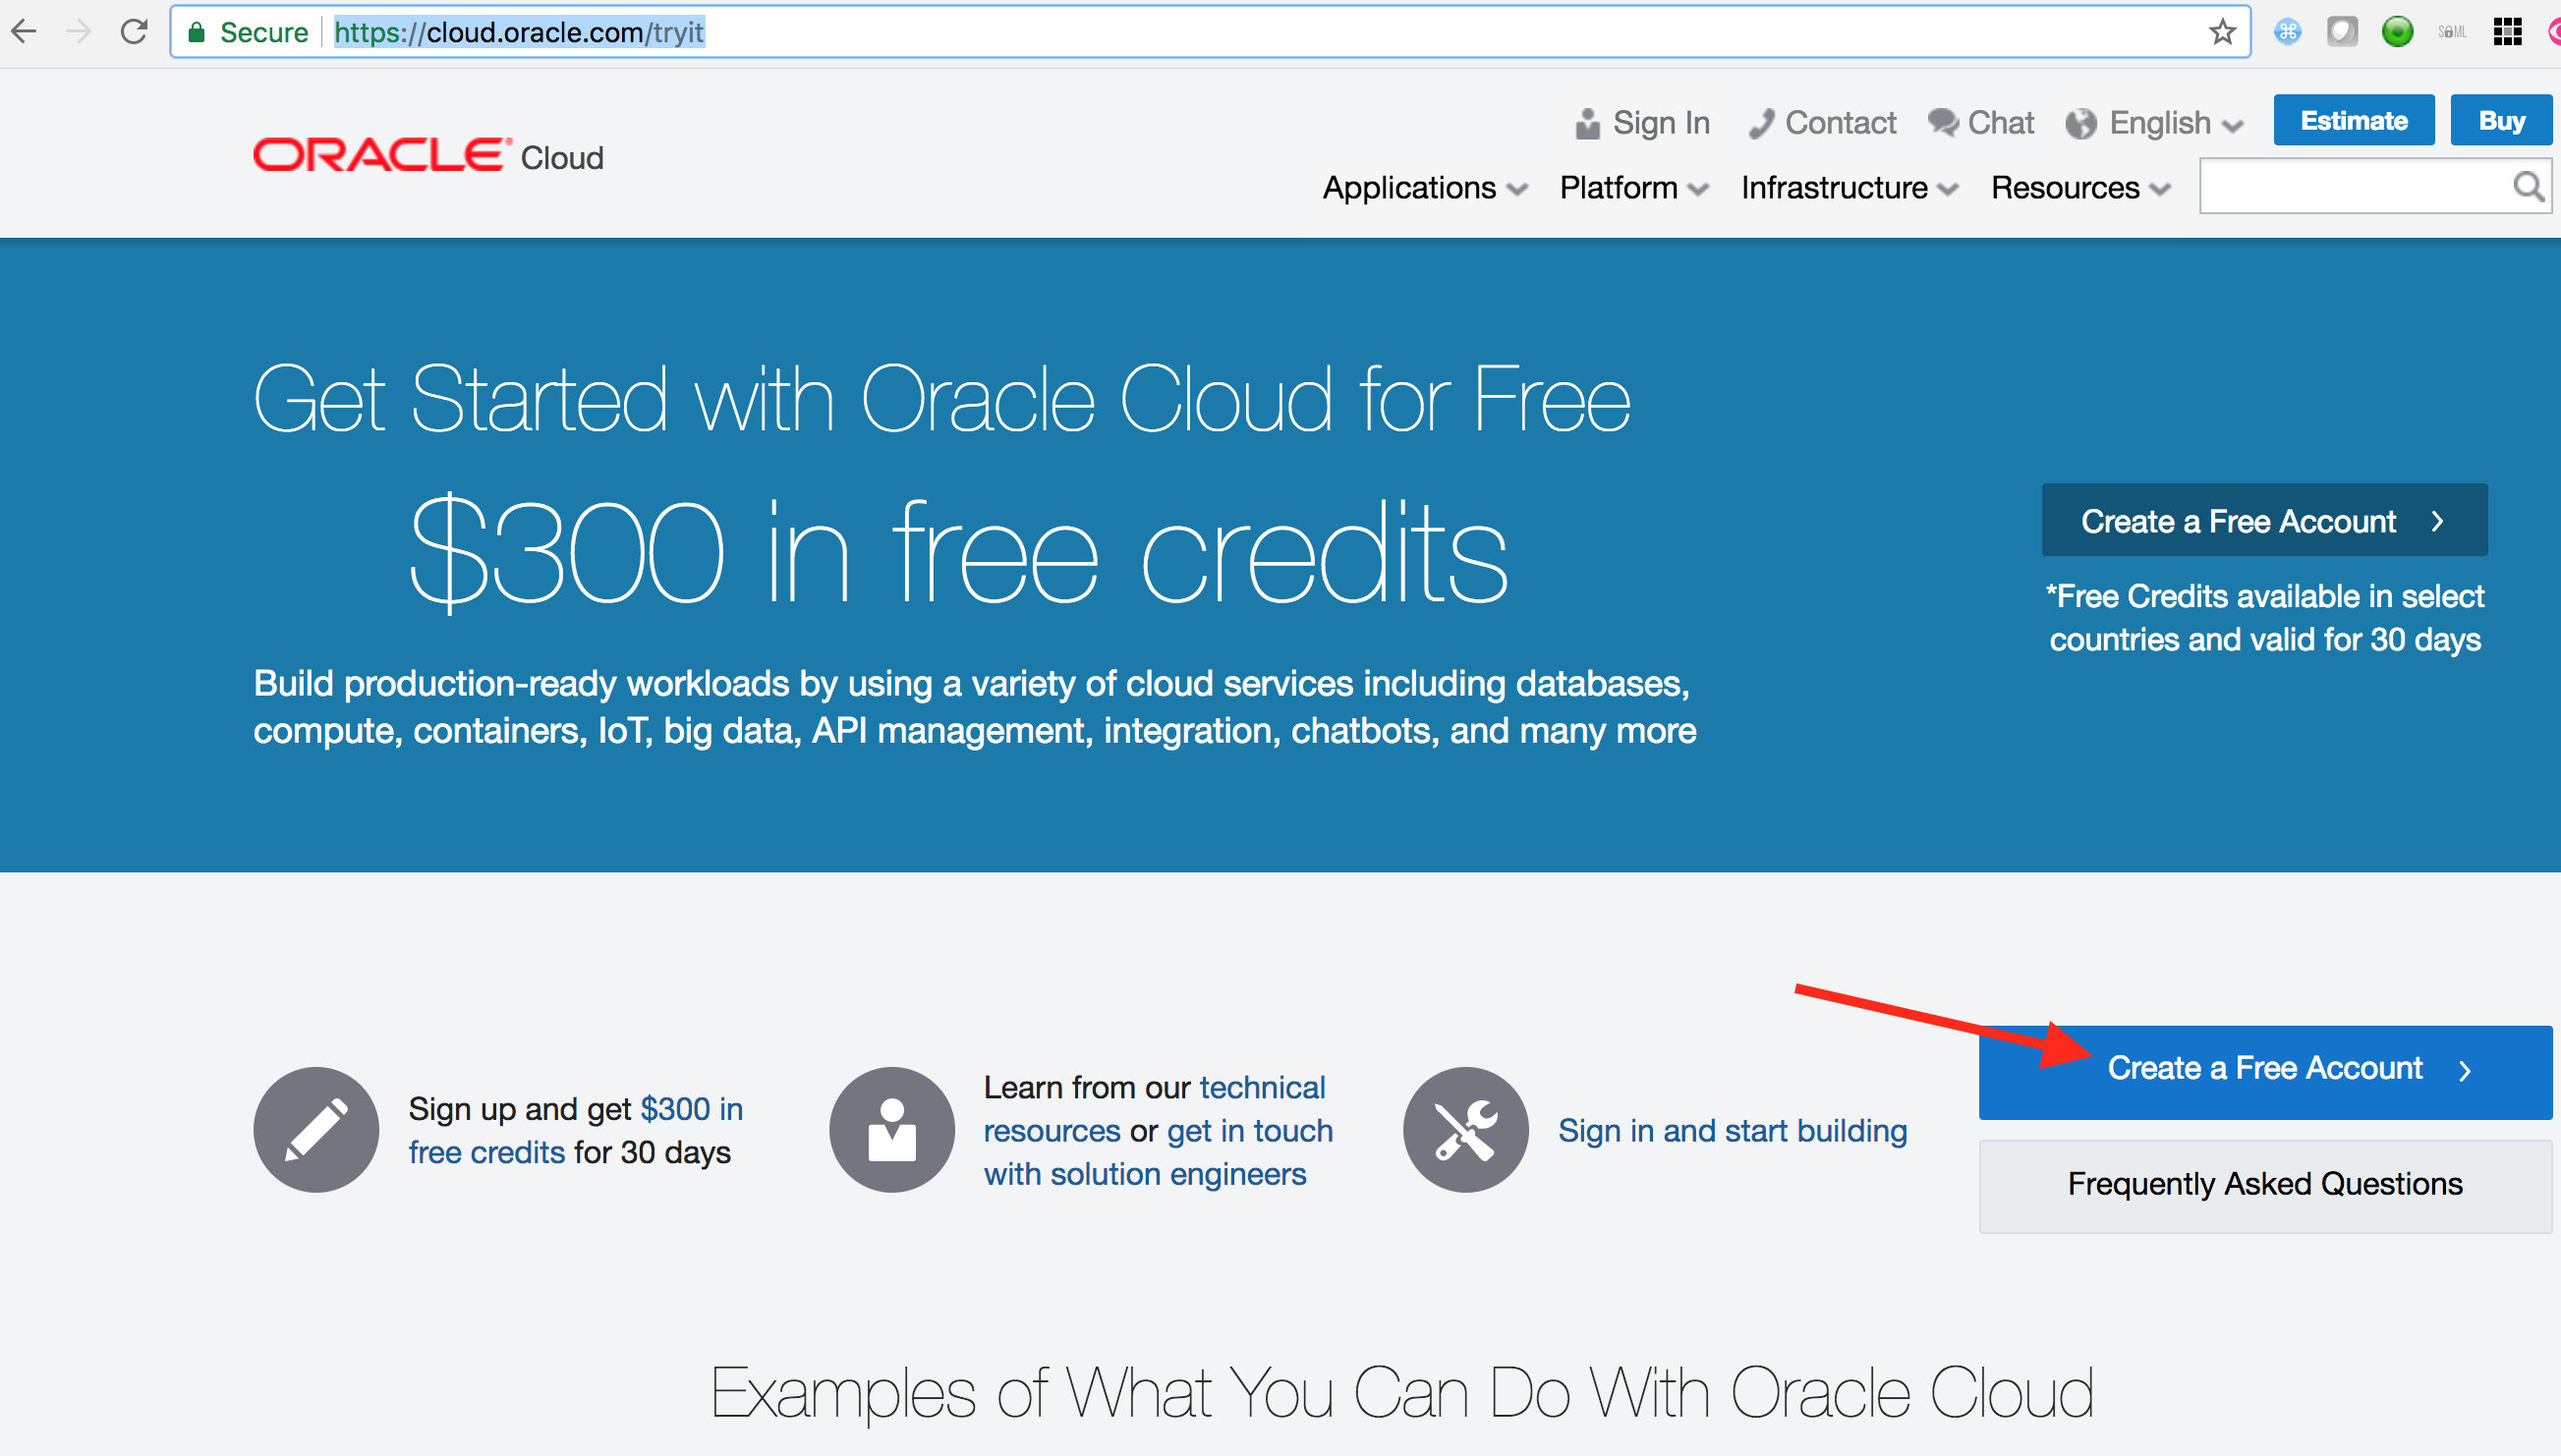
Go to https://cloud.oracle.com/tryit
-
Click on Create a Free Account
-
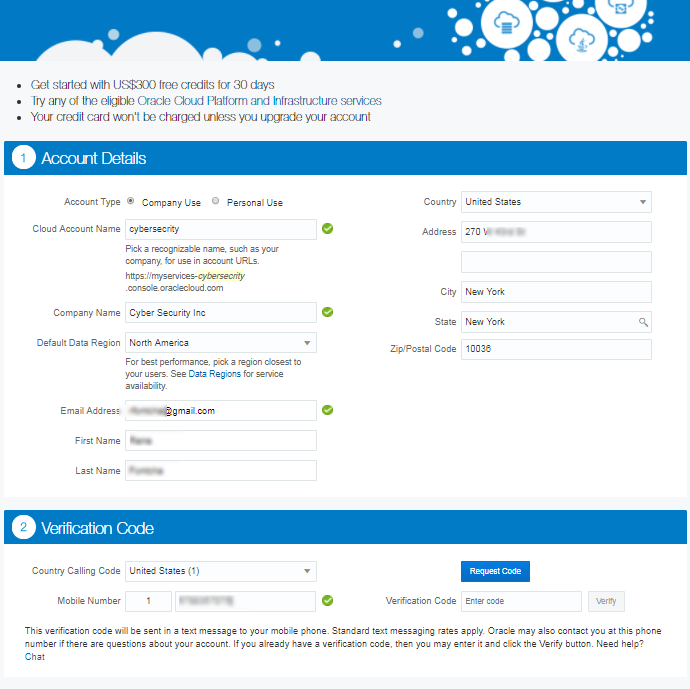
Fill in the form as shown below
-
Provide your cell phone number and click
Request Code
-
Type in the code received on your mobile phone and click
Verify
-
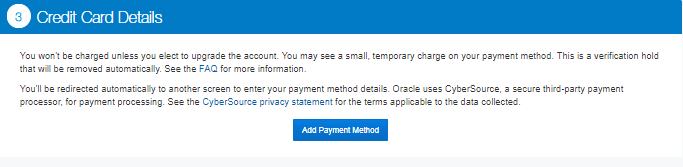
Add Credit Card Details. You won’t be charged unless you choose to extend after your $300 credit is fully used.
-
Accept the
Terms & Conditions
After about 15 minutes your account will be provisioned and you will receive a welcome email with details on the next steps
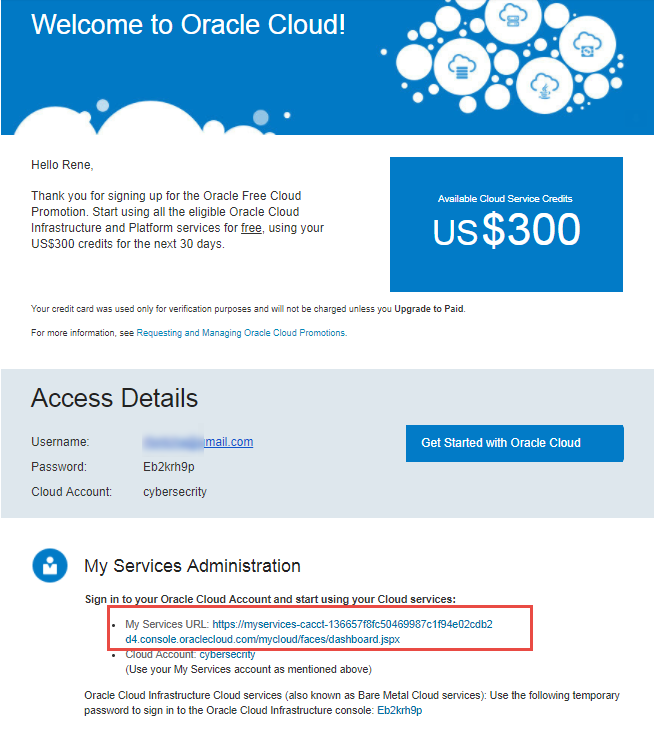
-
Navigate to
My Services AdministrationURL shown above to get started and login with the temporary password provided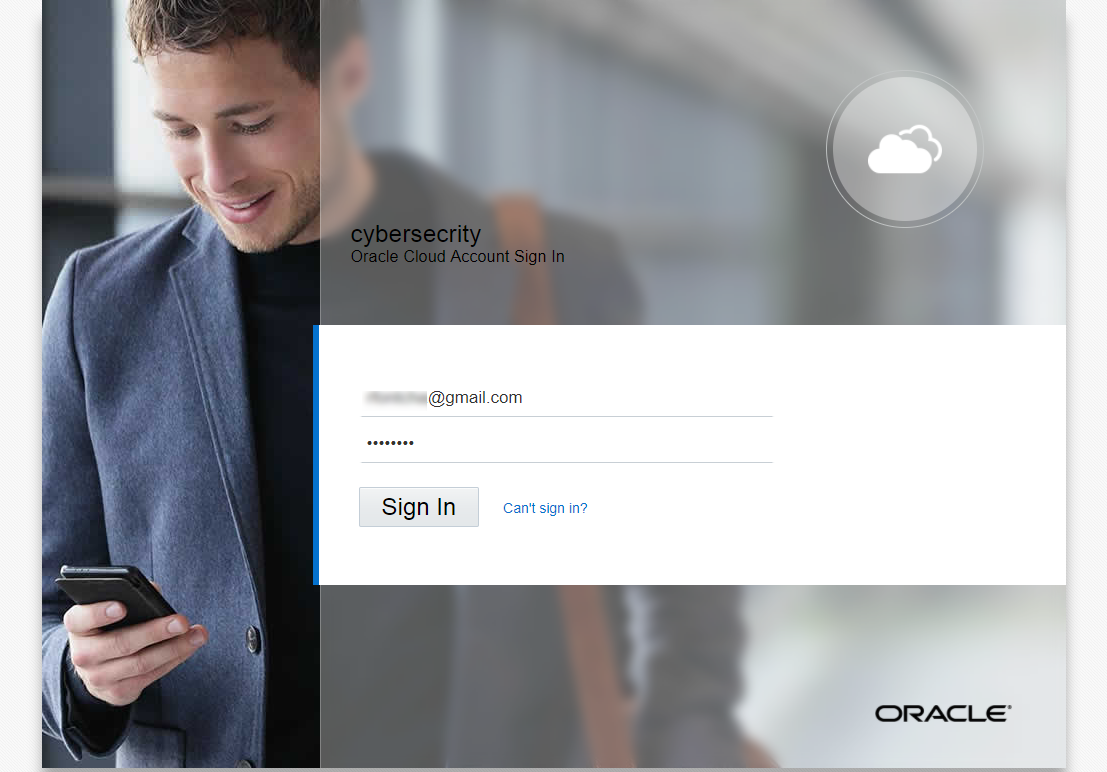
-
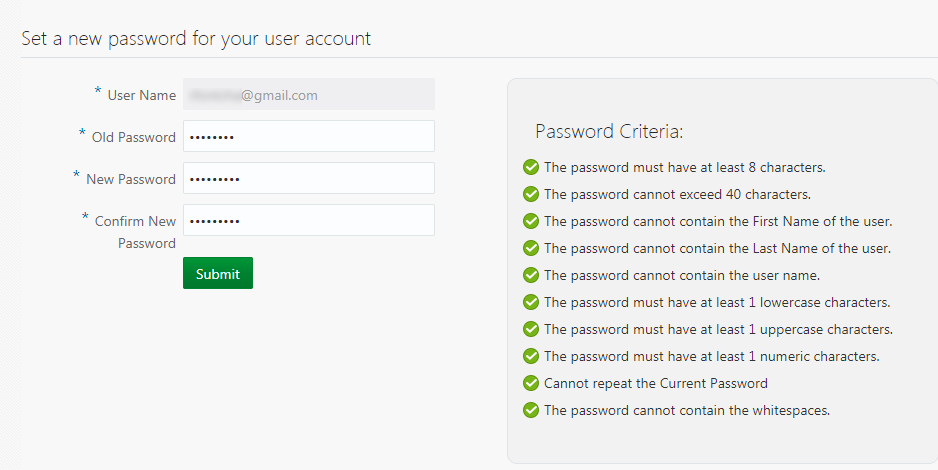
Set a new password for your account
Login to your Oracle Cloud Account
-
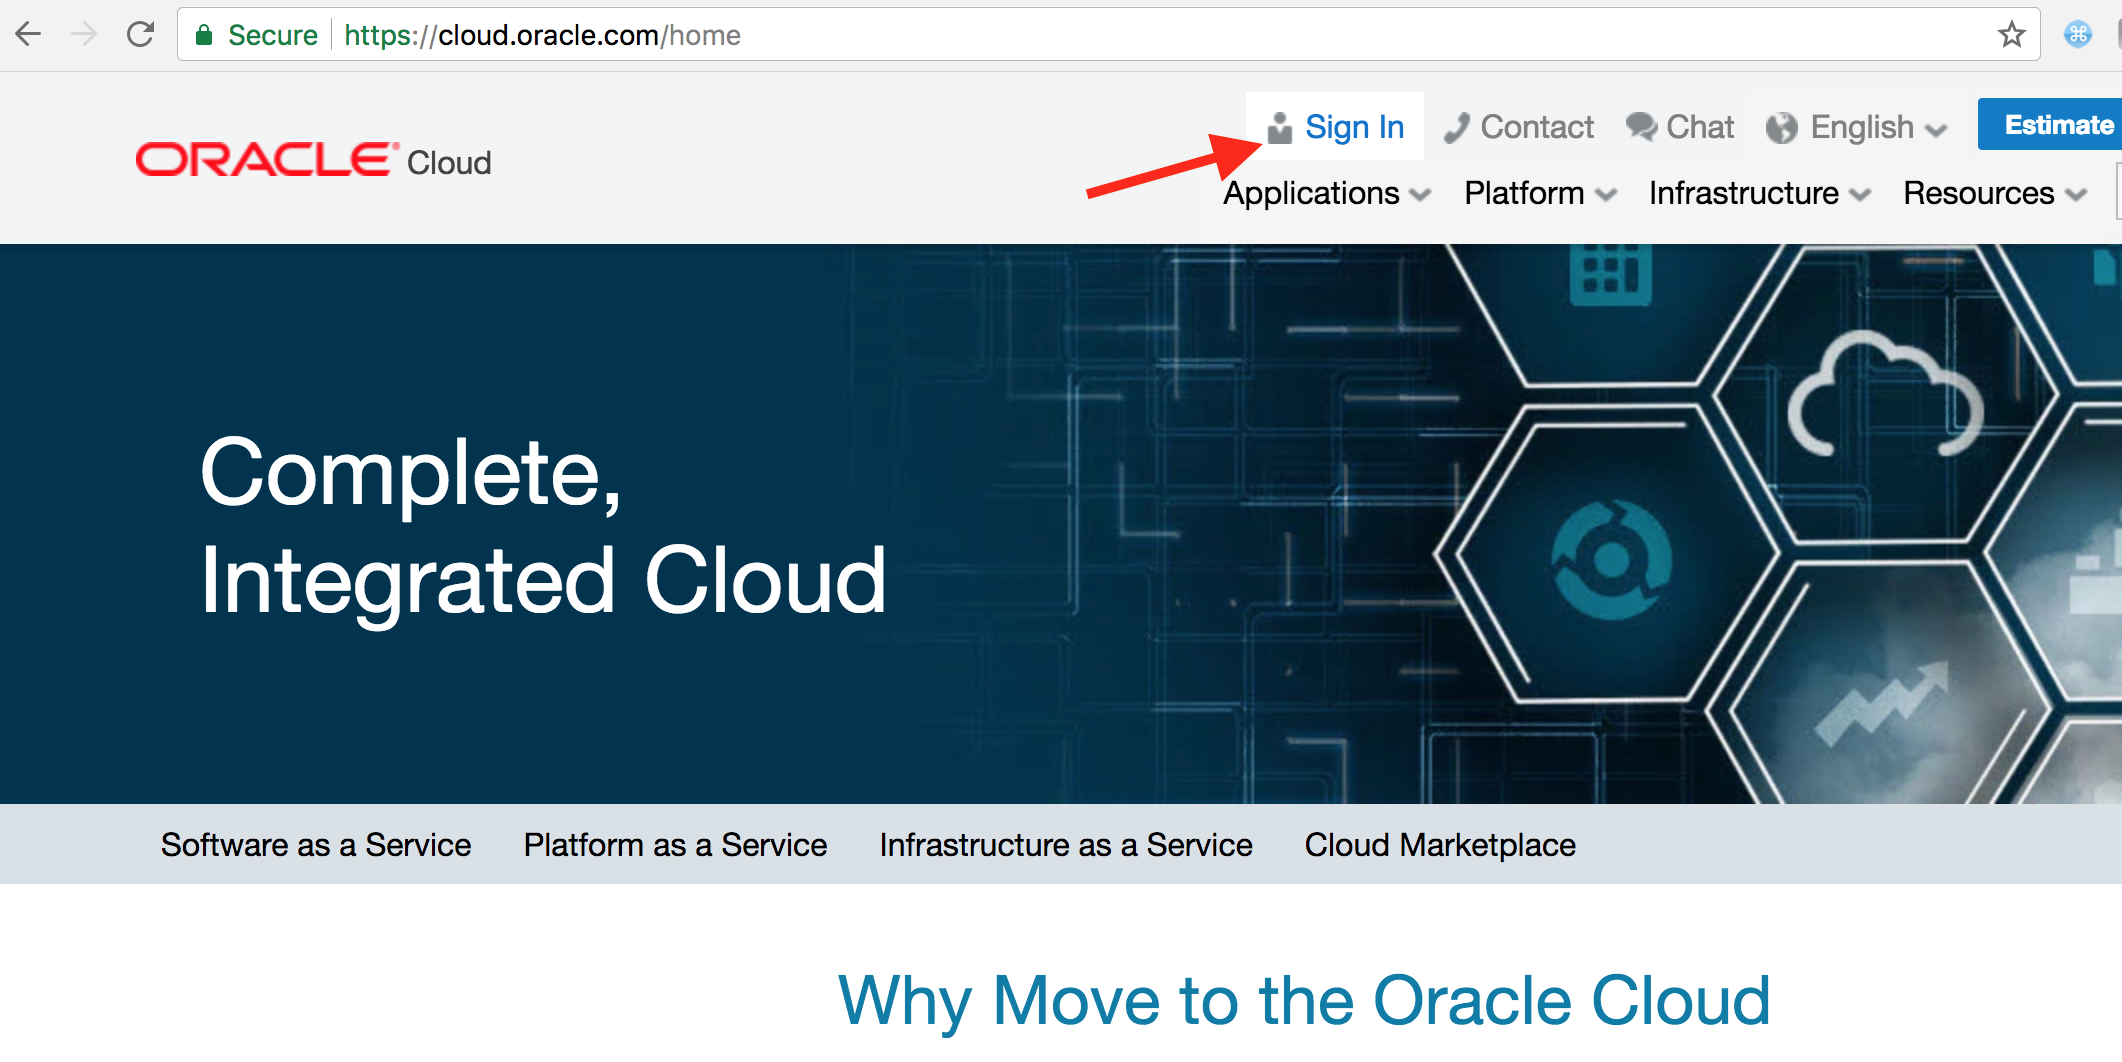
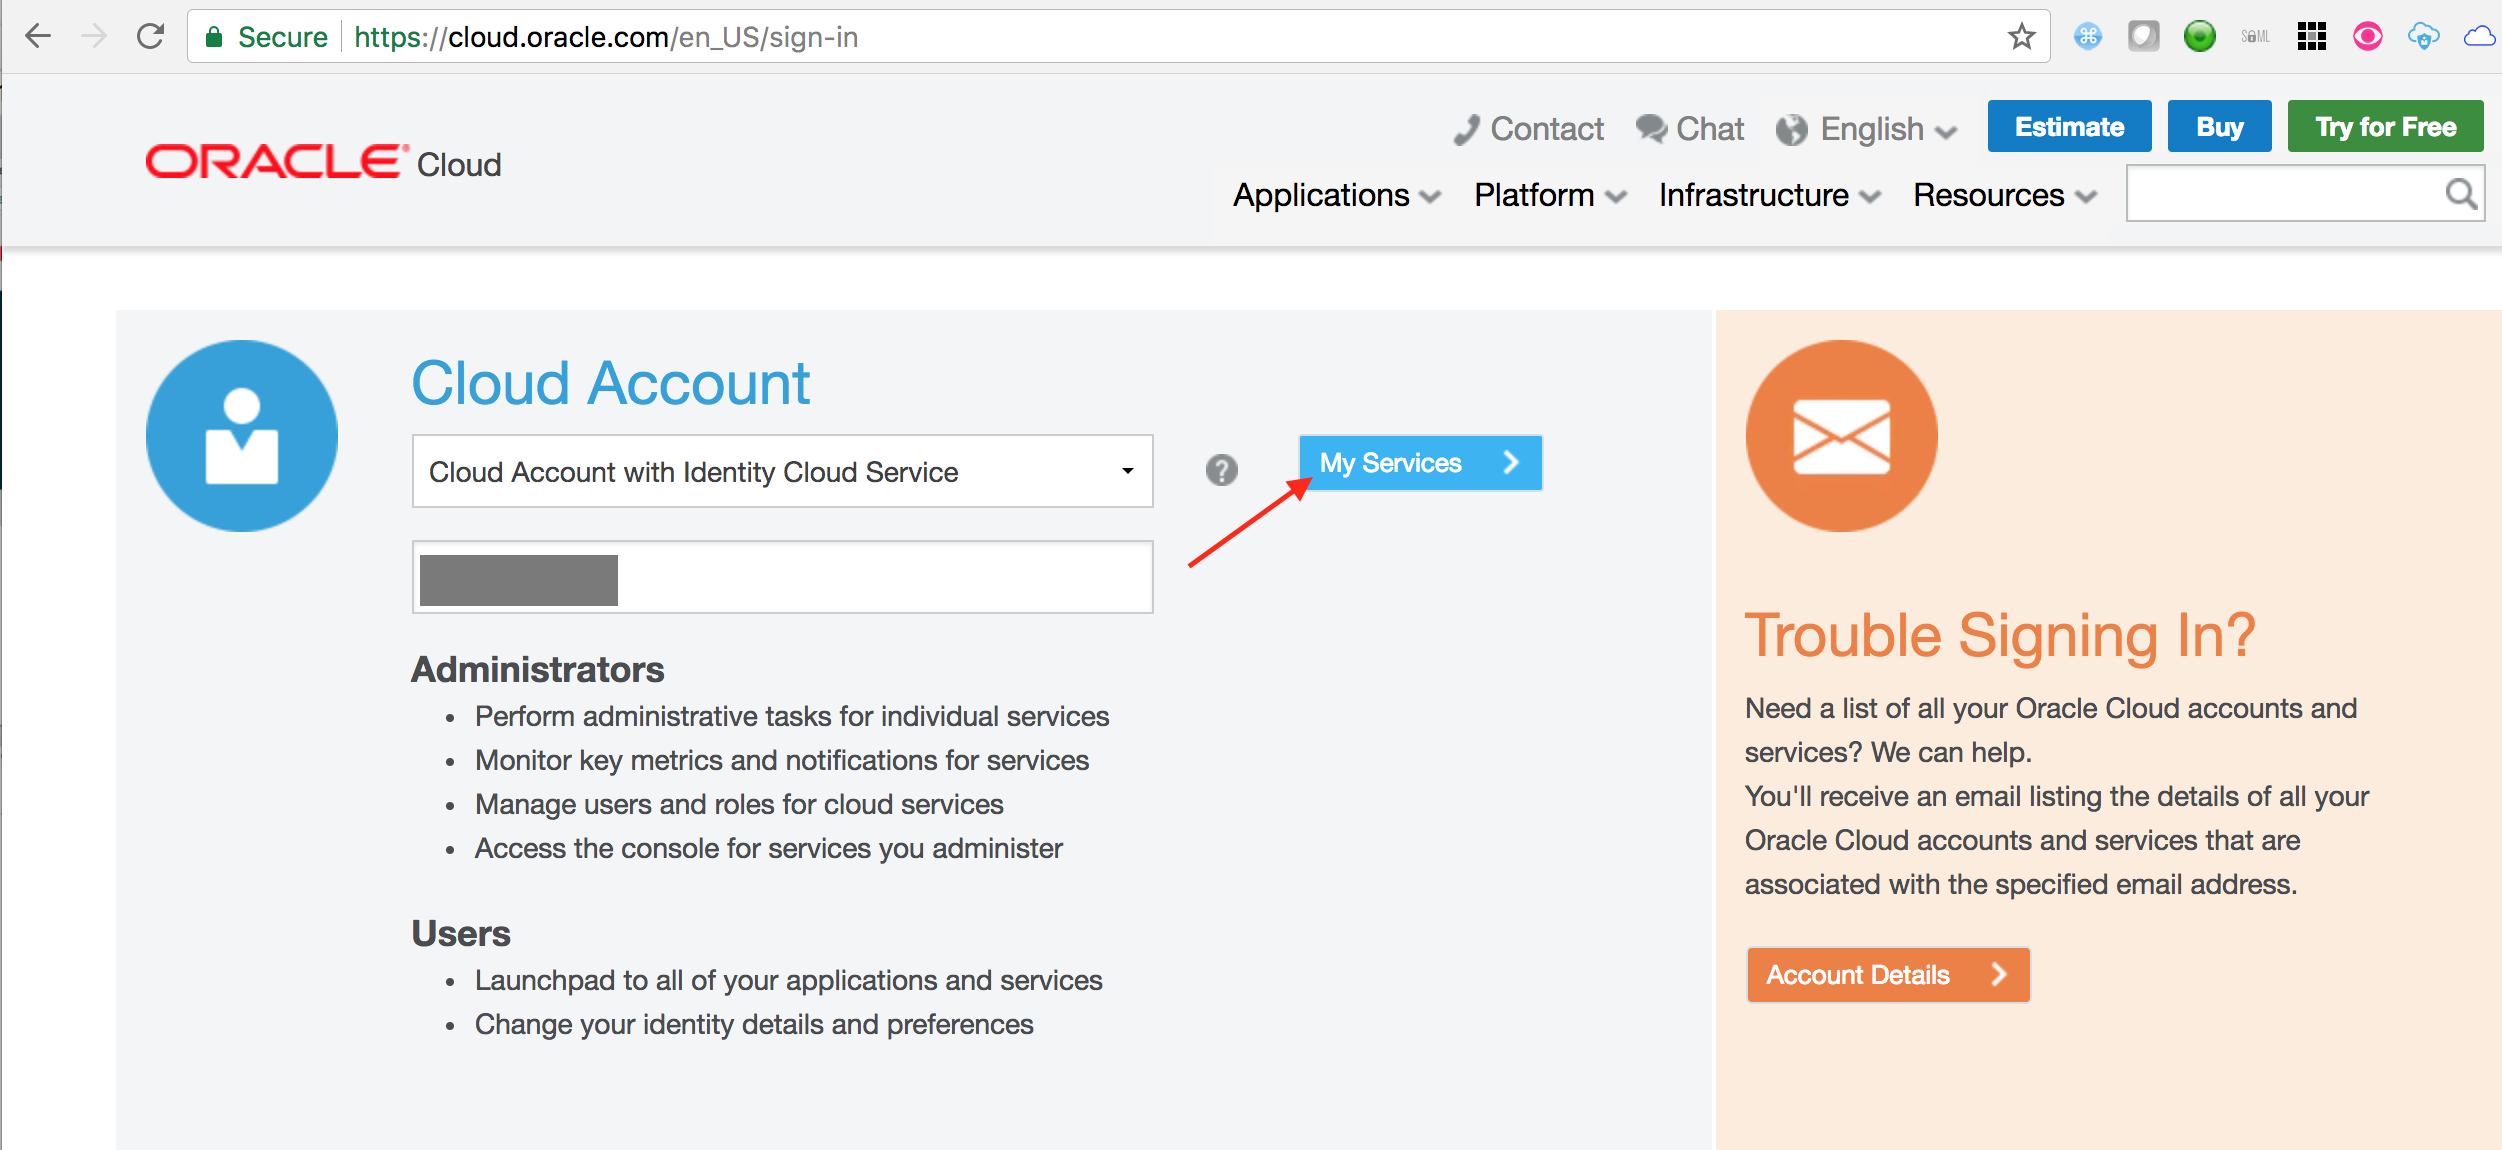
From any browser, go to the URL: https://cloud.oracle.com
-
click Sign In in the upper right hand corner of the browser
- Ensure Cloud Account with Identity Cloud Service is selected. Enter your cloud account name. Click on My Services
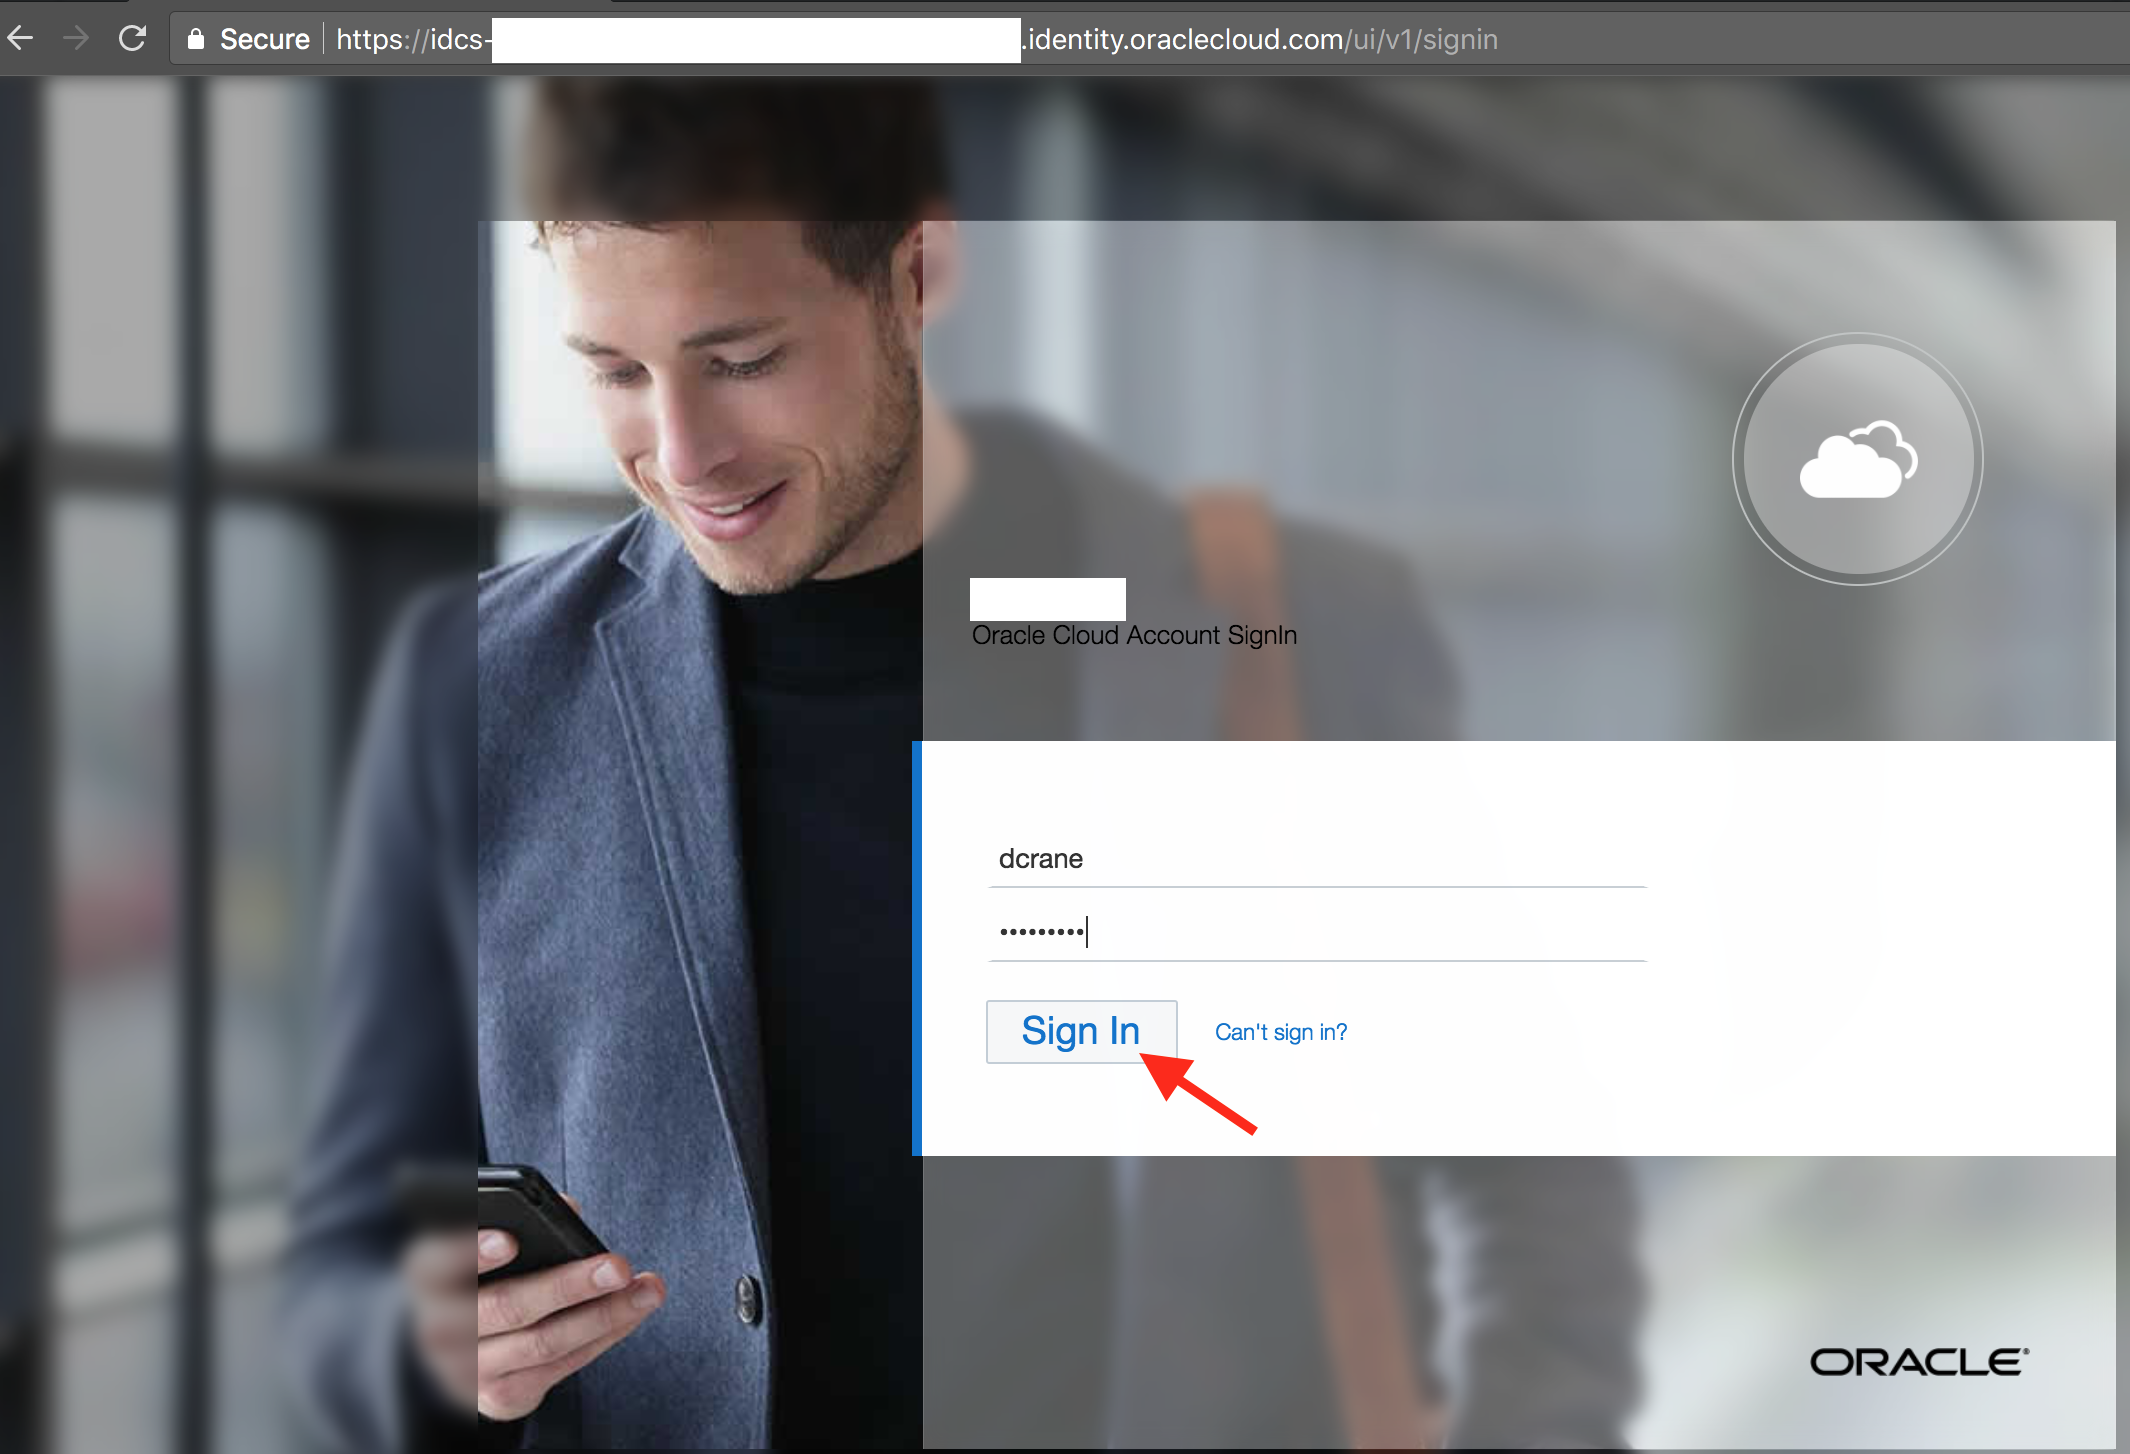
- On the login page, enter your user name and password and click Sign In
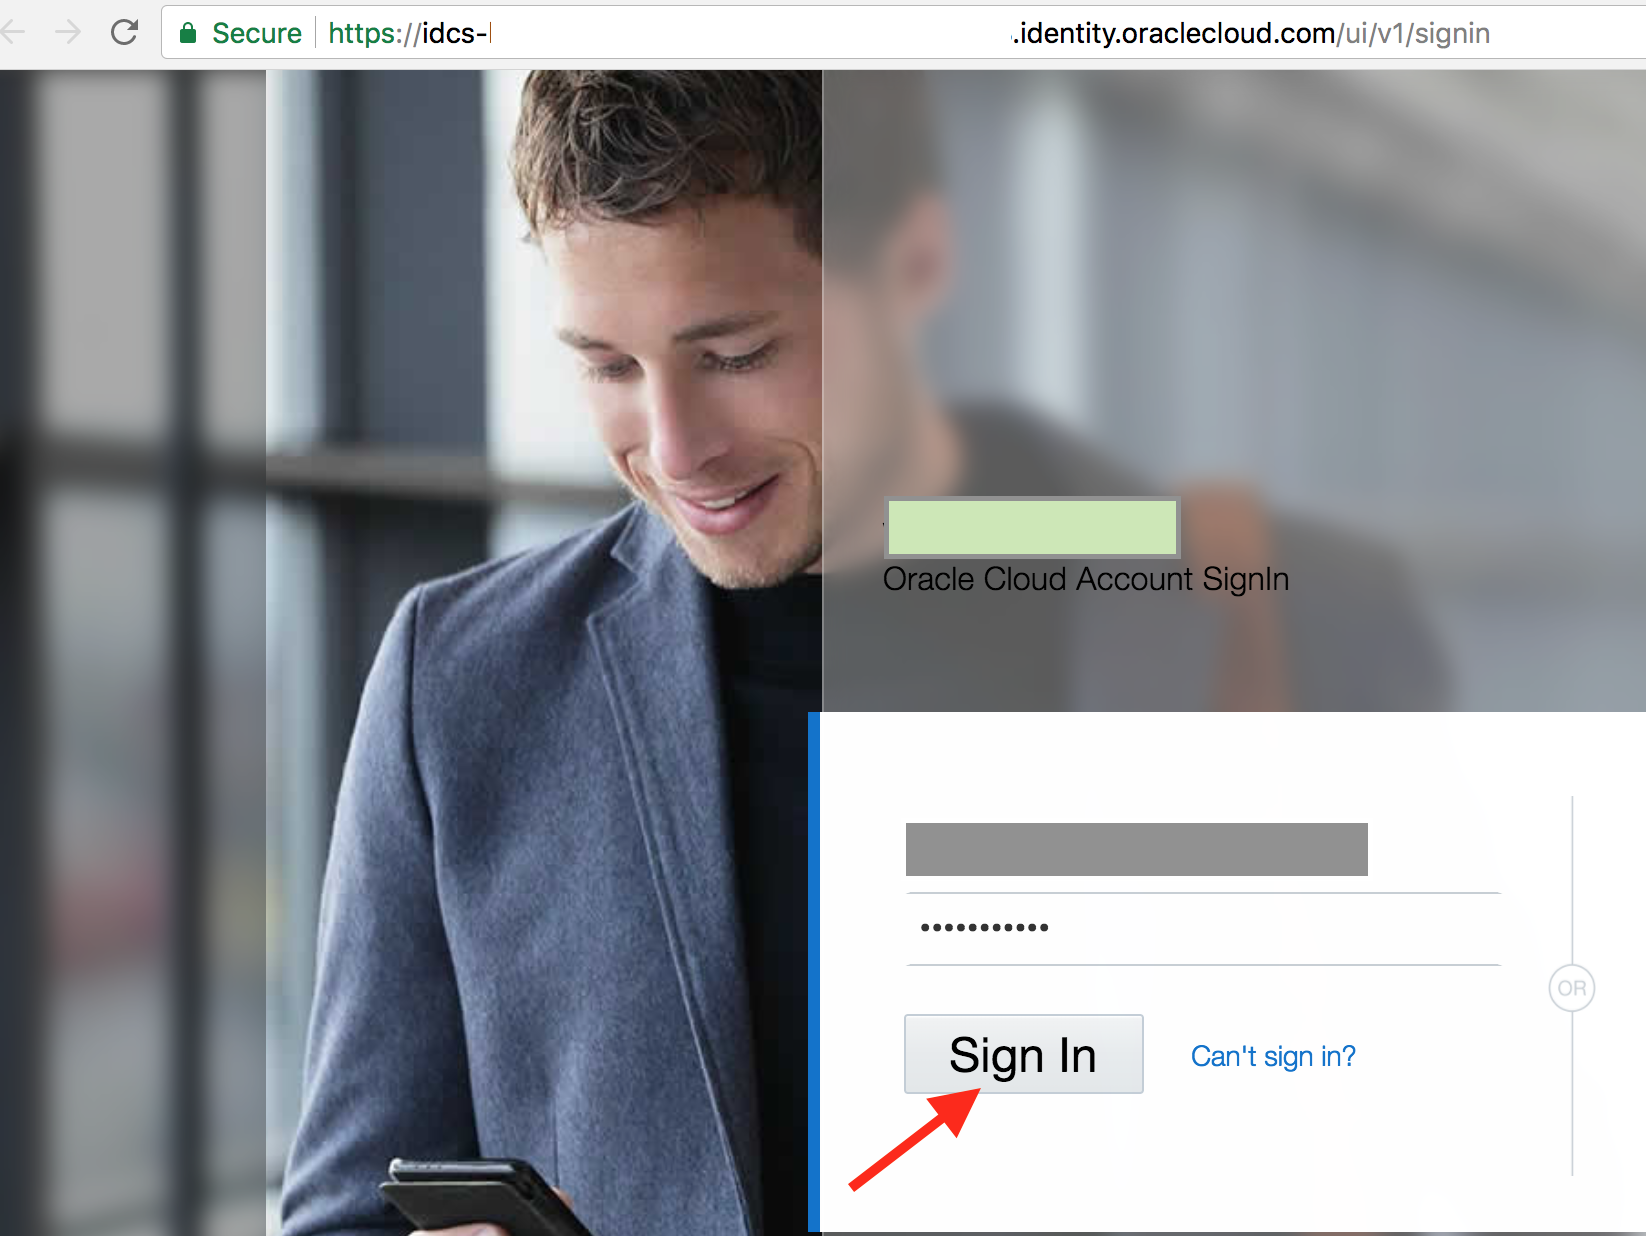
- You will be redirected to the landing page dashboard.
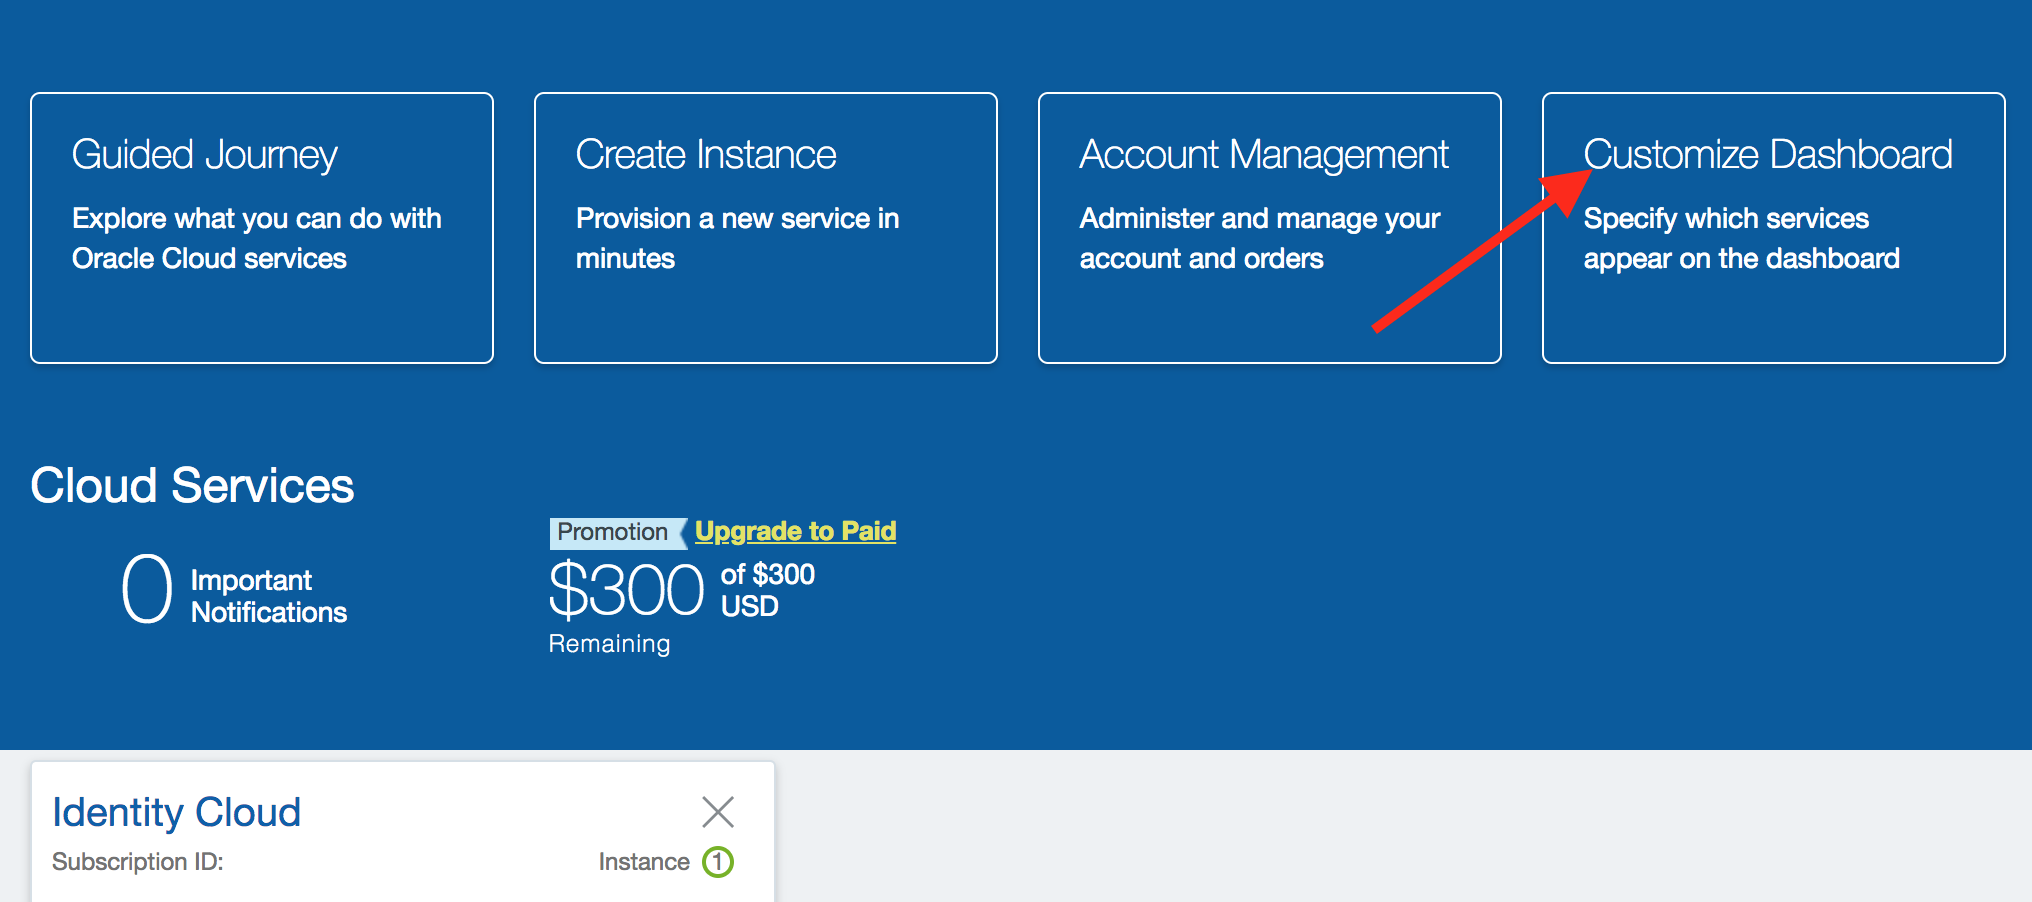
Arrange services on dashboard
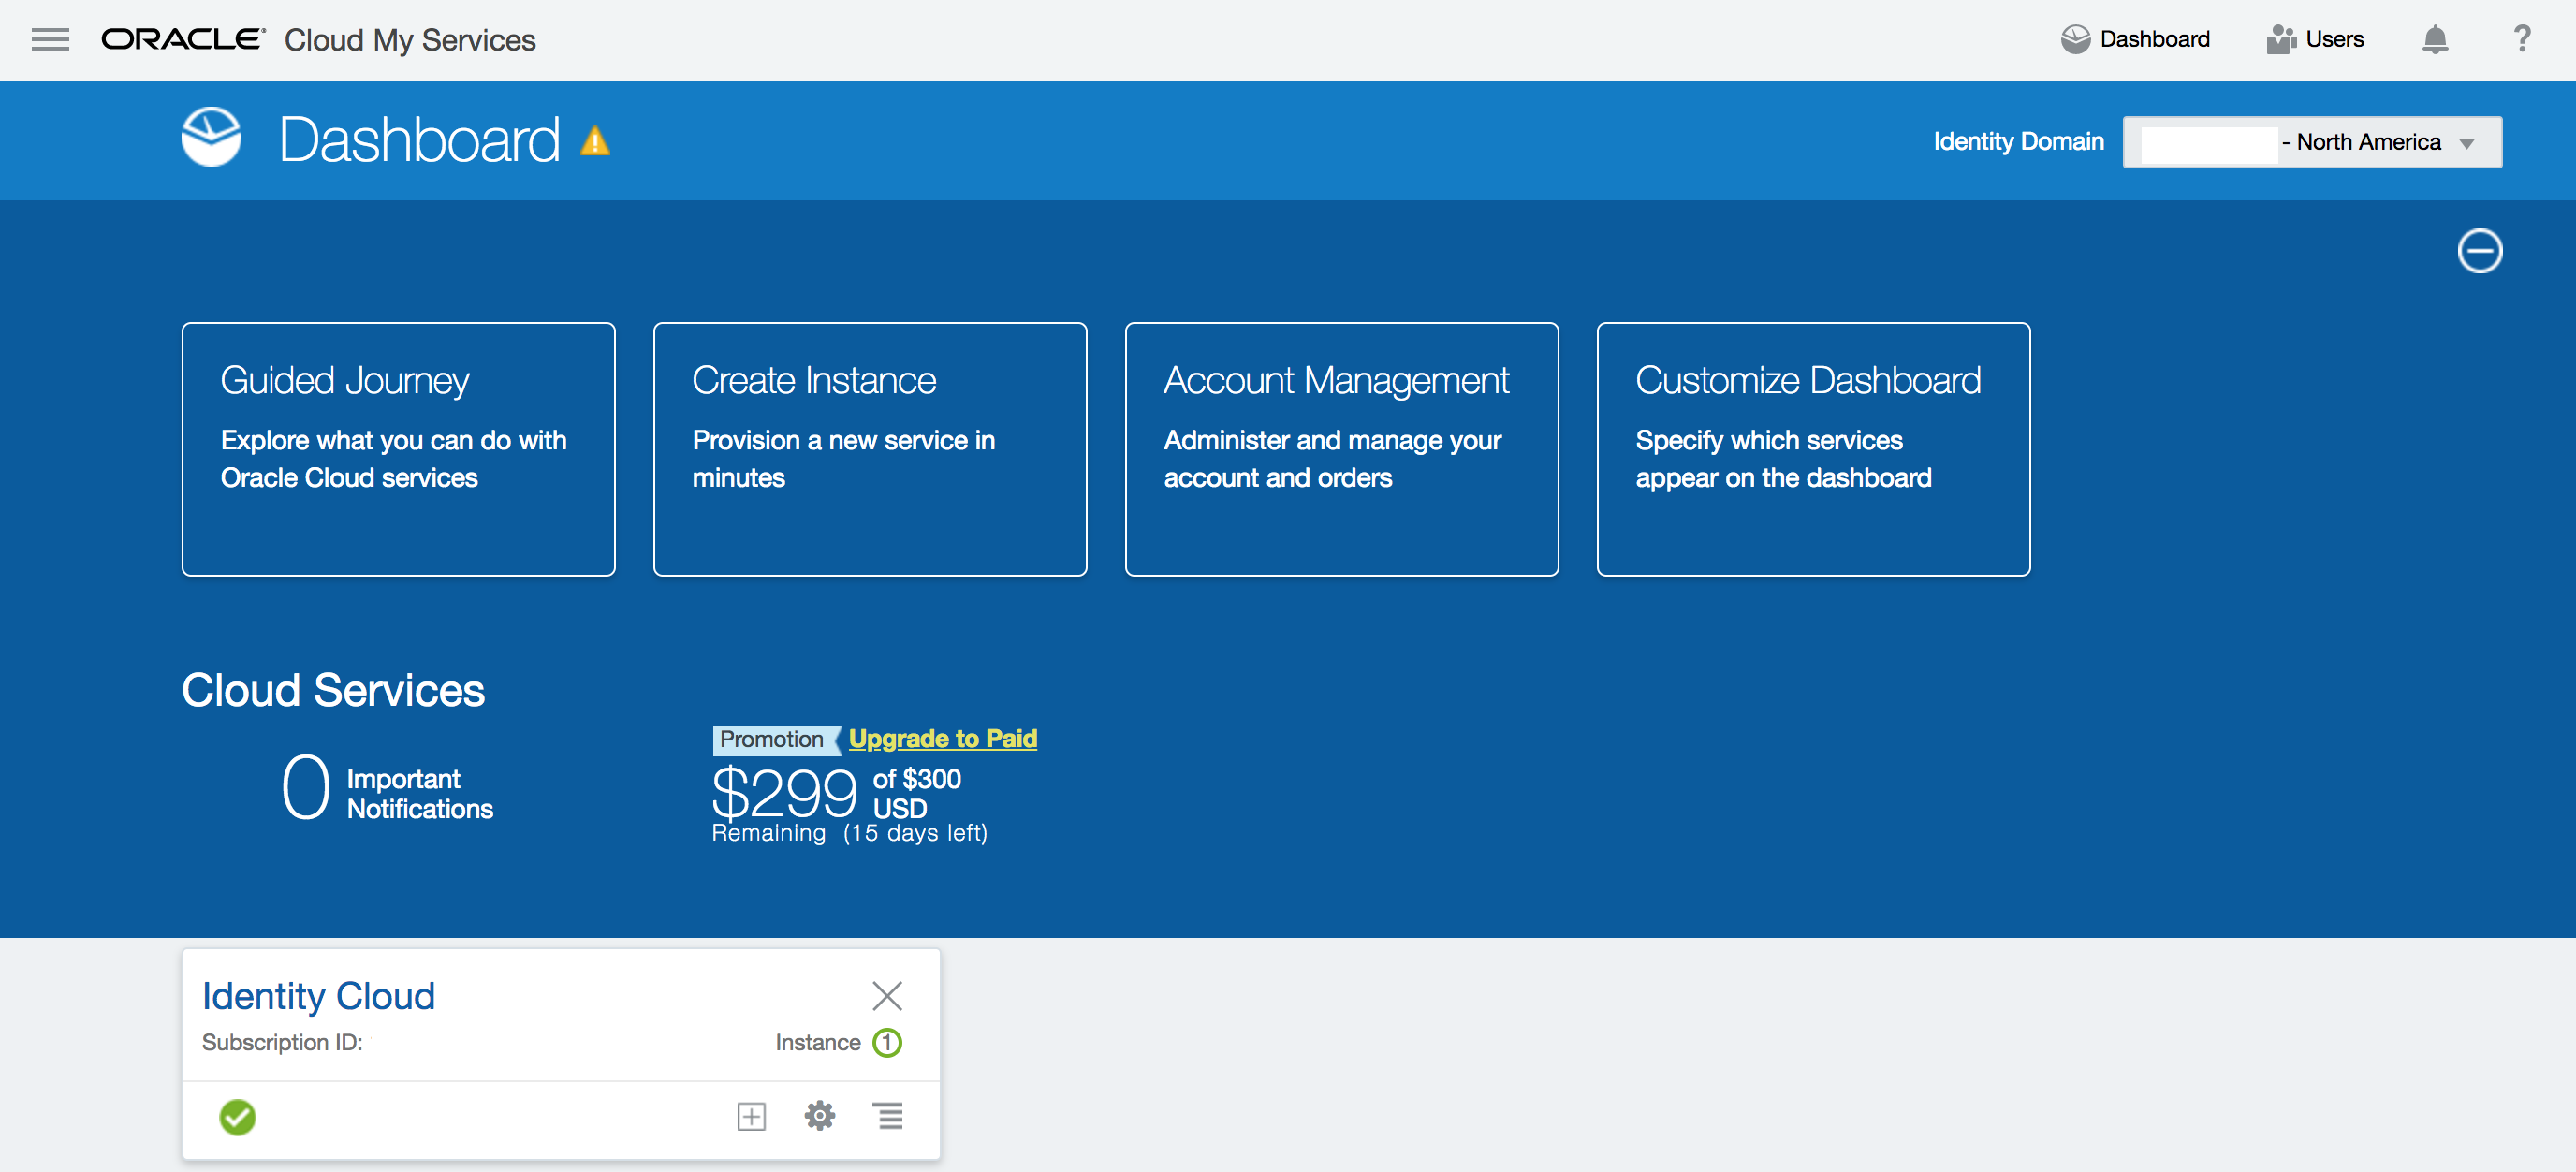
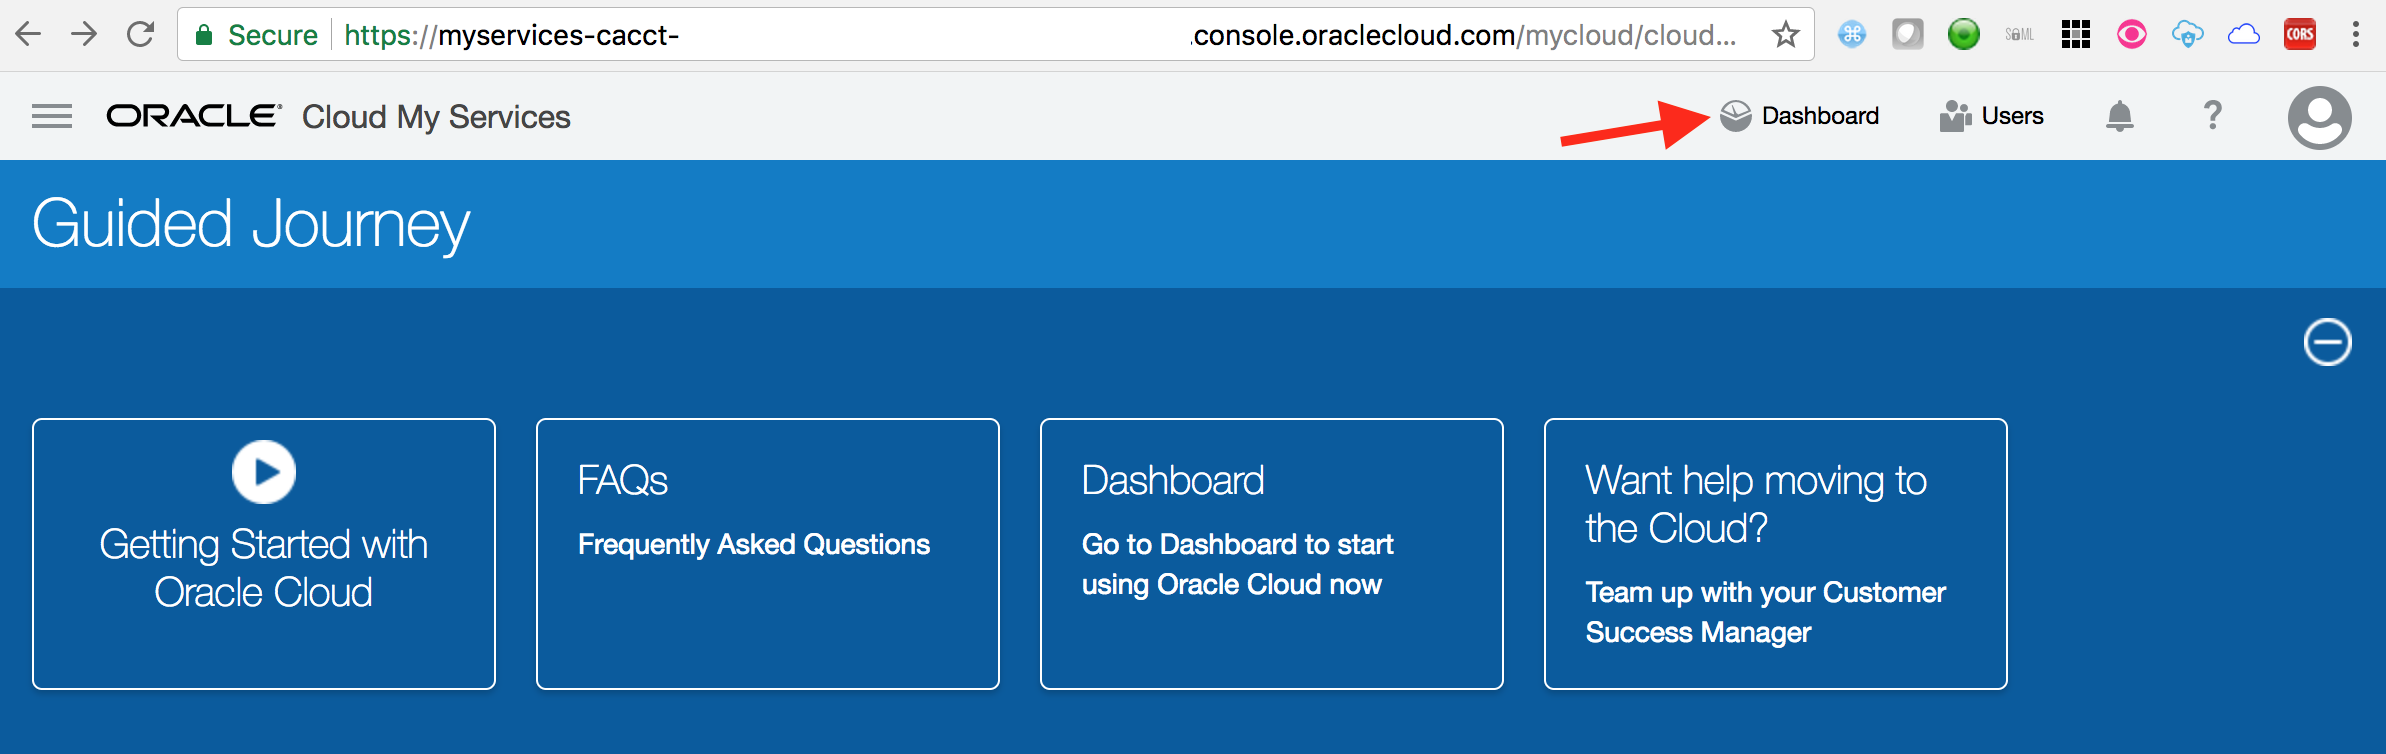
- If not already there, click on the
Dashboardlink on the top right hand corner.
- Verify that dashboard shows the
Identity Cloudservice tile.
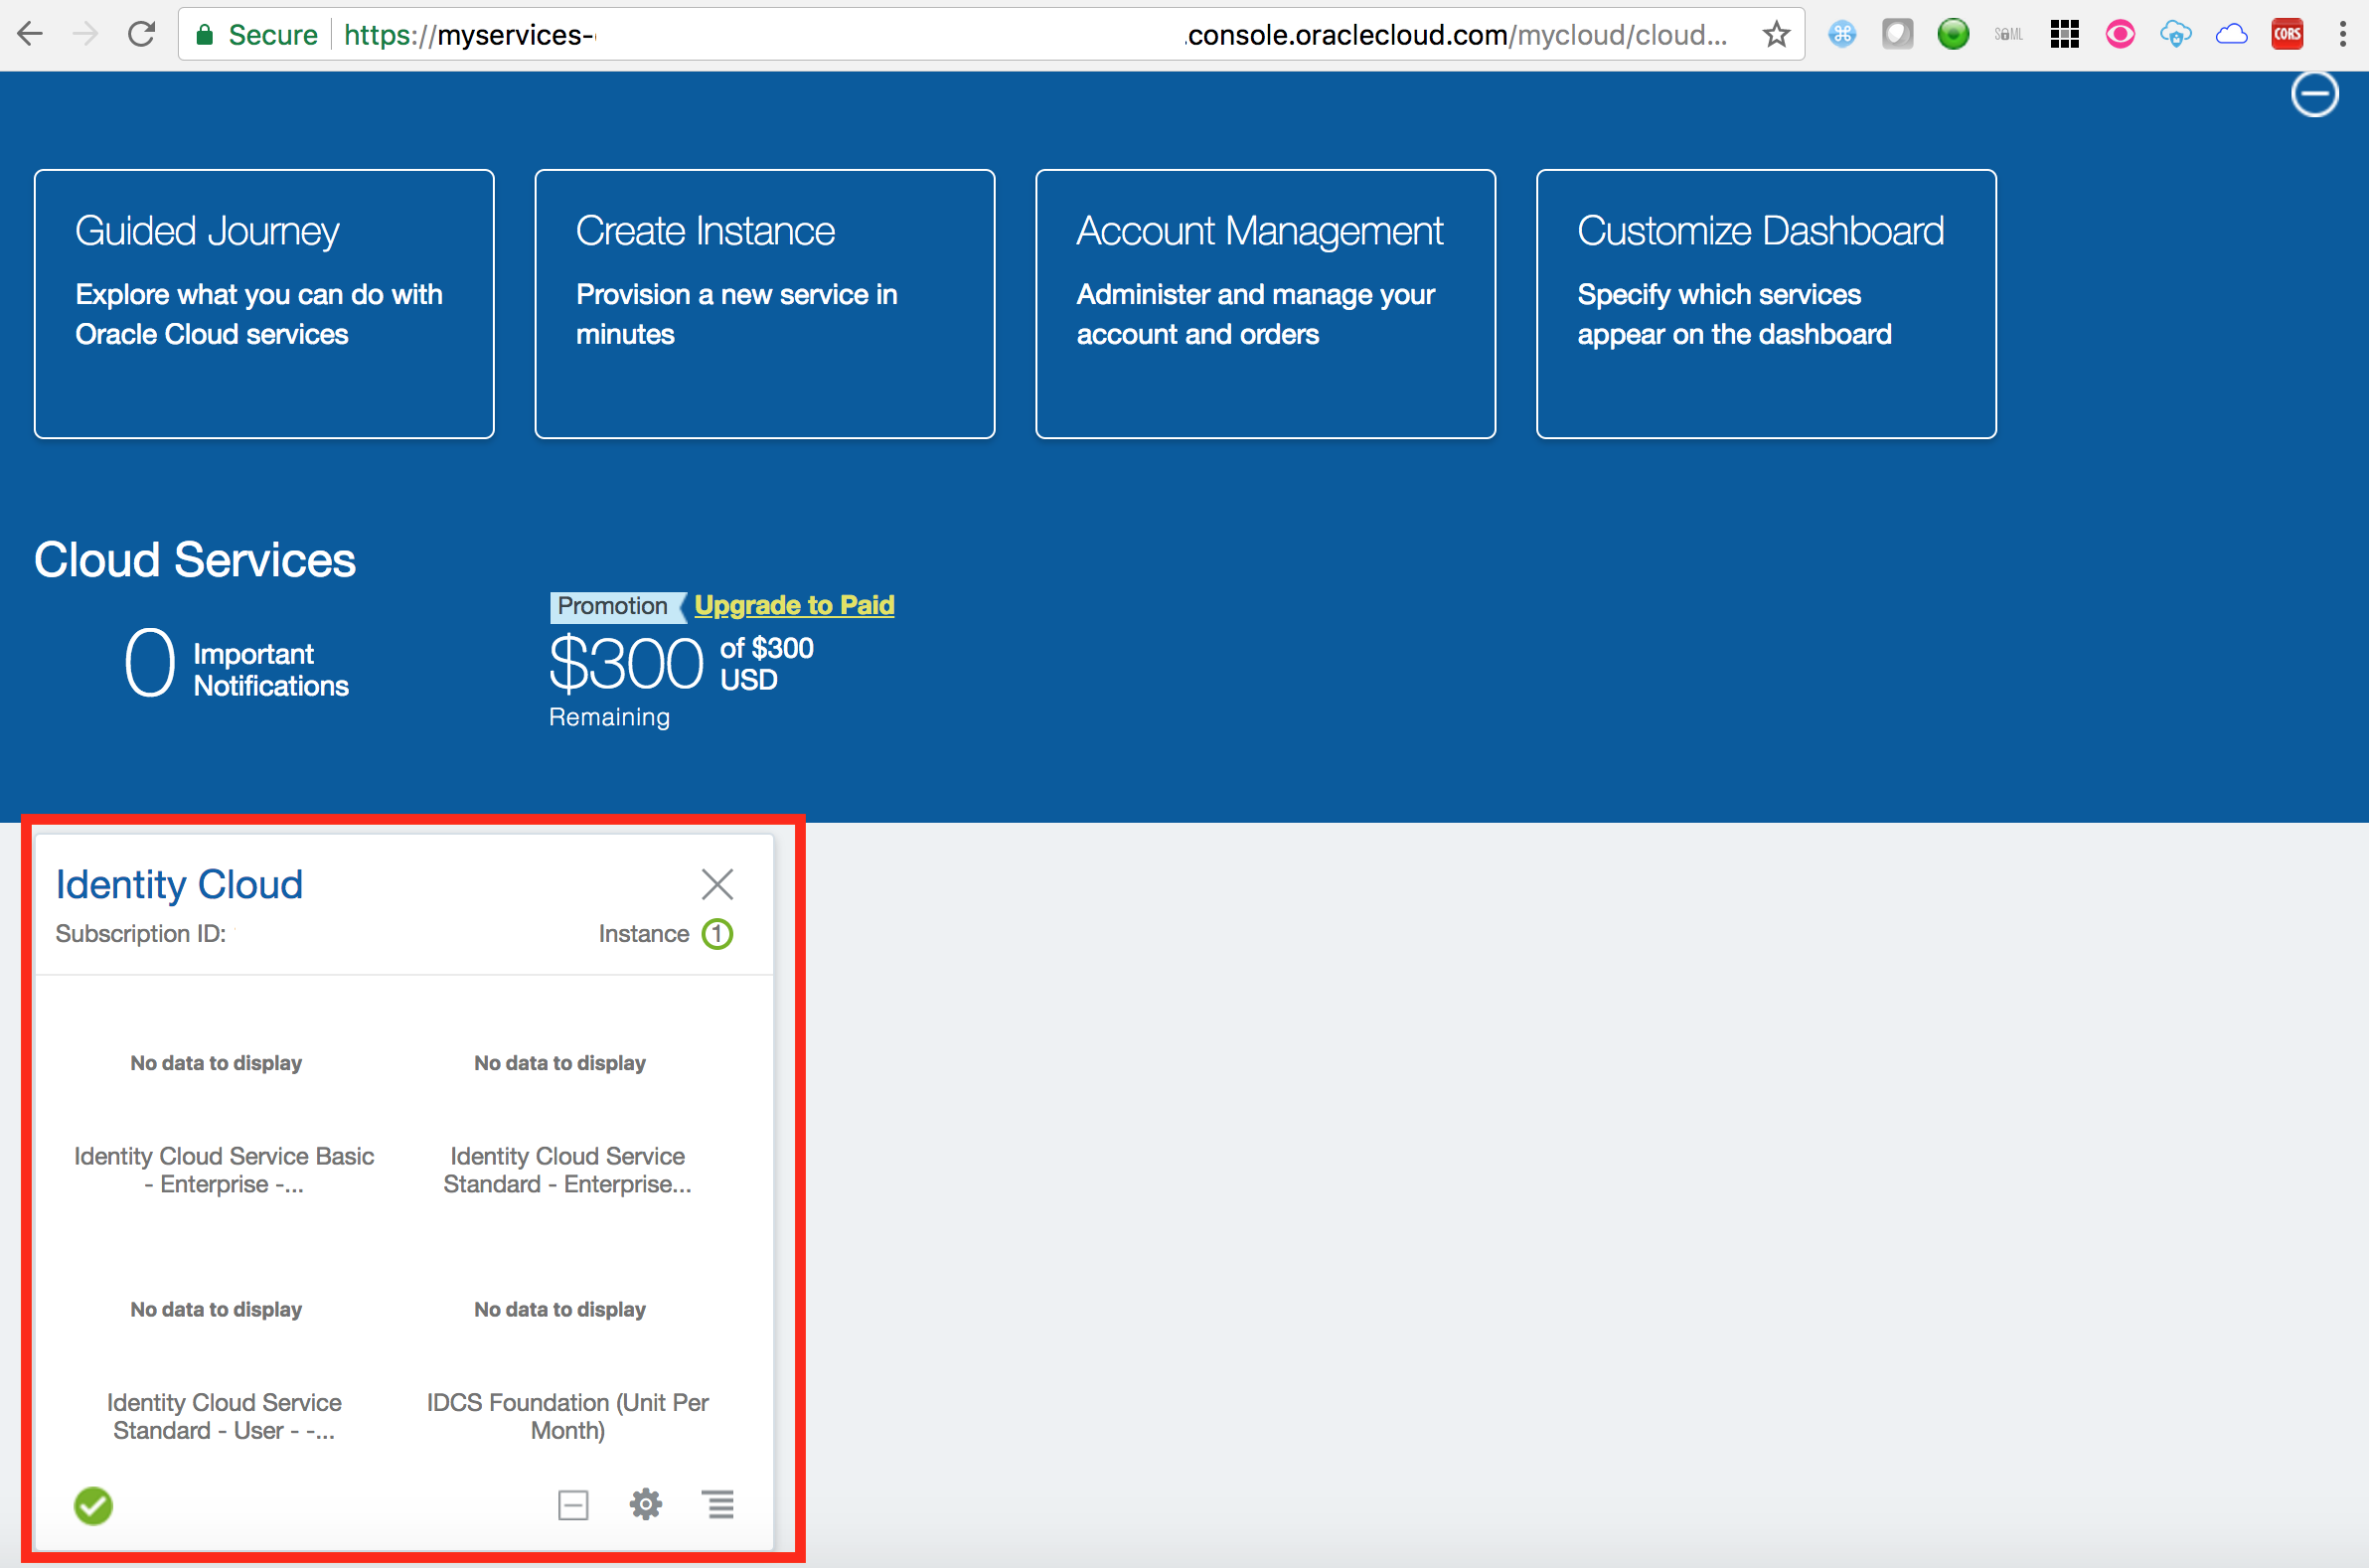
- Click on
Customize Dashboard
- Scroll down on the pop-up page to find the service
Oracle CASB. Click onShowbutton against the service. Close the pop-up.
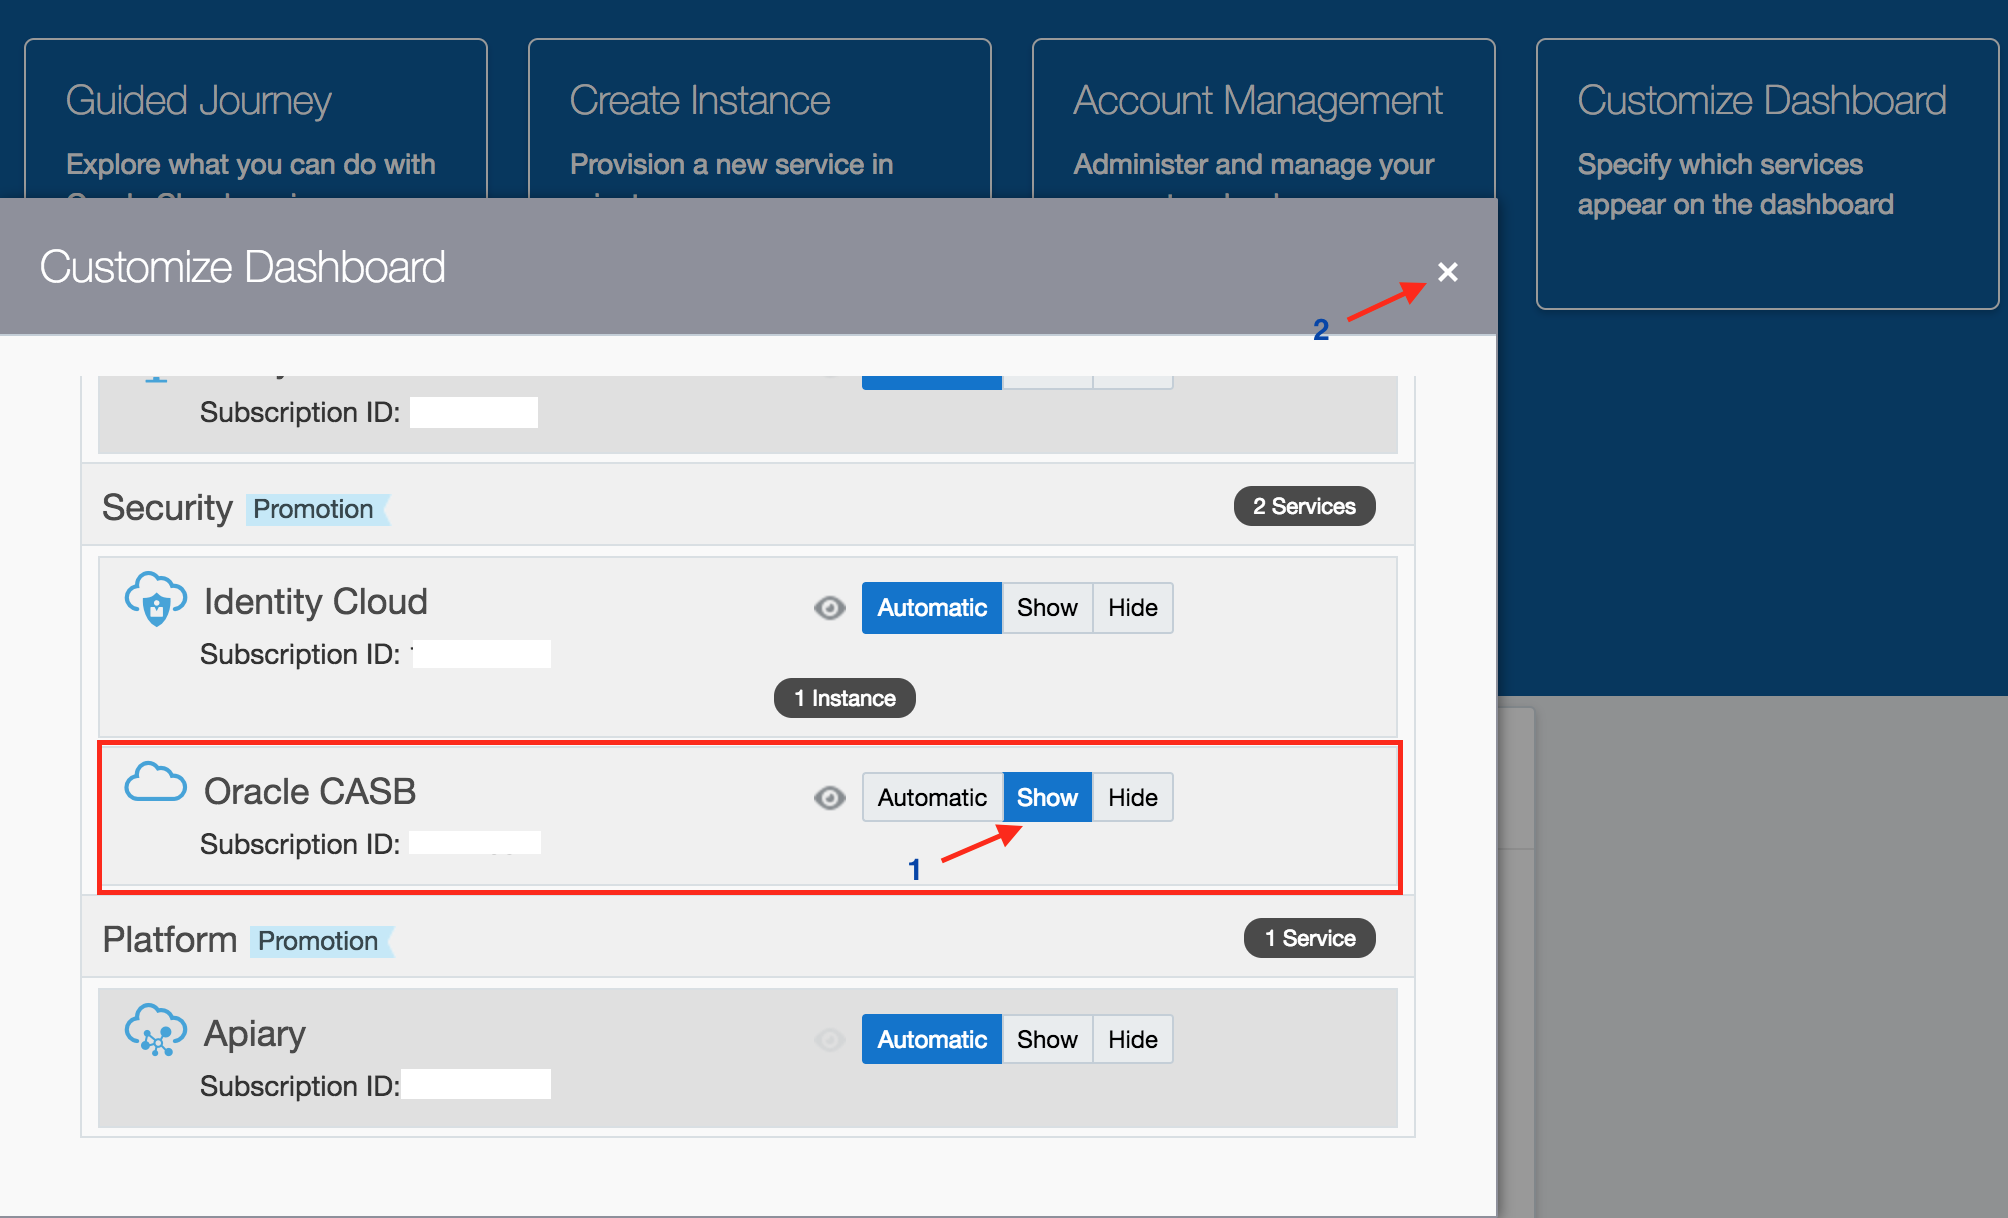
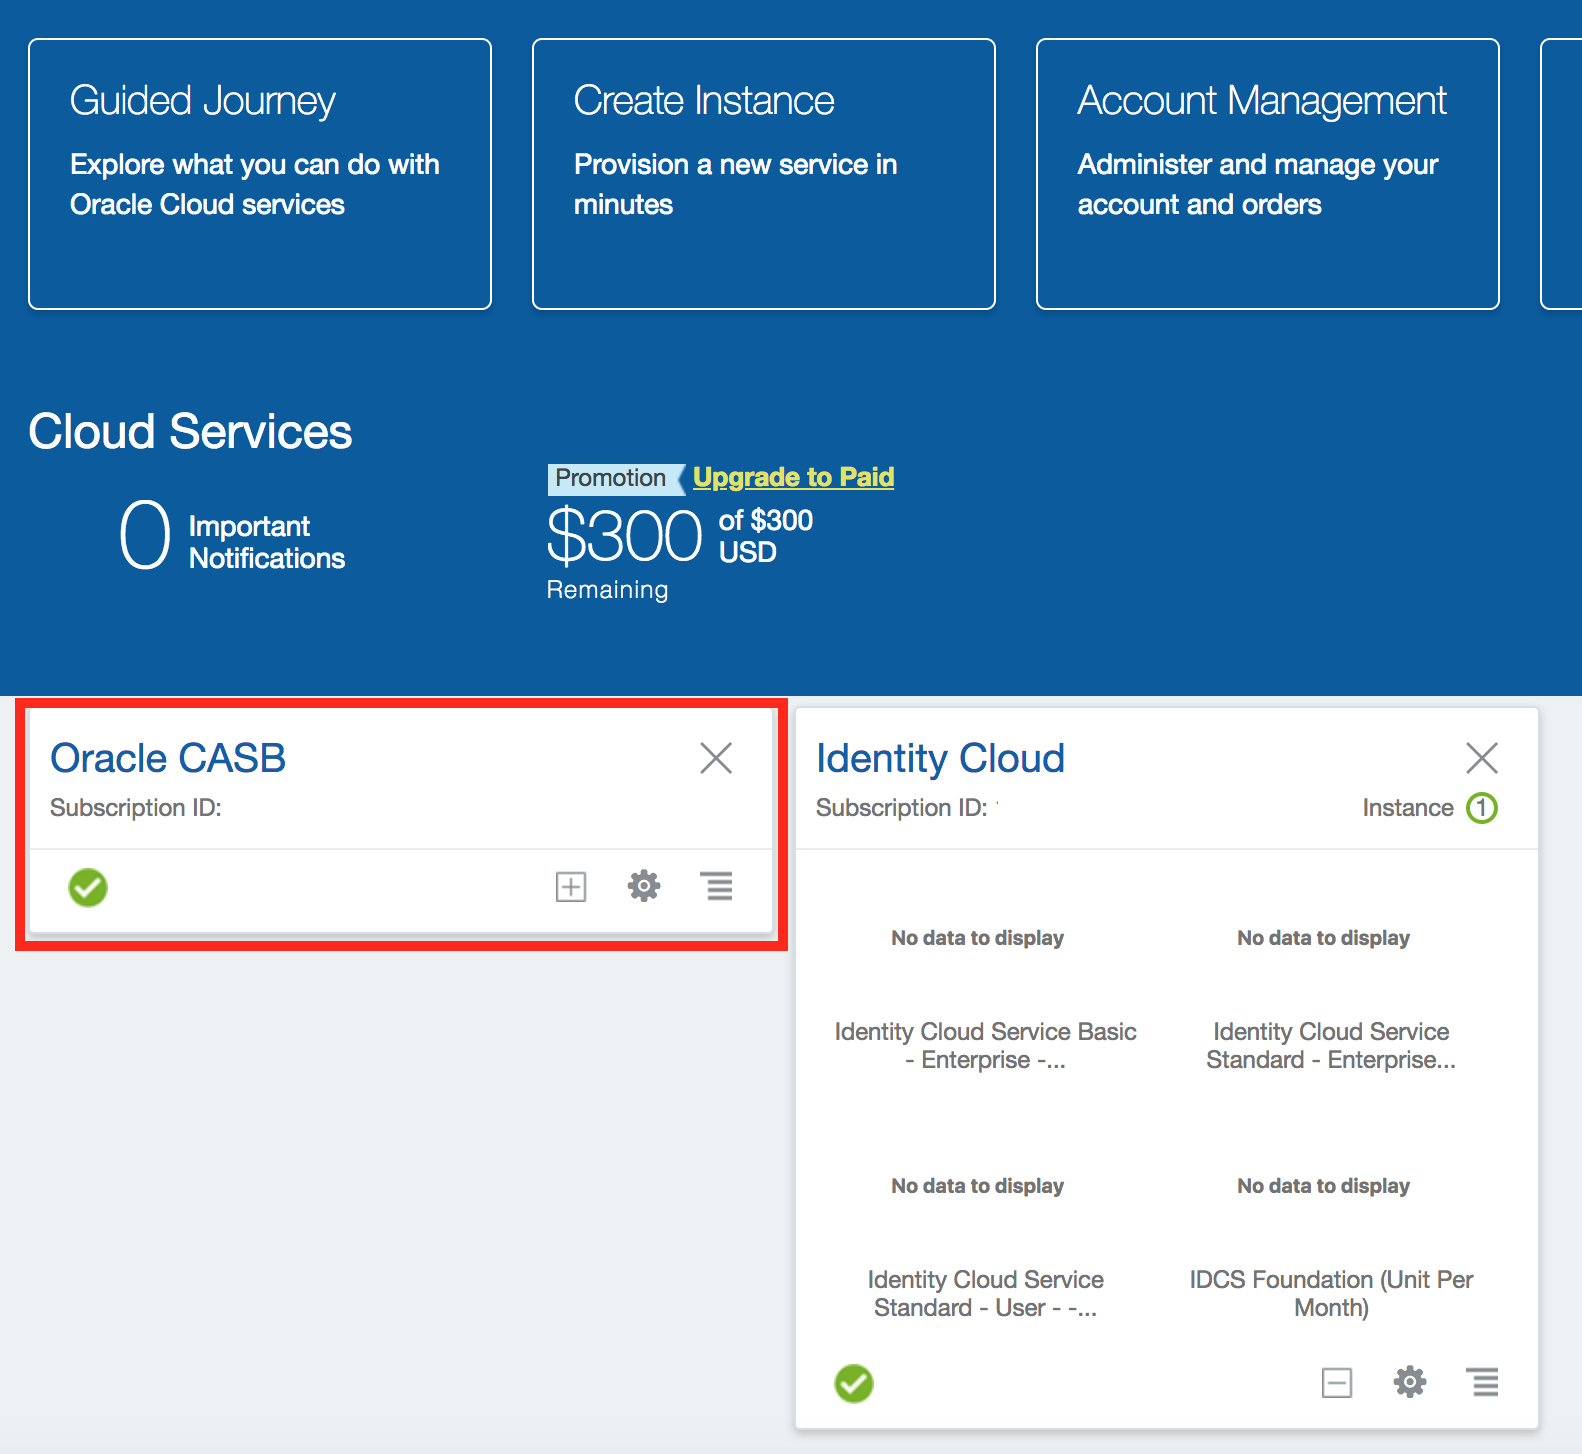
- Verify that a service tile appears for
Oracle CASBon the dashboard.
IDCS - overview
Access IDCS Admin Console - (Persona: Administrator)
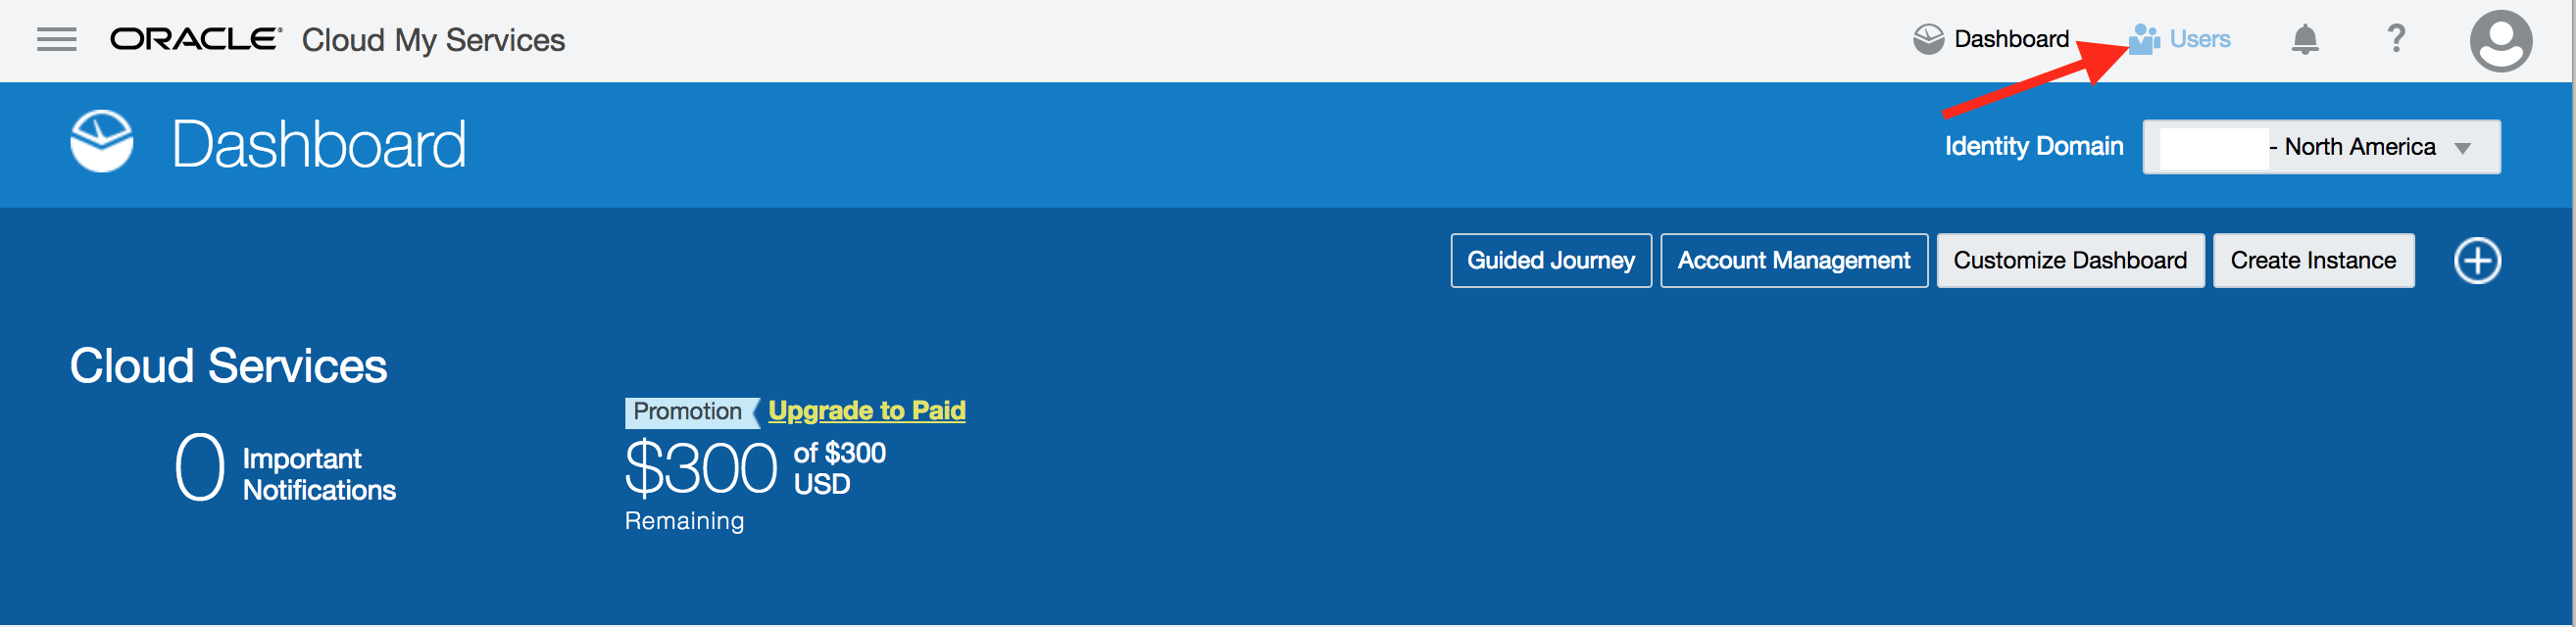
- From the cloud My Services dashboard, click on Users in the upper right hand corner.
- Then click on Identity Console button located towards upper right hand corner again.
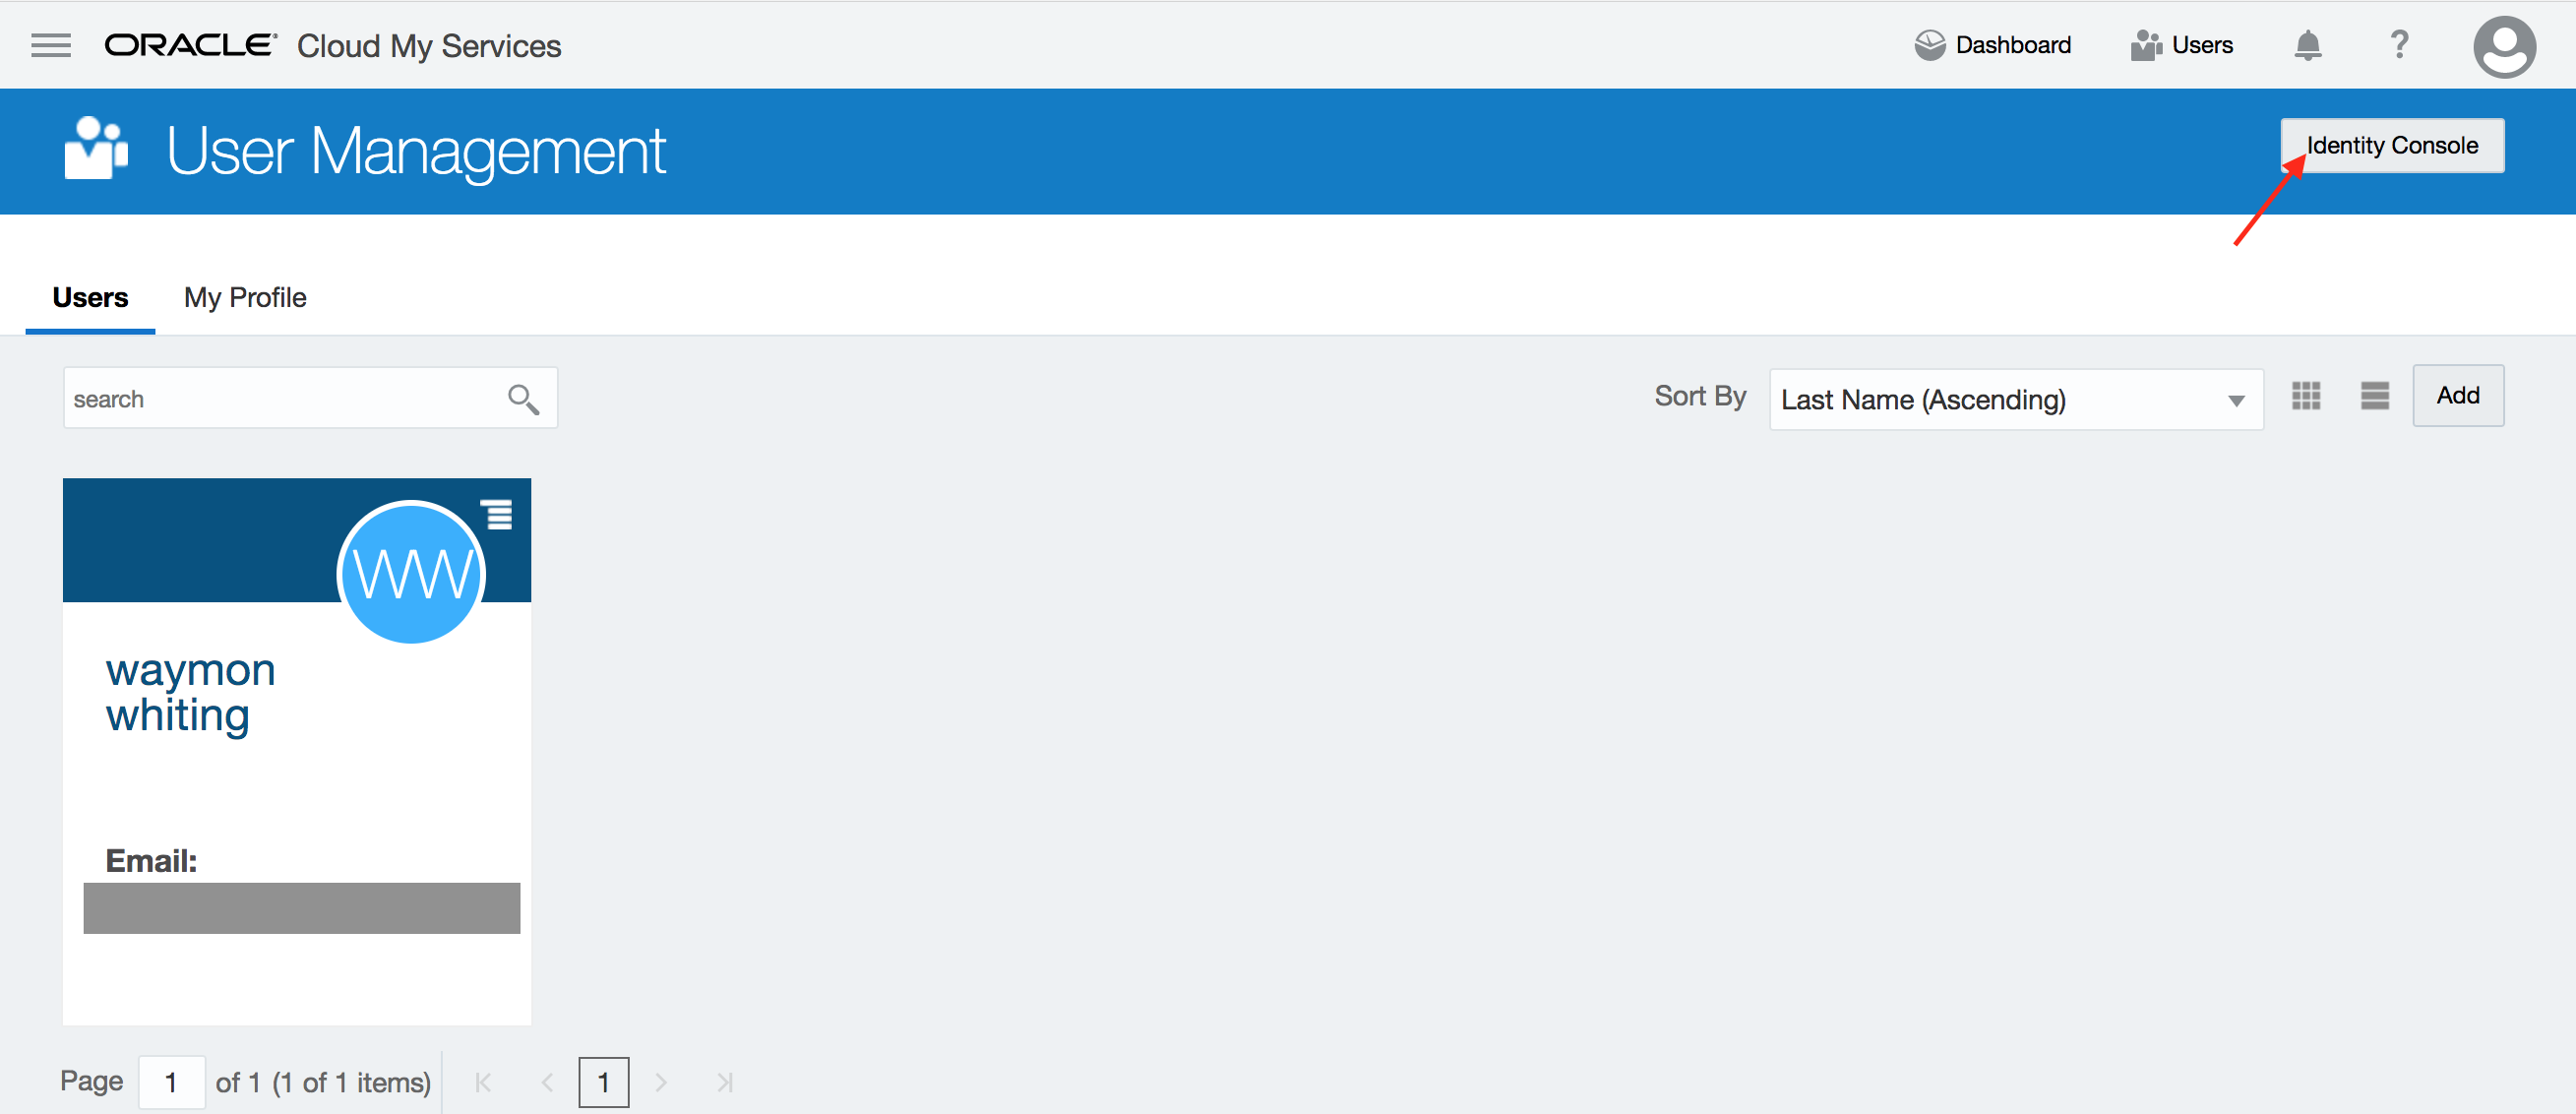
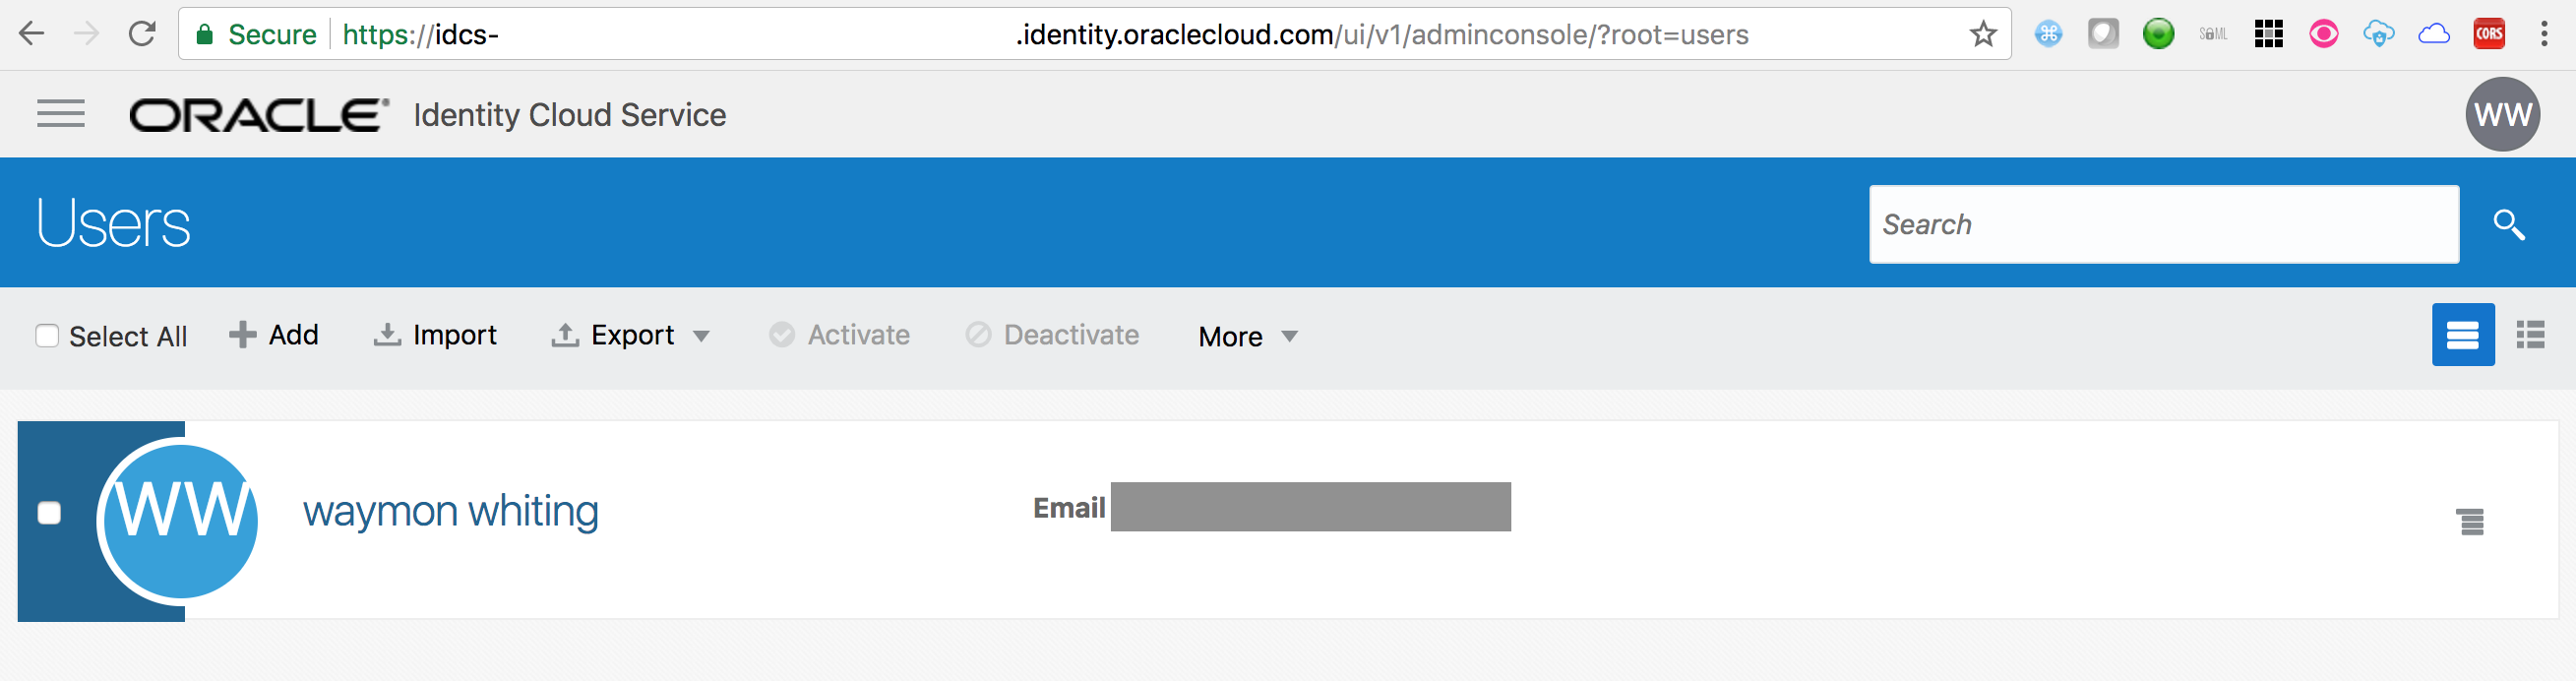
- The users are shown up in IDCS admin console.
Create User - (Persona: Administrator)
IDCS supports user (also groups) on-boarding from on-premise Active Directory, using file upload, REST API, on-premise Oracle Identity Management solution, or manually from IDCS admin console.
For the exercise we will be manually creating a user from admin console.
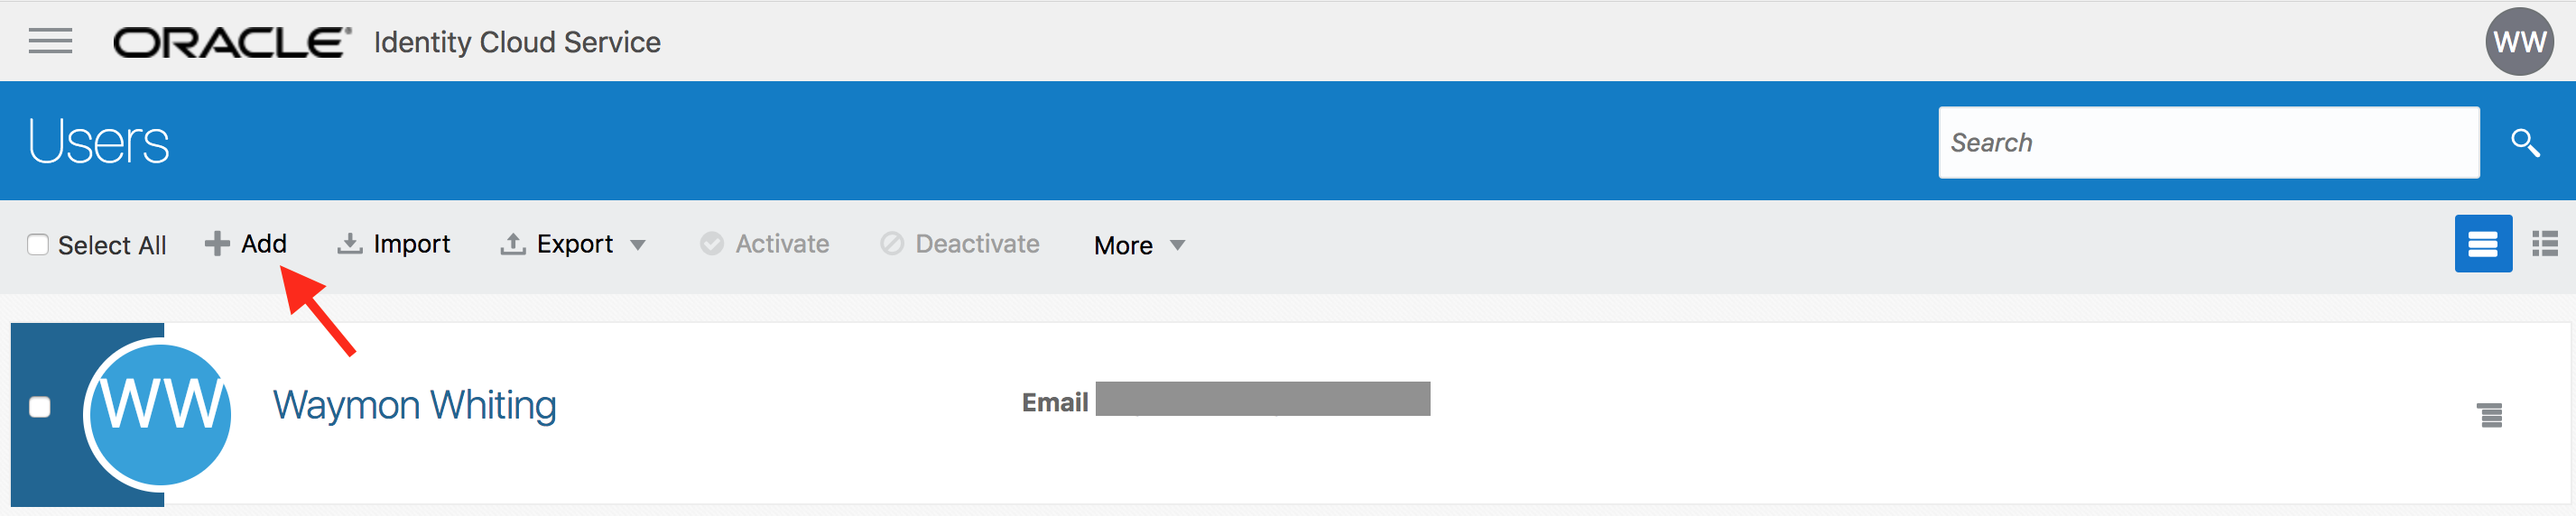
- On the Users page, click on the Add button.
- On the pop-up page (step 1), provide values for First Name, Last Name and valid E-mail. Click on Next.

- On step 2, select the group OCI_Administrators. Then click on Finish.
This group grants access to Oracle’ IAAS service (Infrastructure-As-A-Service).
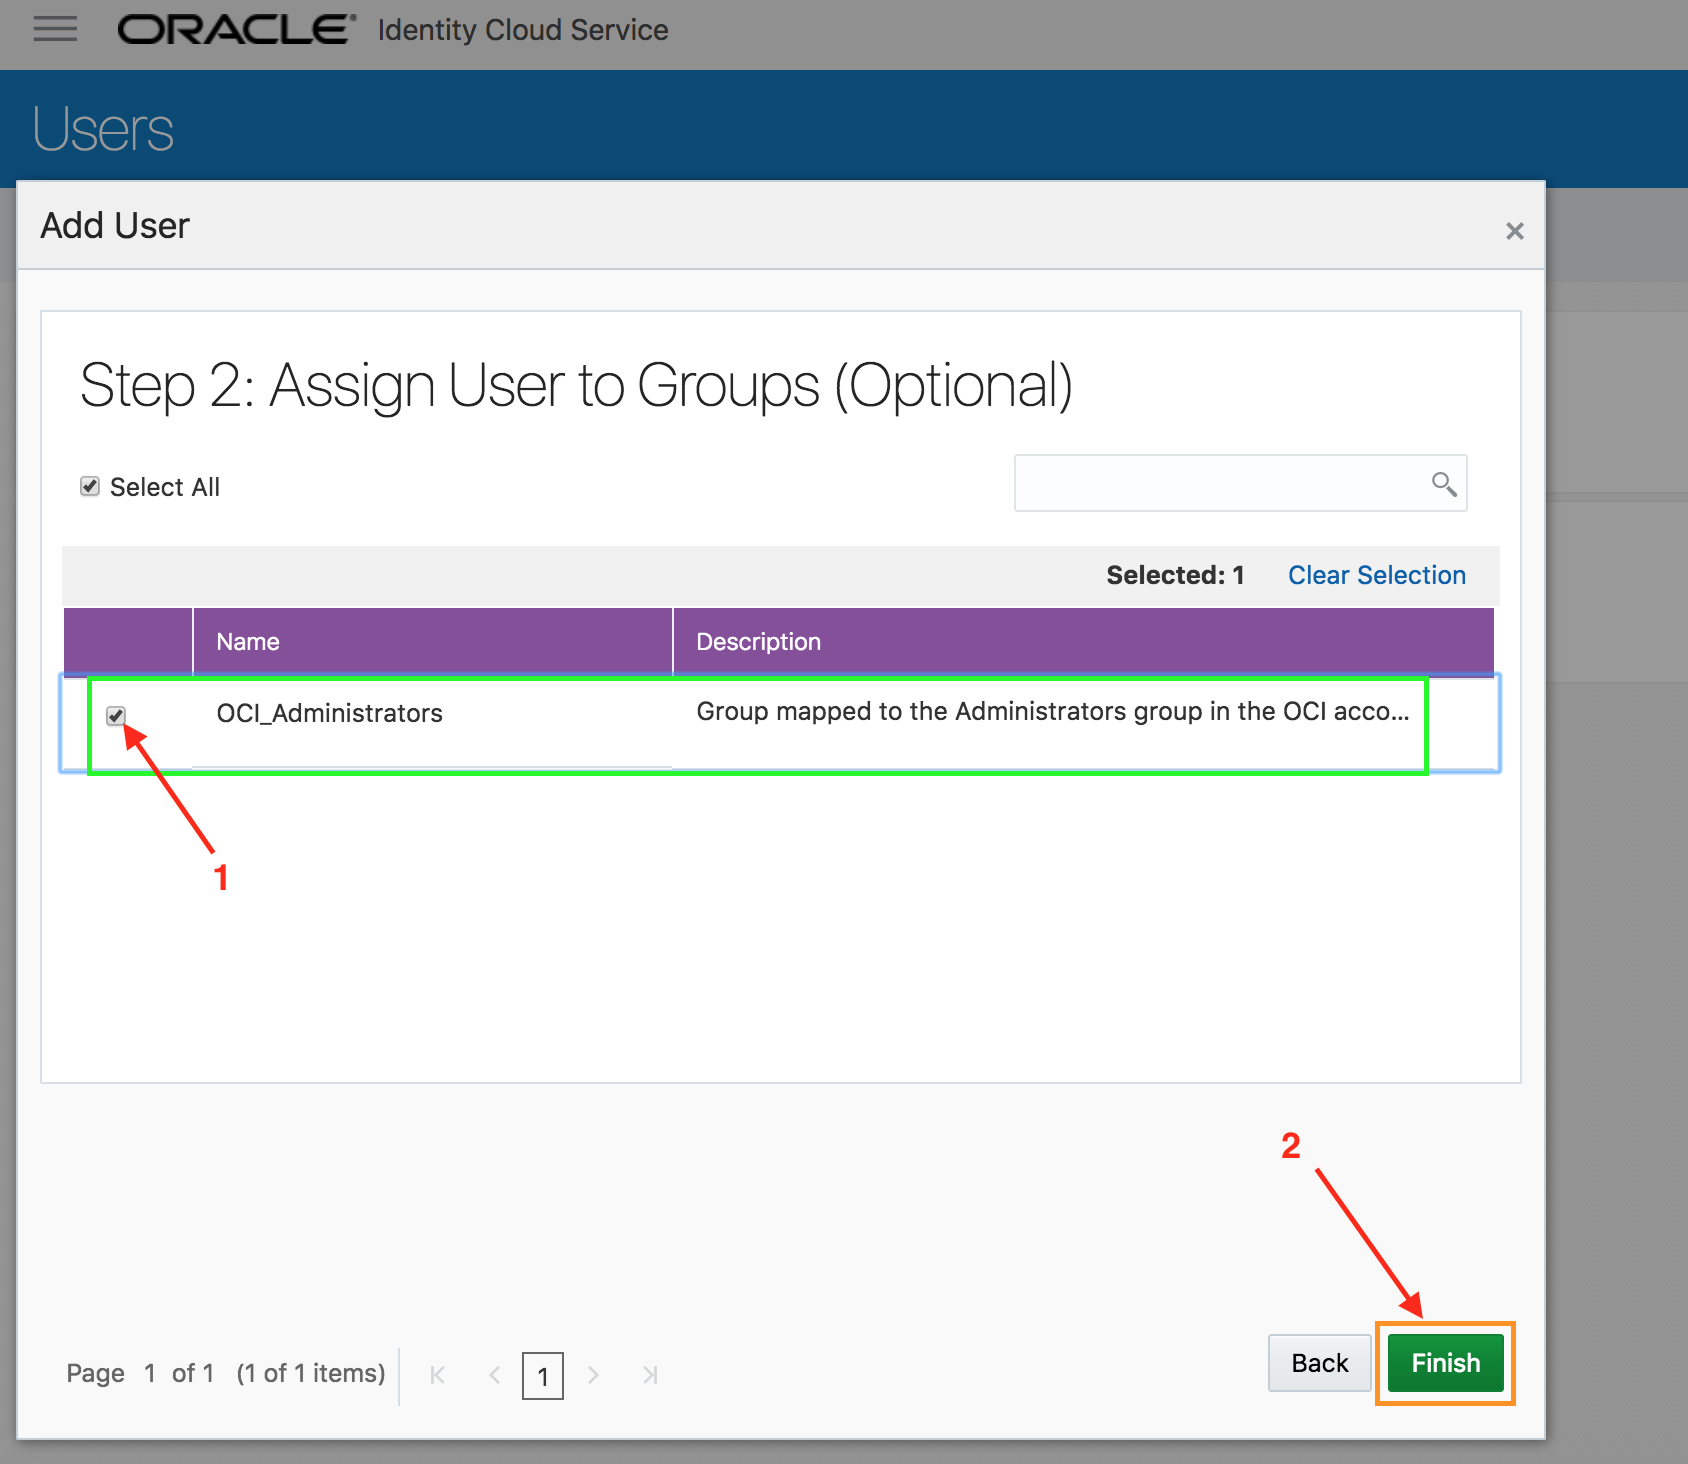
- Verify that the user gets created successfully.
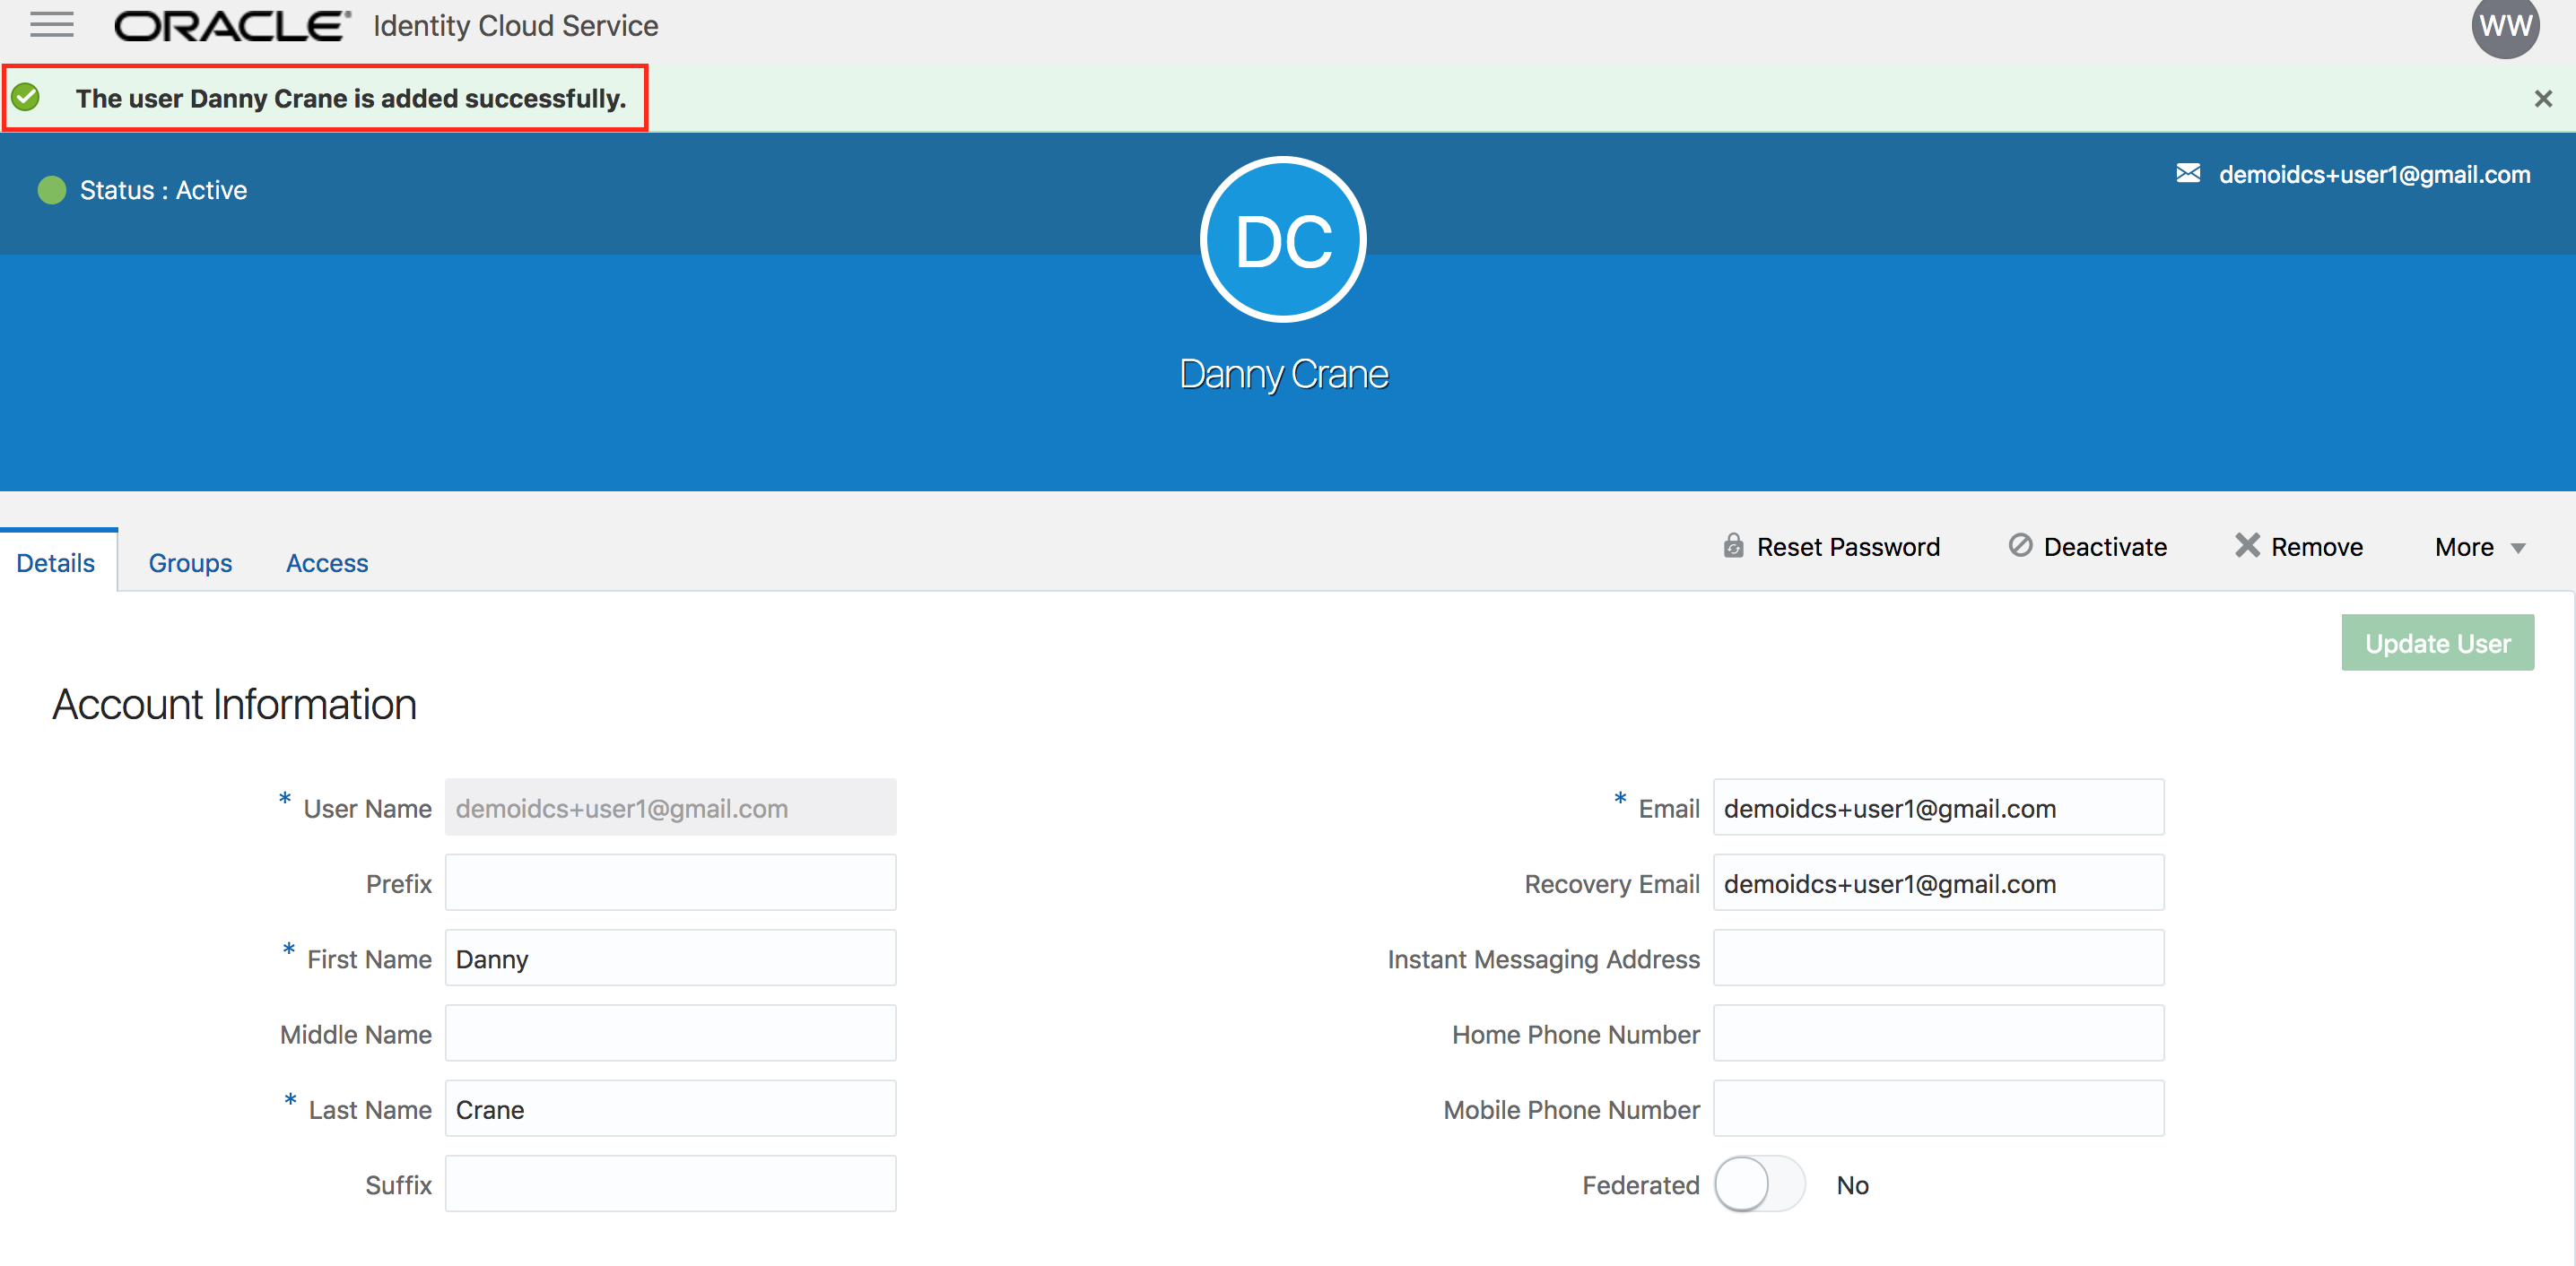
- Congratulations, you successfully created a new user into IDCS and granted him access to Oracle IAAS.
Configure multi-factor authentication - (Persona: Administrator)
When a user signs in to an application, they are prompted for their user name and password, which is the first factor – something that they know. With Multi Factor Authentication (MFA) enabled in Oracle Identity Cloud Service, the user is then required to provide a second type of verification. This is called 2-Step Verification.
The two factors work together to add an additional layer of security by using either additional information or a second device to verify the user’s identity and complete the login process.
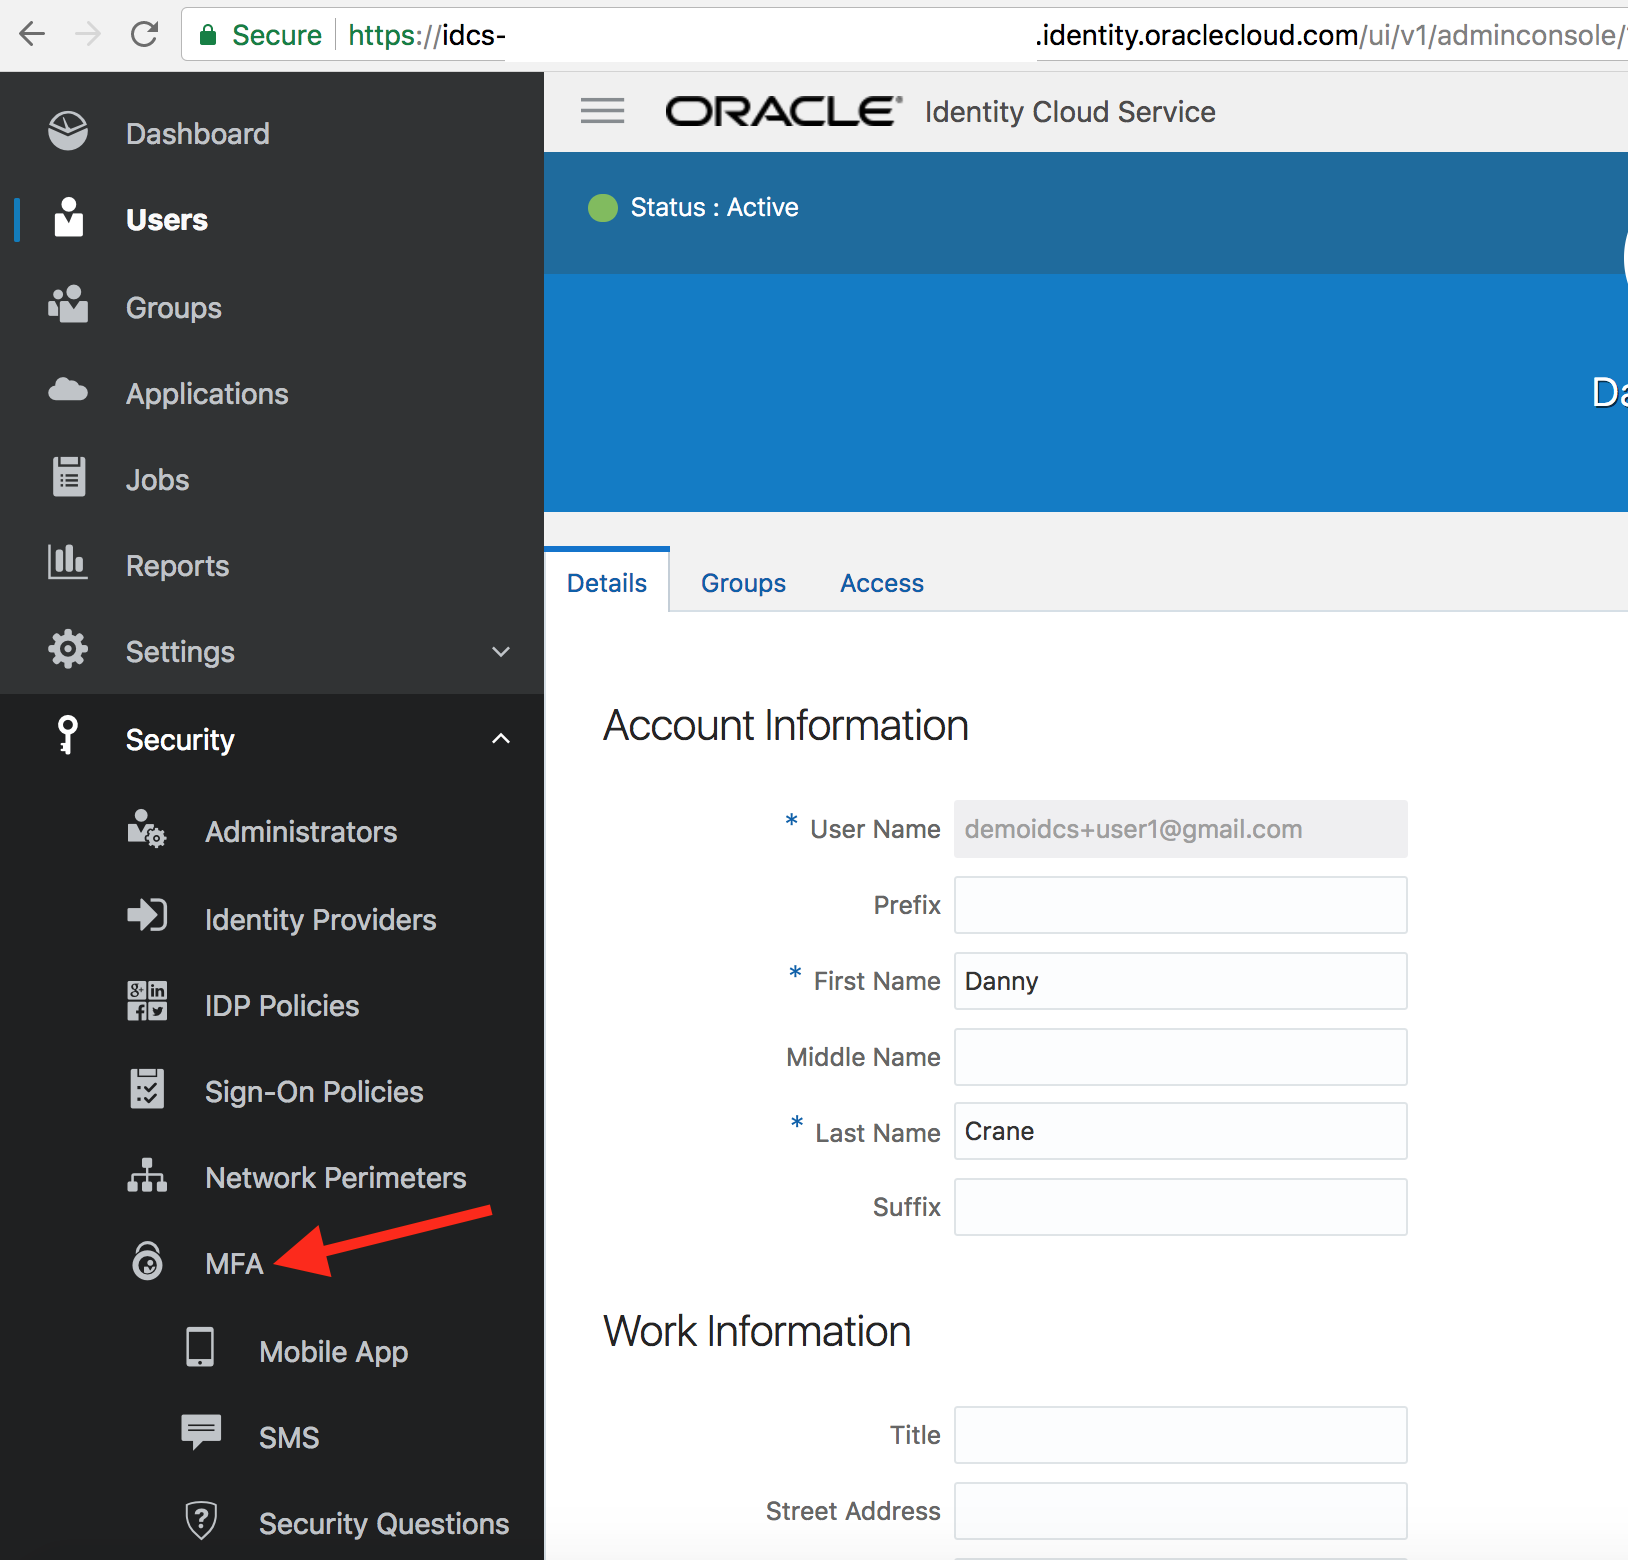
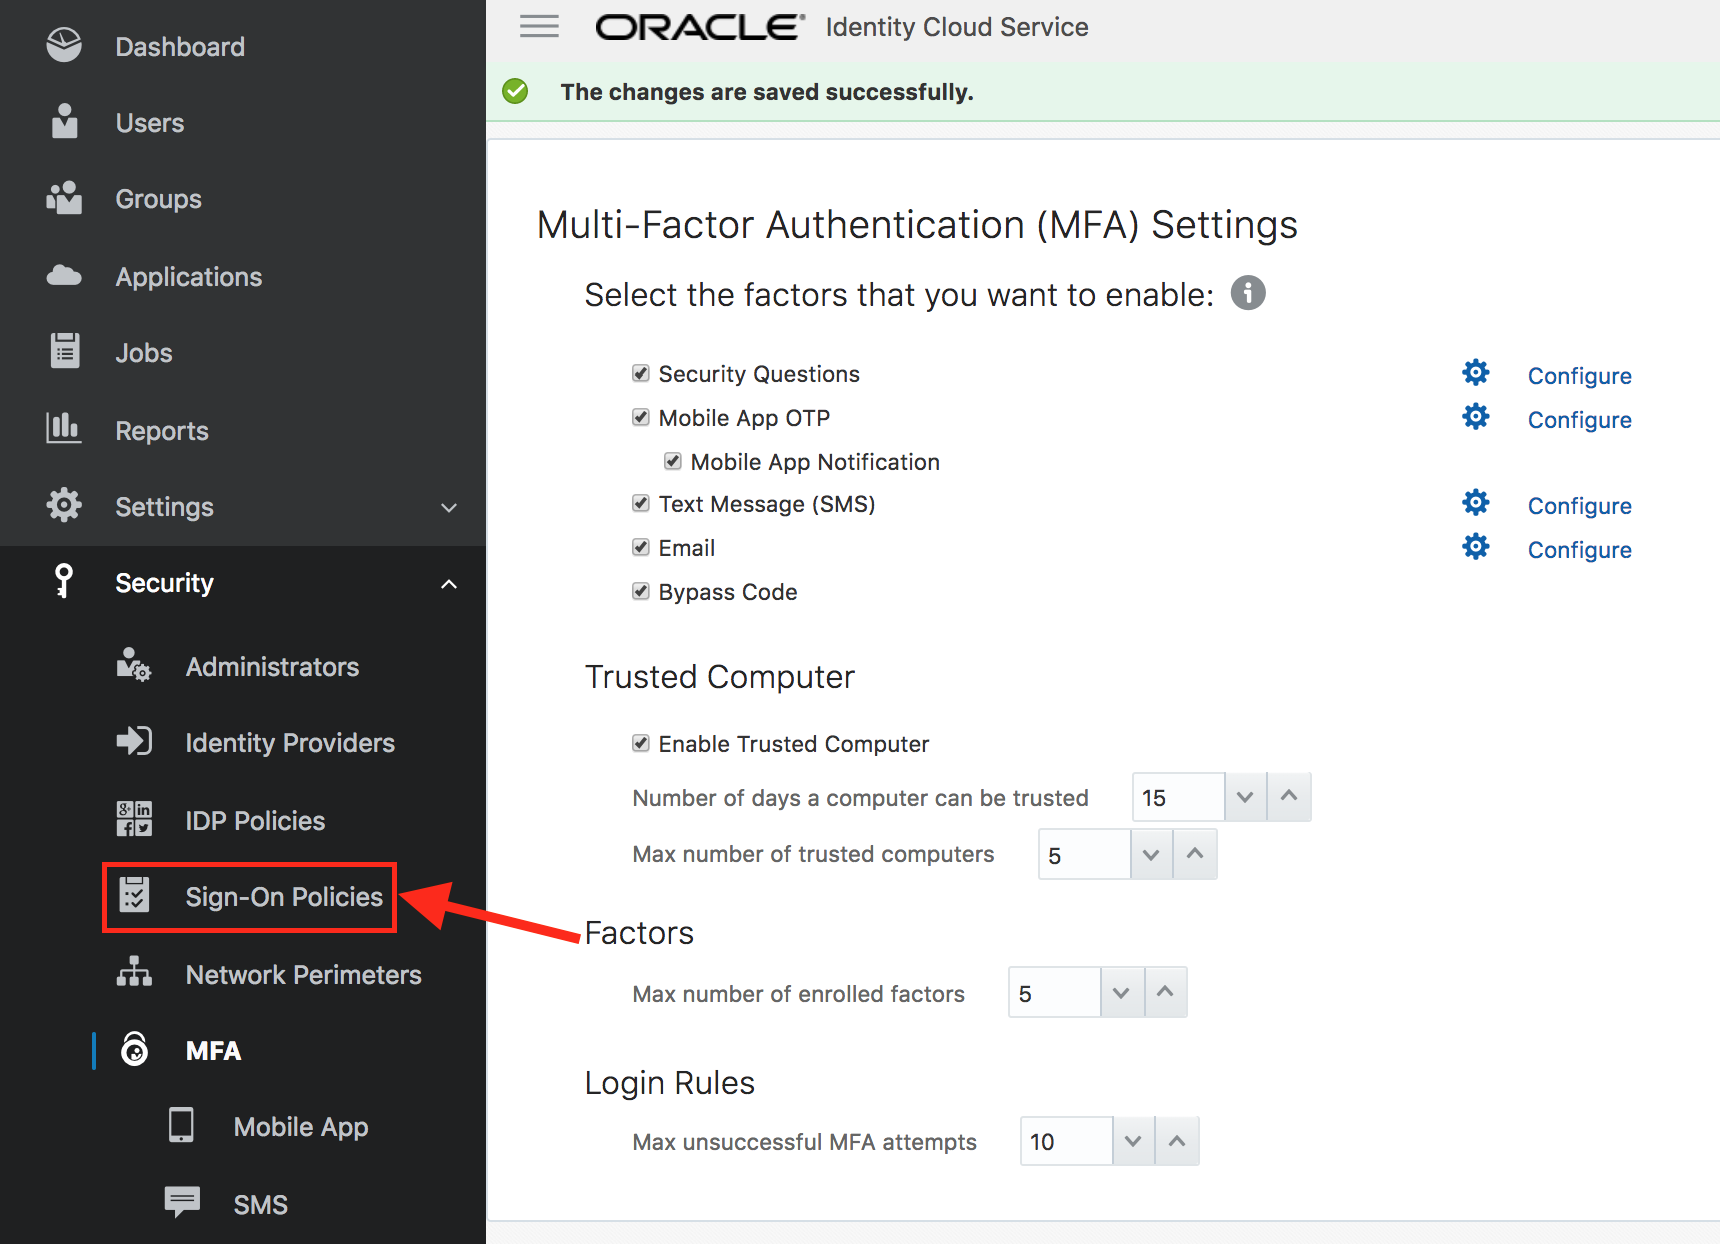
- From IDCS admin console, select Security -> MFA from the sidebar to the left.
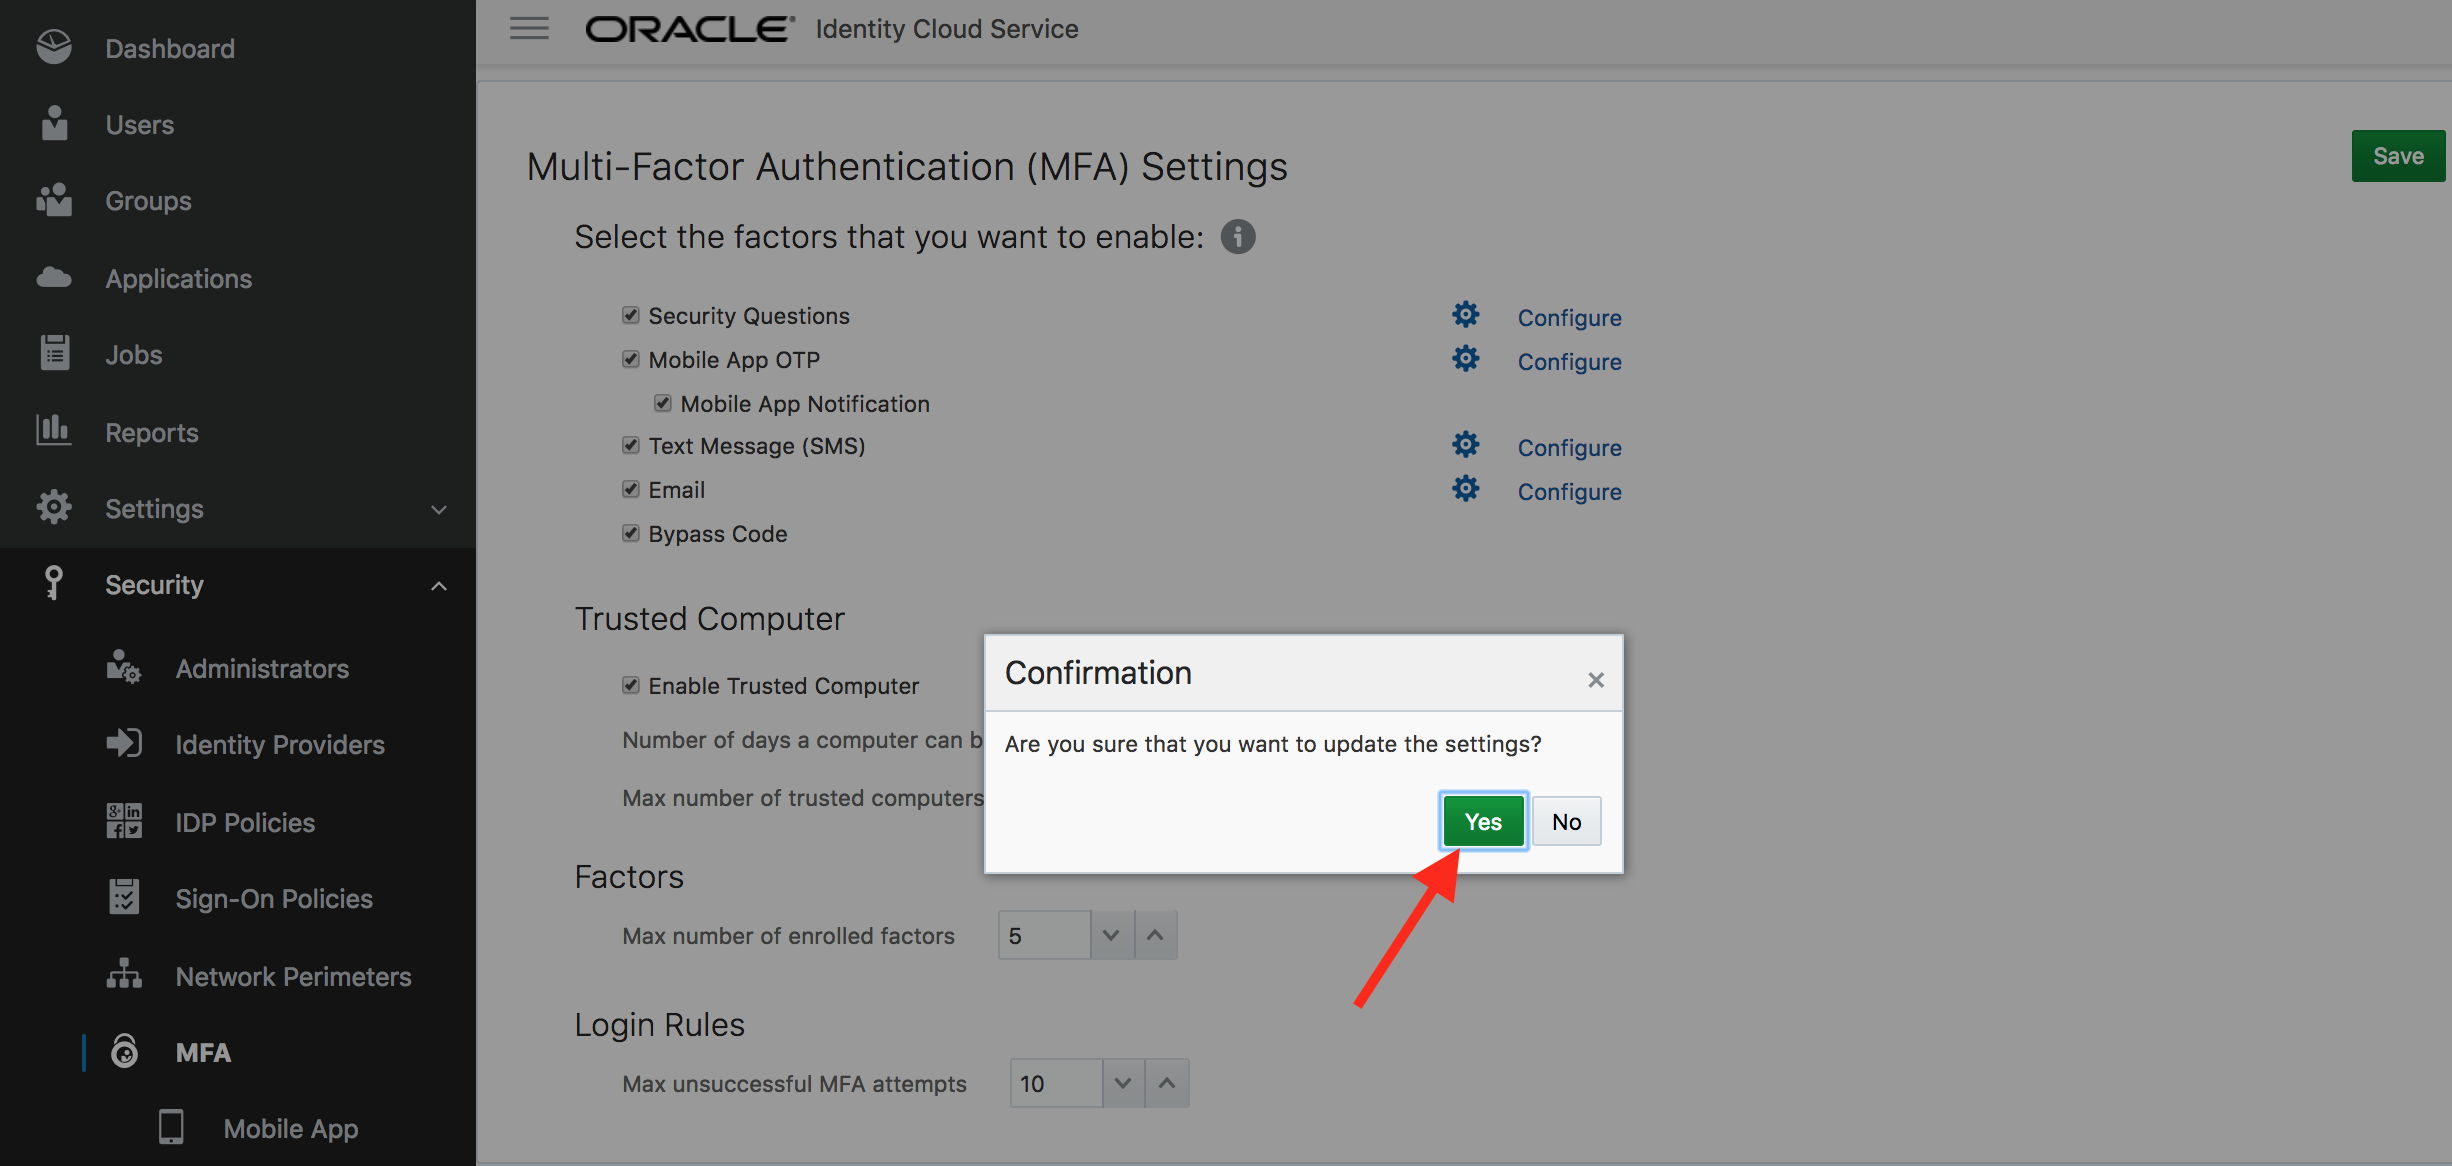
- Select all the options for Select the factors that you want to enable. Keep all other parameters to their default values. Click on Save.

- Confirm new MFA settings.
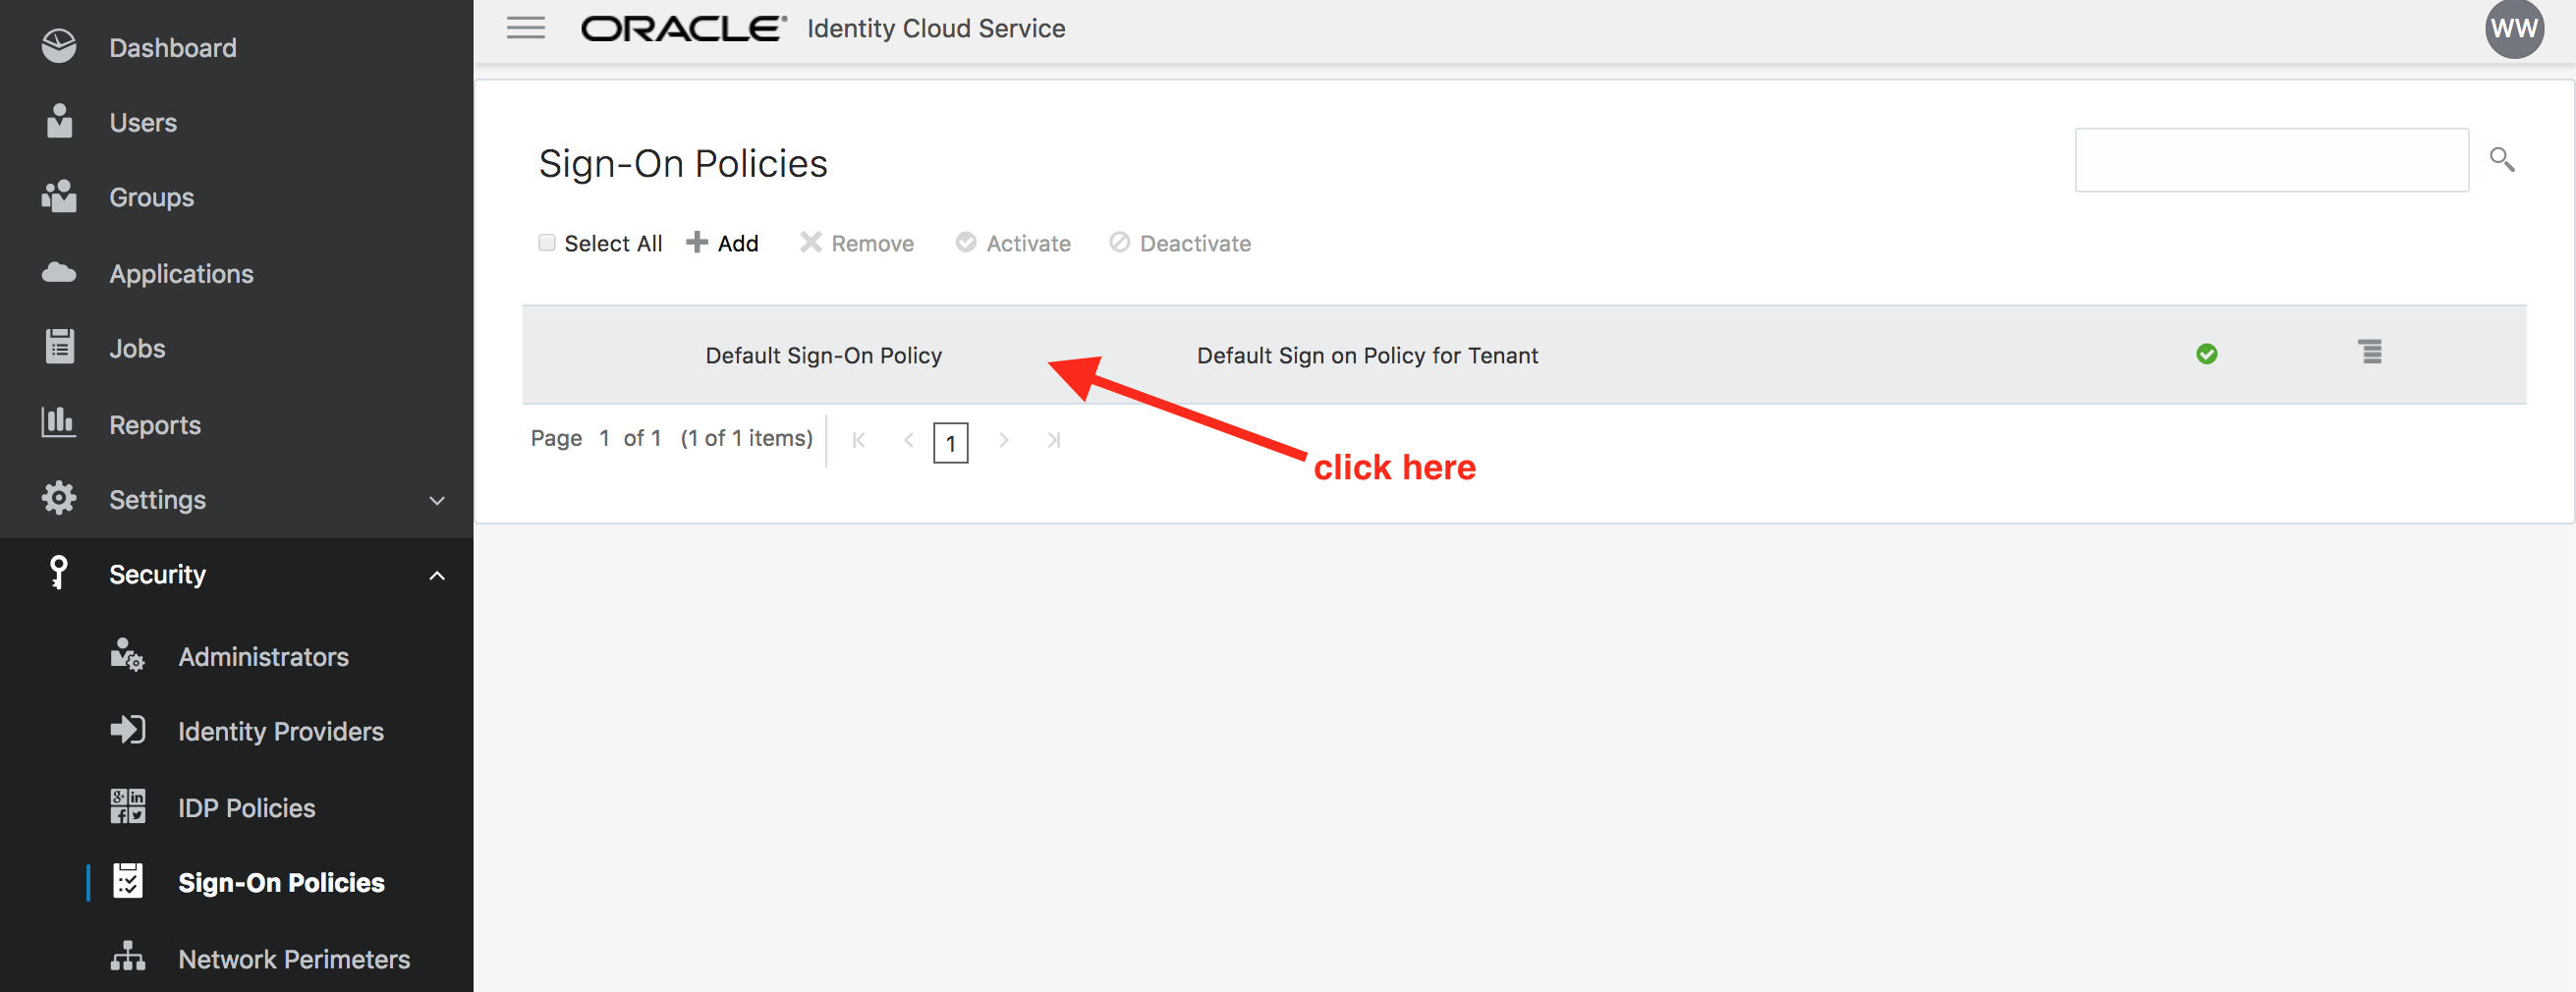
- Select Security -> Sign-On Policies from the sidebar to the left of admin console.
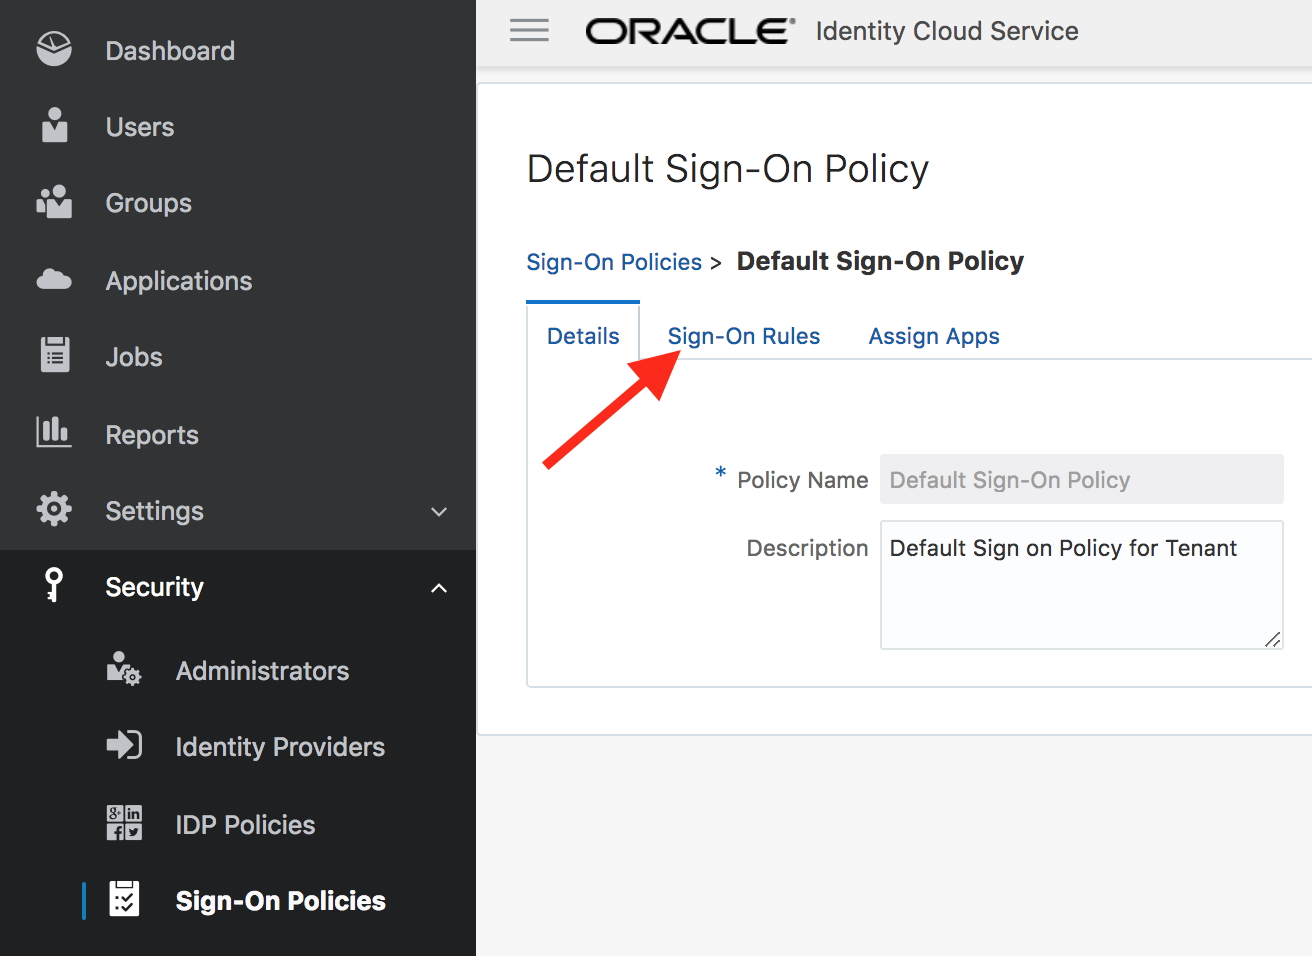
- Click on Default Sign-On Policy. This will open up the policy.
- Go to the Sign-On Rules tab and then click on Edit against the Default Sign-On Rule.
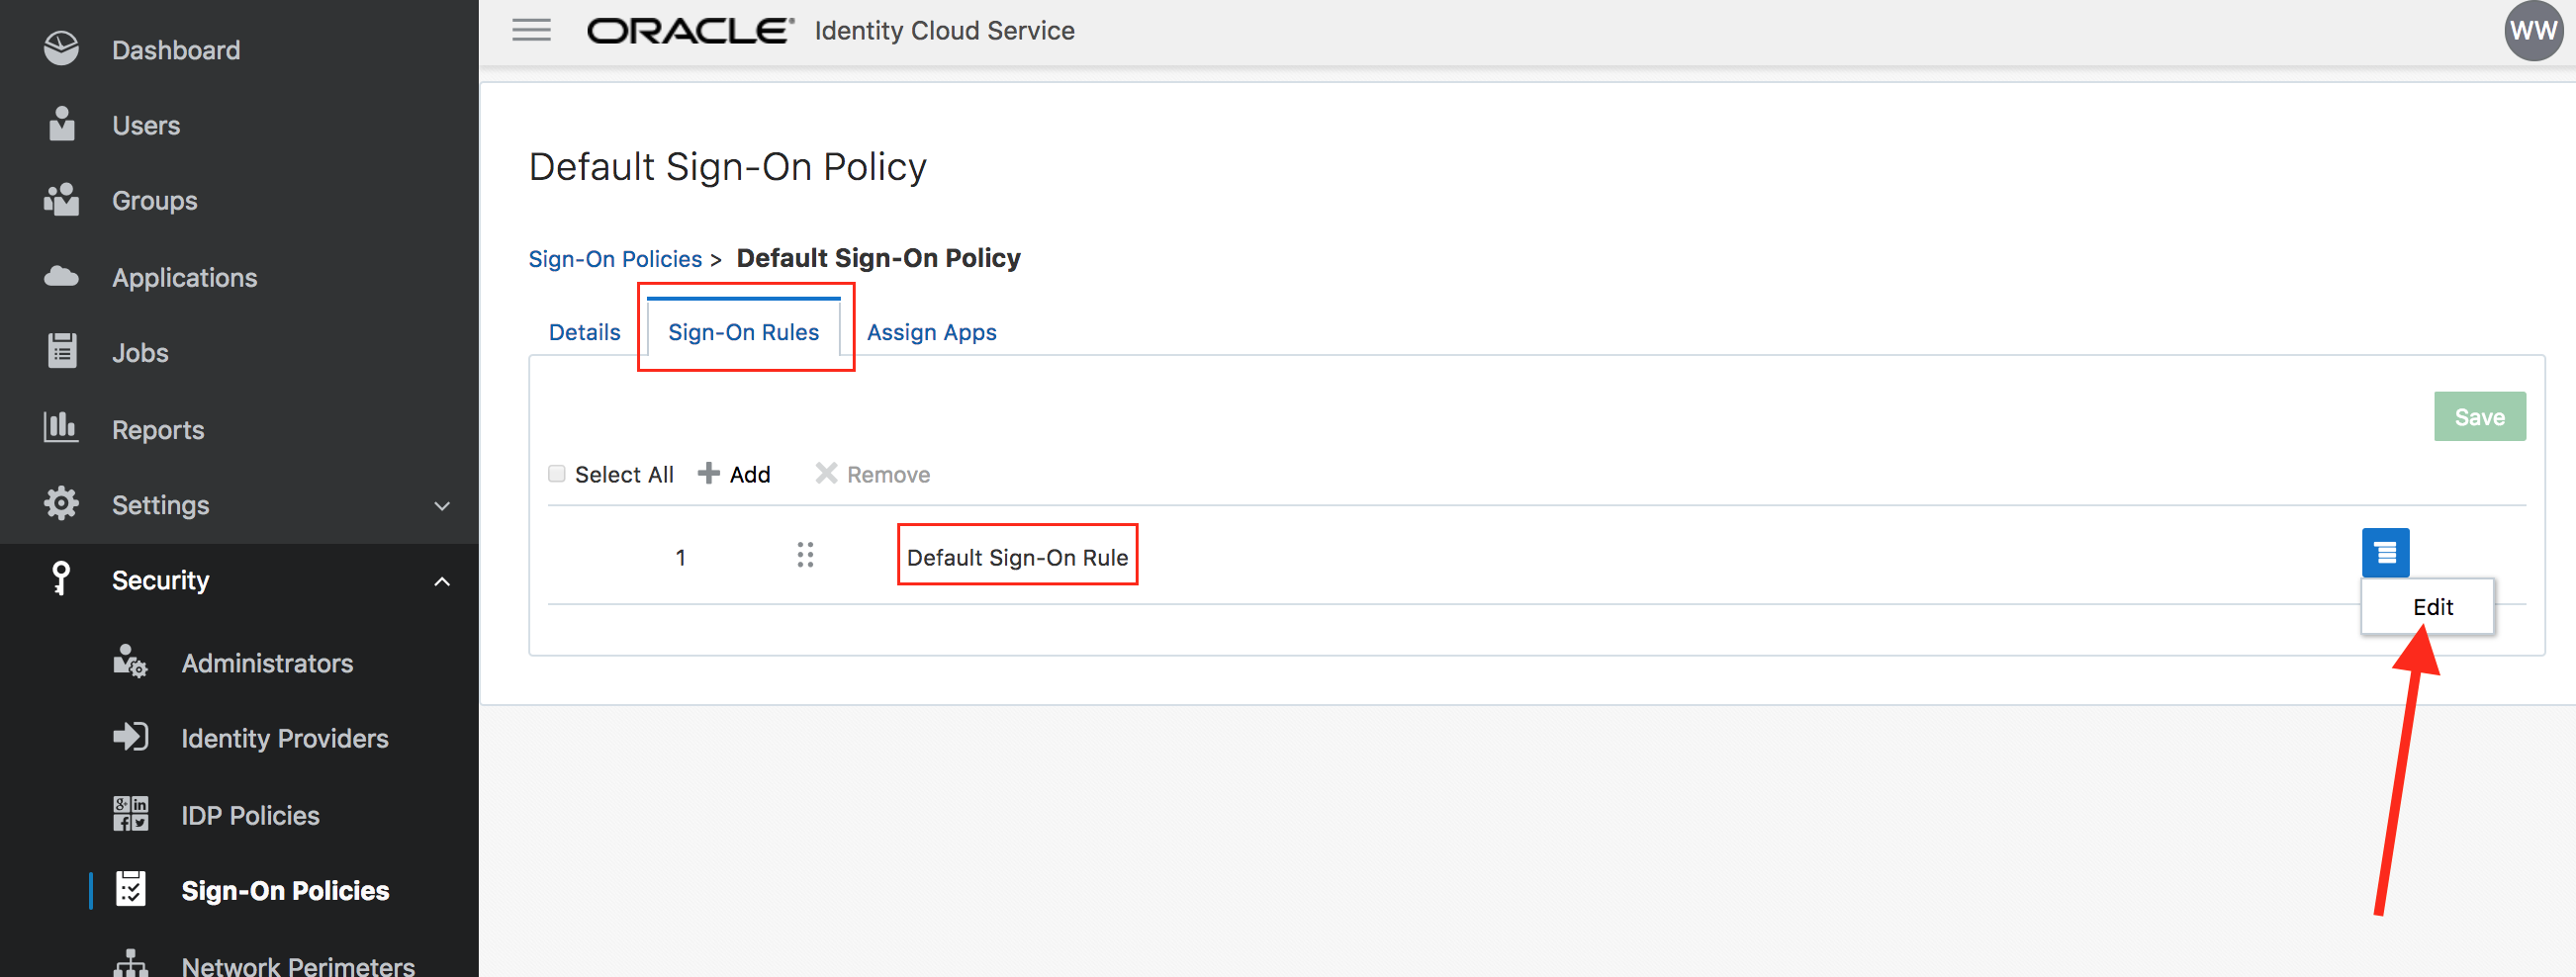
- Check the box Prompt for an additional factor. Set the value of Enrollment to
Optional. Click on Save.


- Congratulations, you enabled and configured multi-factor authentication within IDCS.
Activate account - (Persona: End-User)
For end-user flow, use either a separate browser or an incognito/ private browser session. This will ensure that administrator and user sessions are not mixed up.
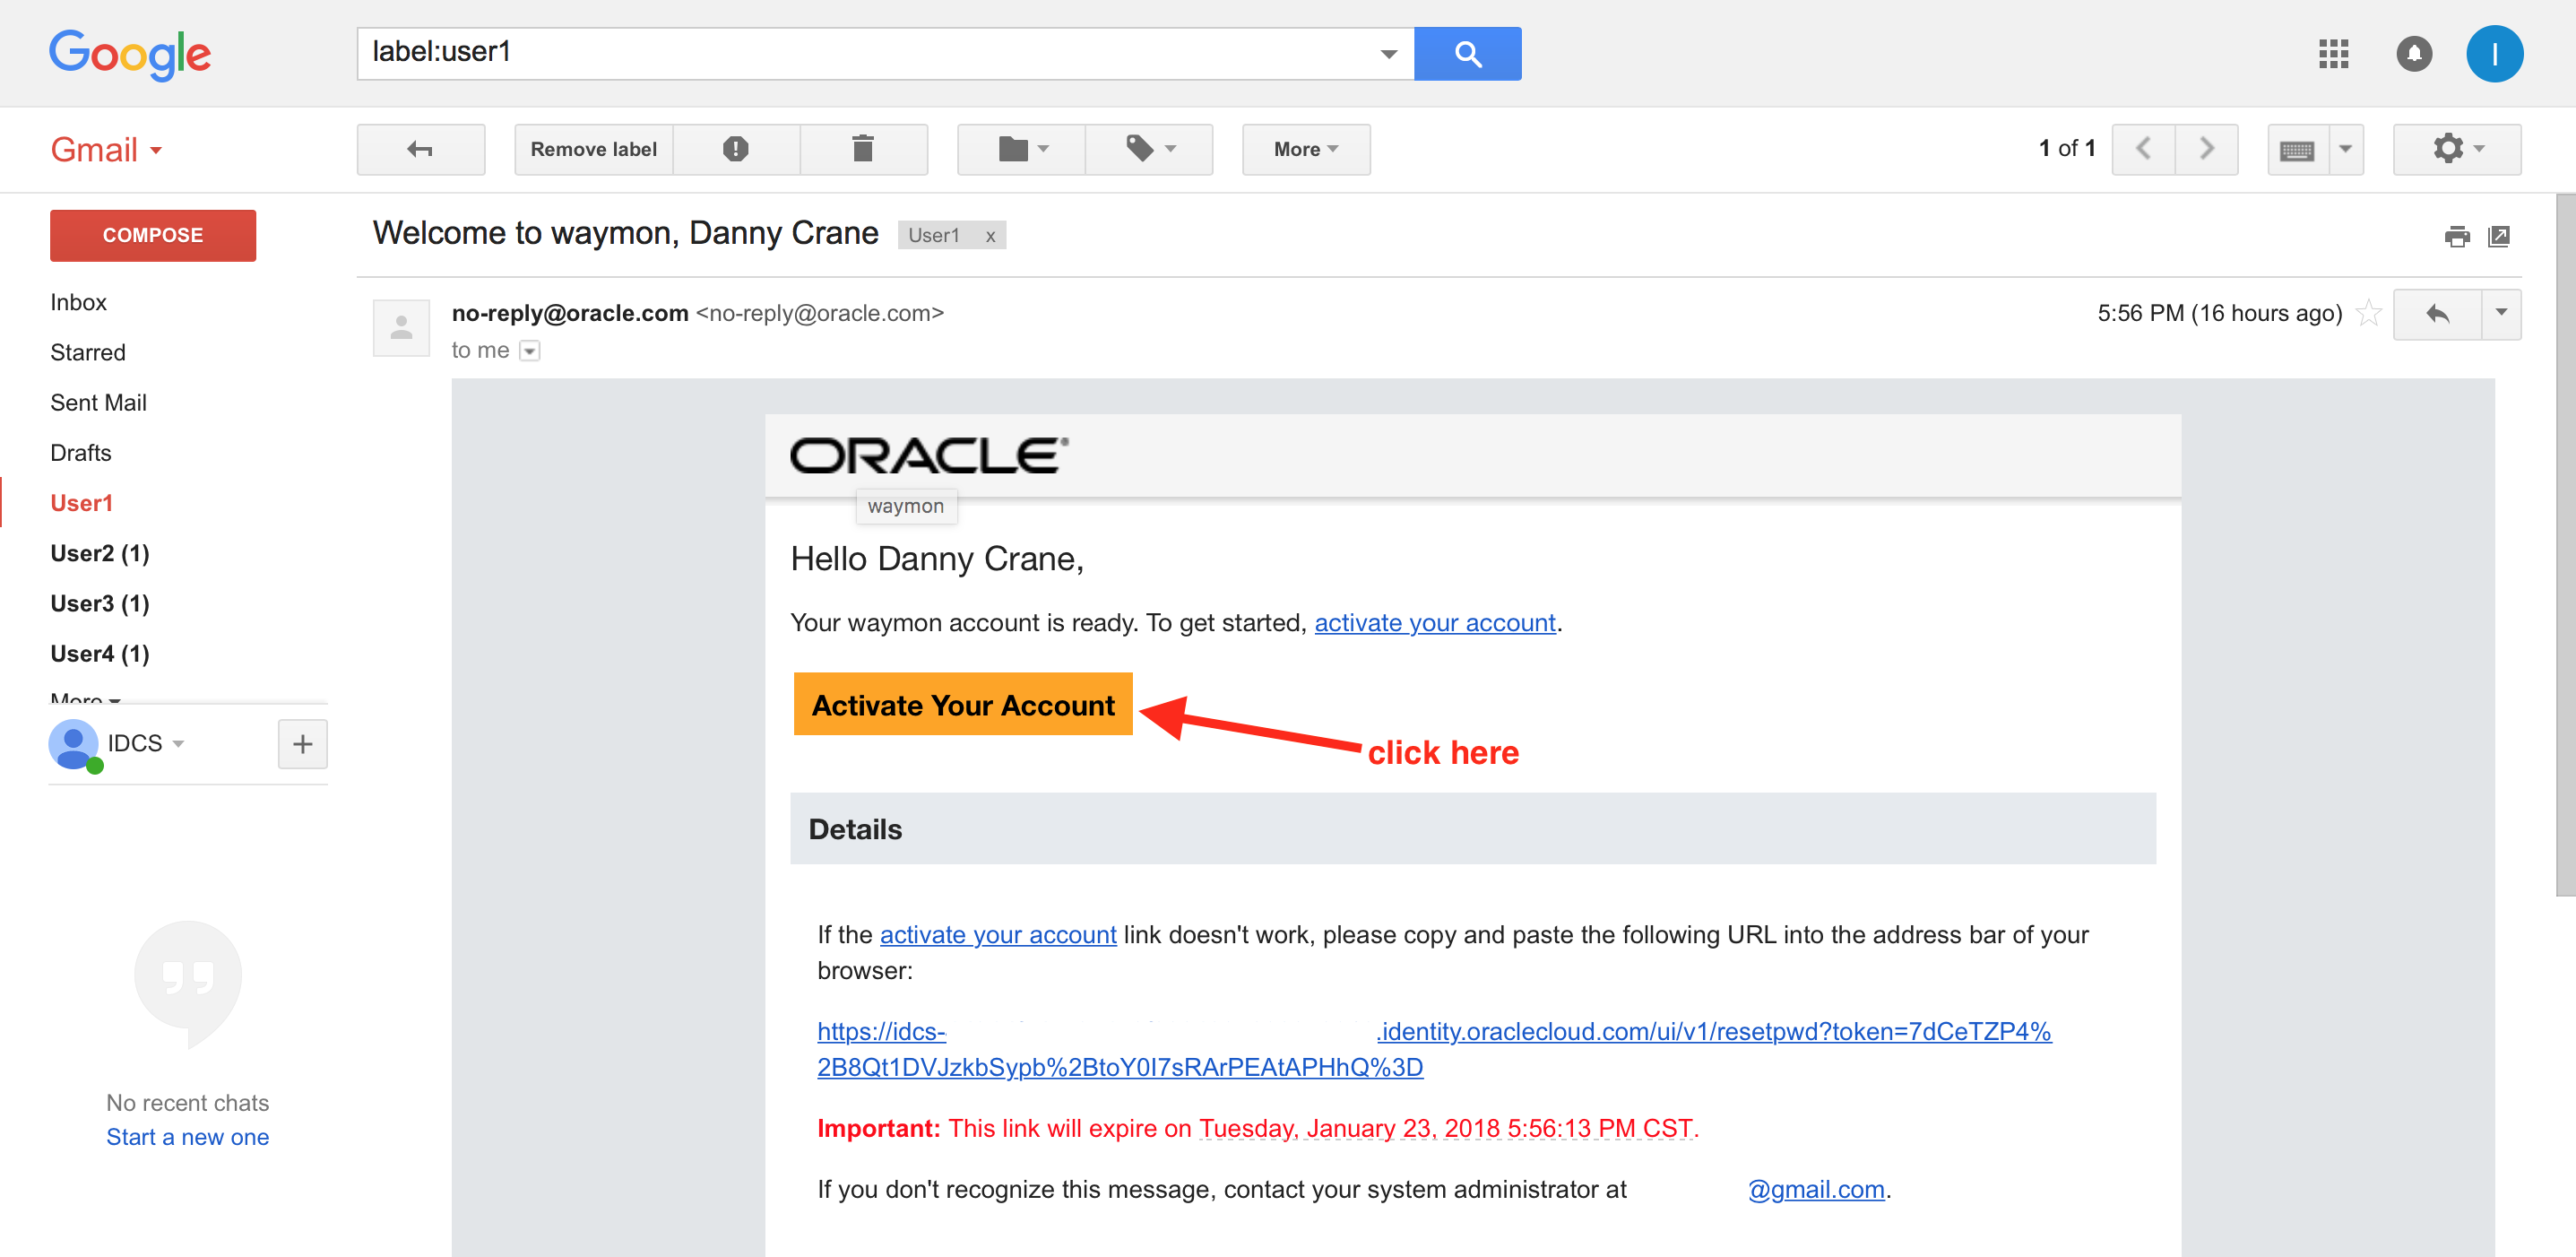
- Open your email client for the address you provided during user creation. Verify that there is an activation email from IDCS.
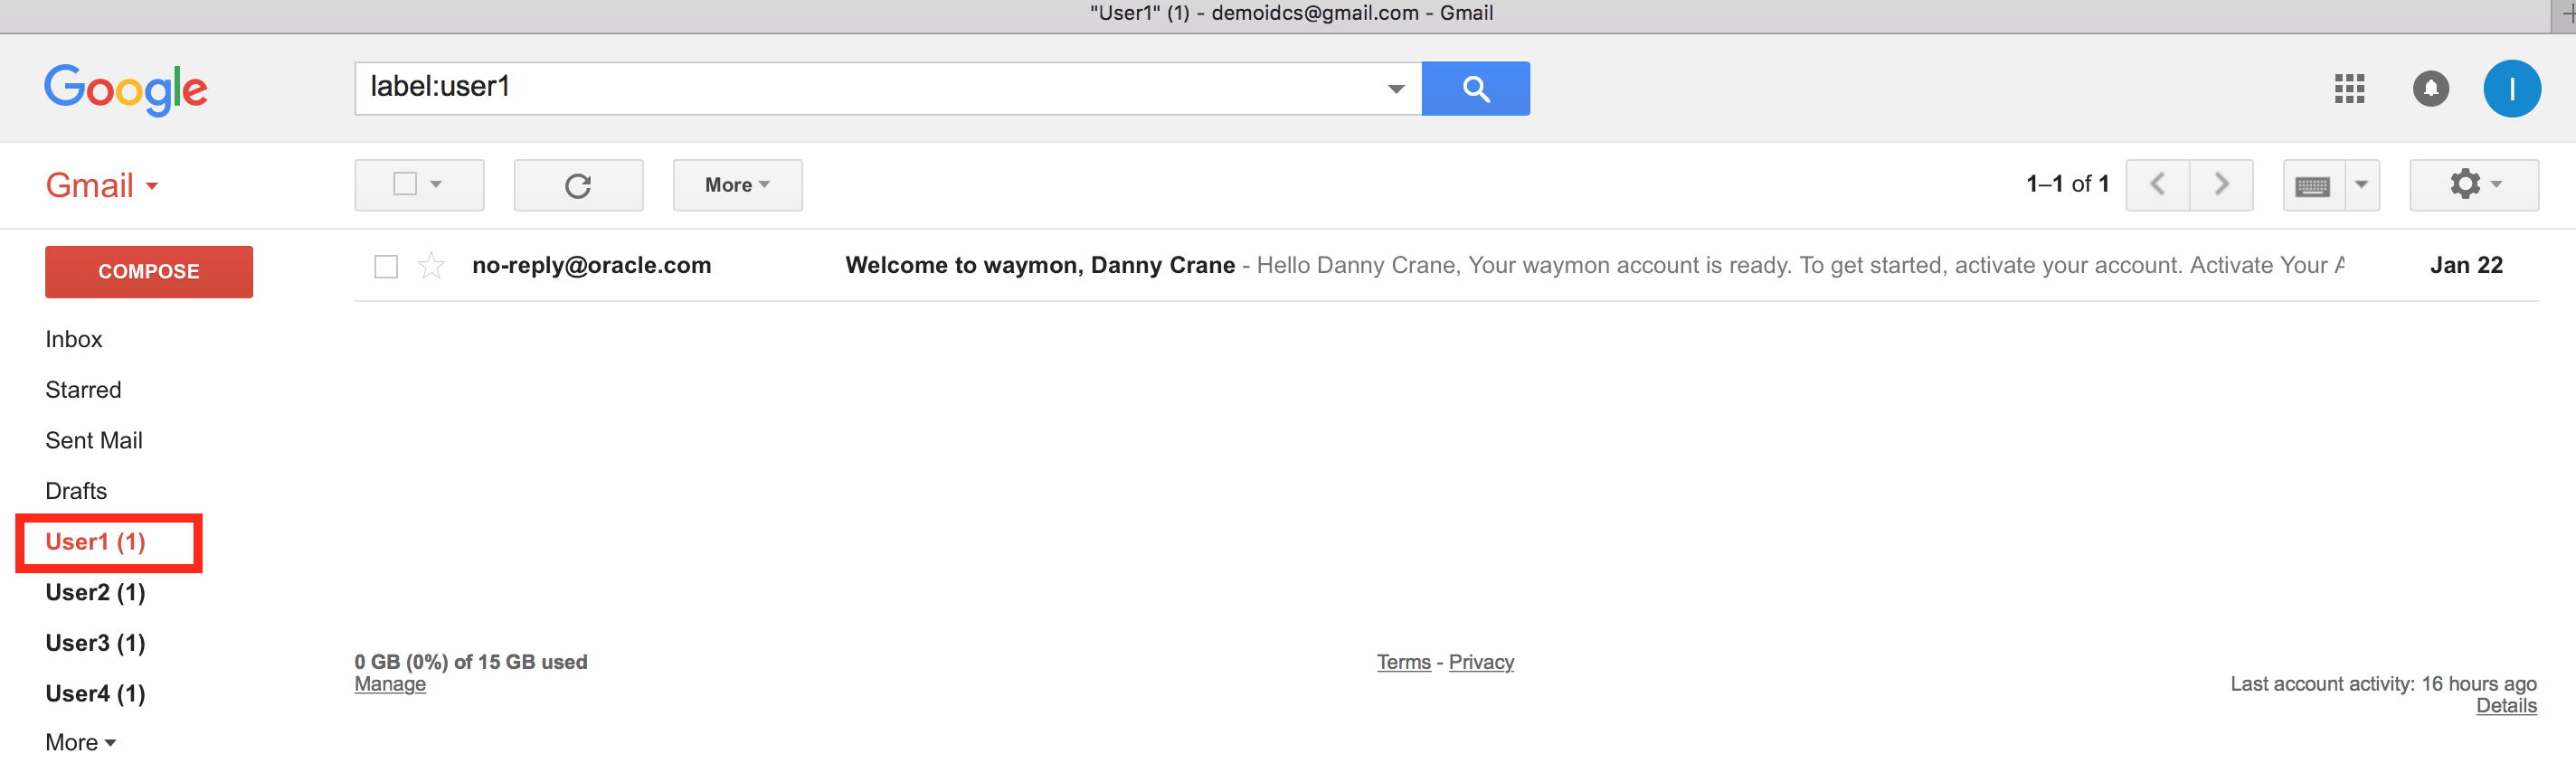
- Open and review the email. Click on the Activate Your Account button.
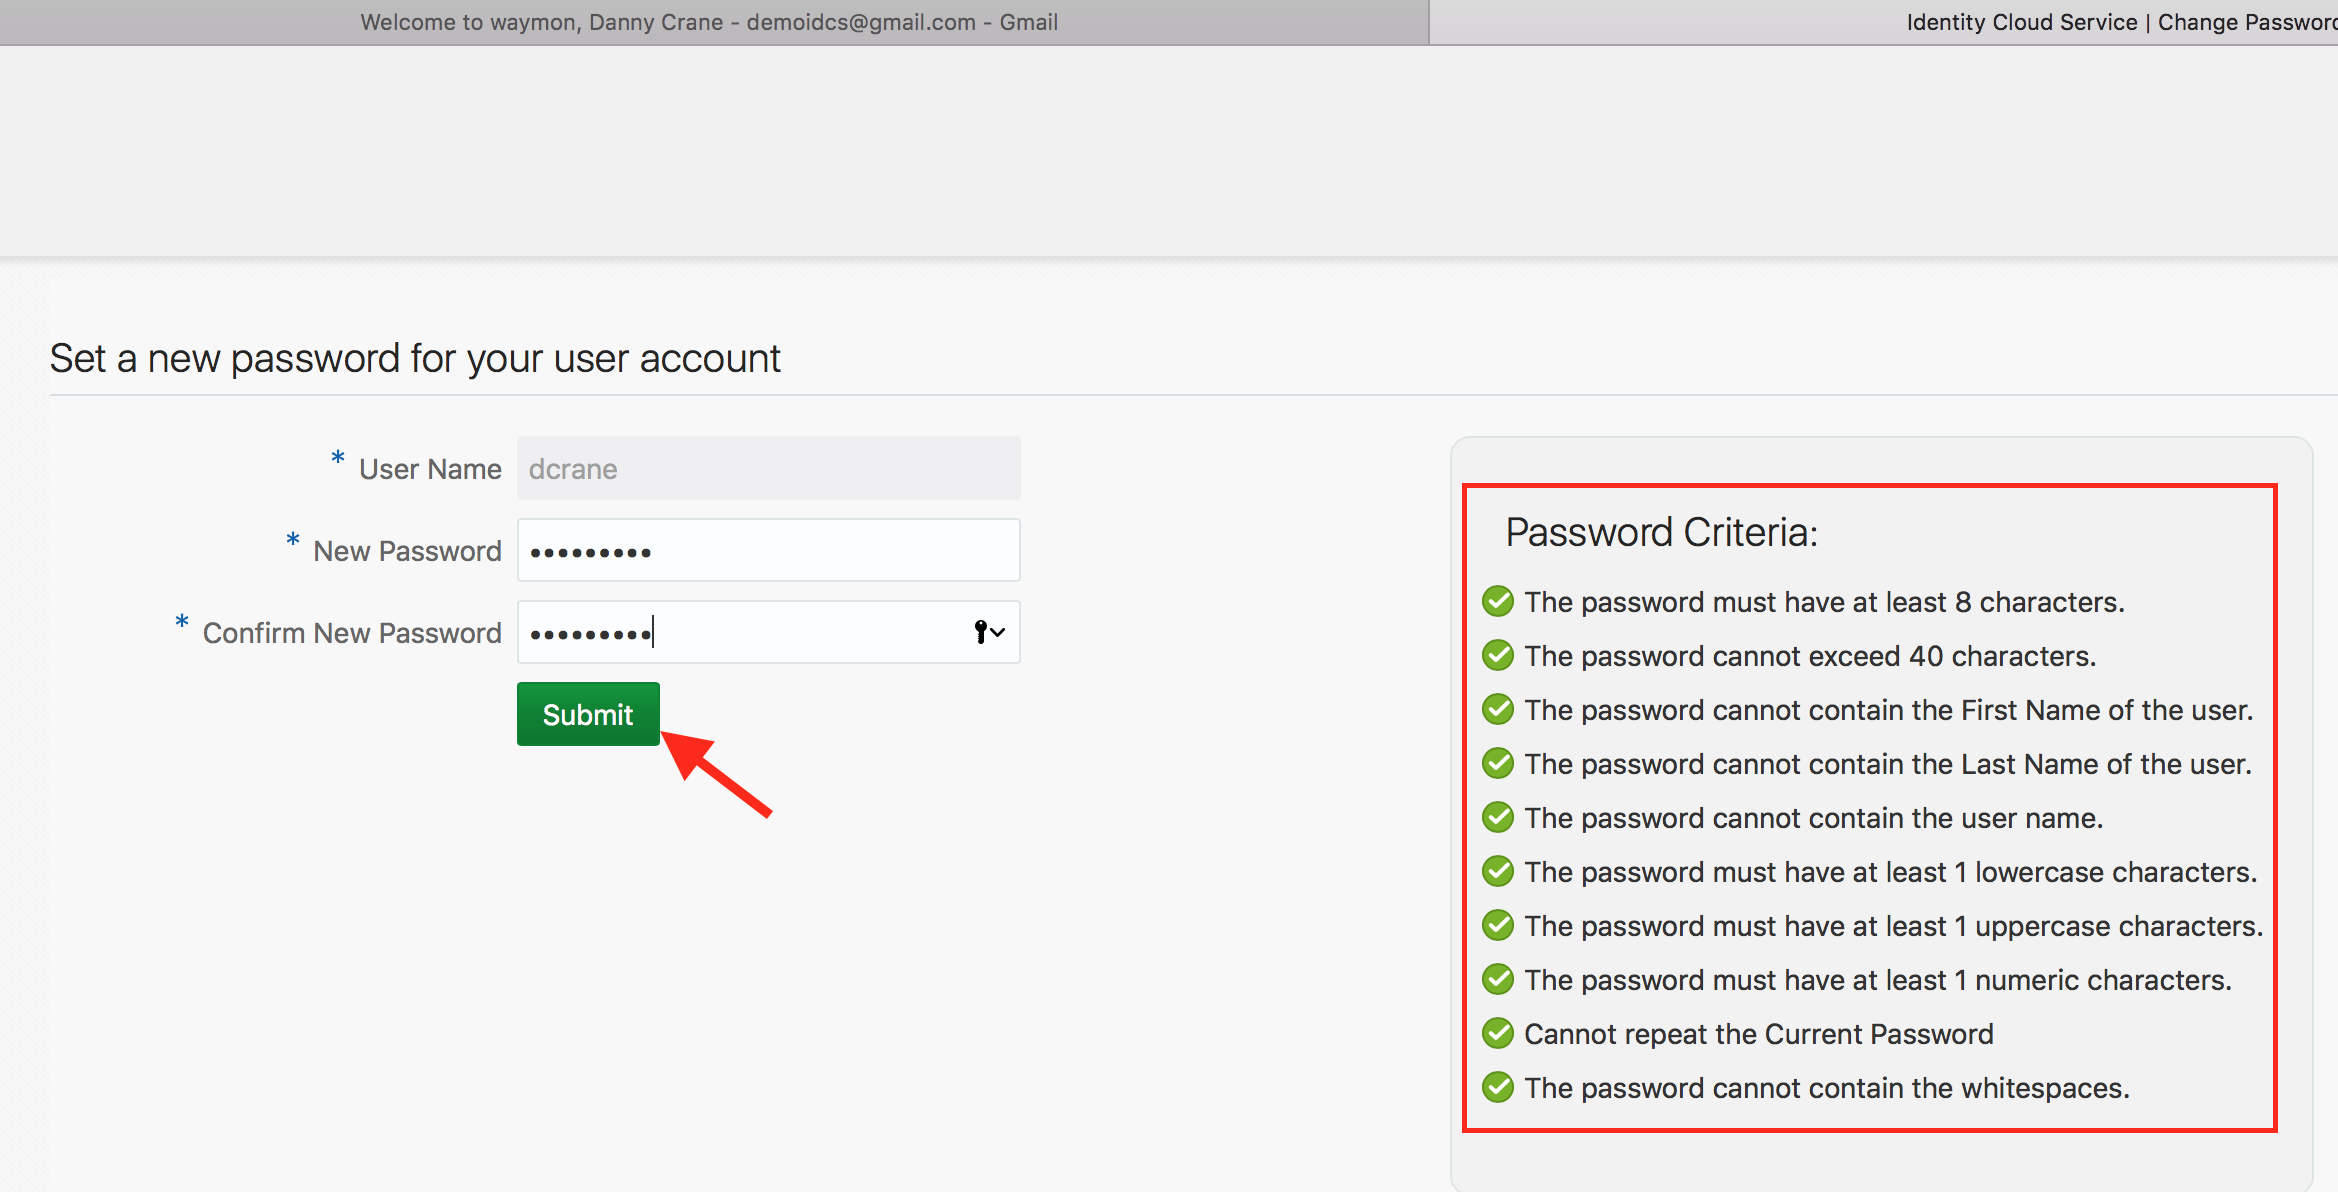
- IDCS change password page will open up. Provide a suitable password that passes the listed Password Criteria. The criterion/rule verification is indicated with a green check mark against each of the rule. Click on Submit.
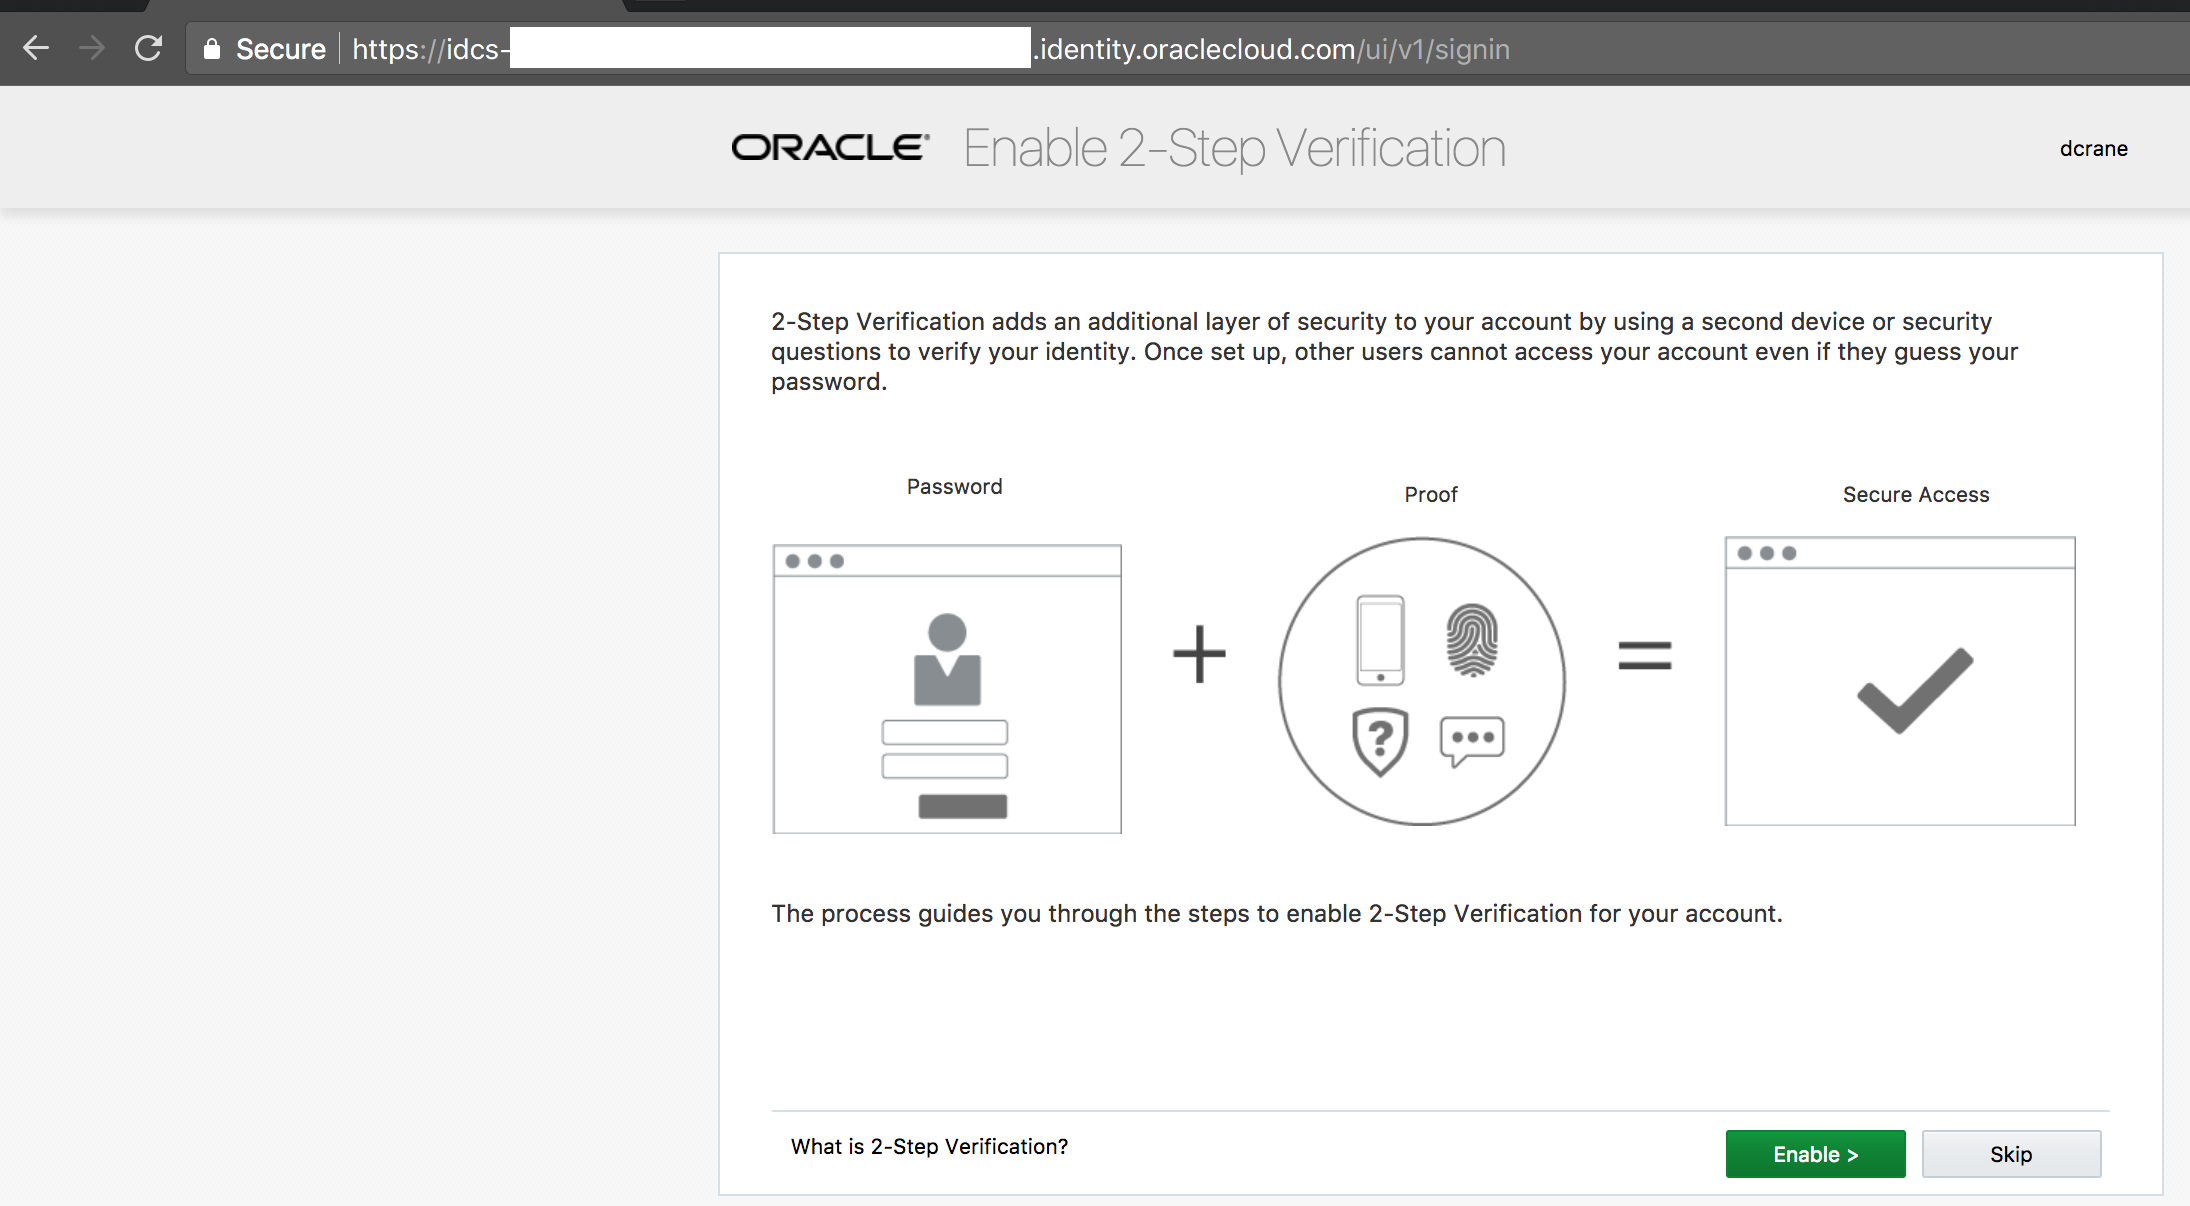
- Verify that you are redirected to the MFA enrollment page.
Enroll in multi-factor authentication - (Persona: End-User)
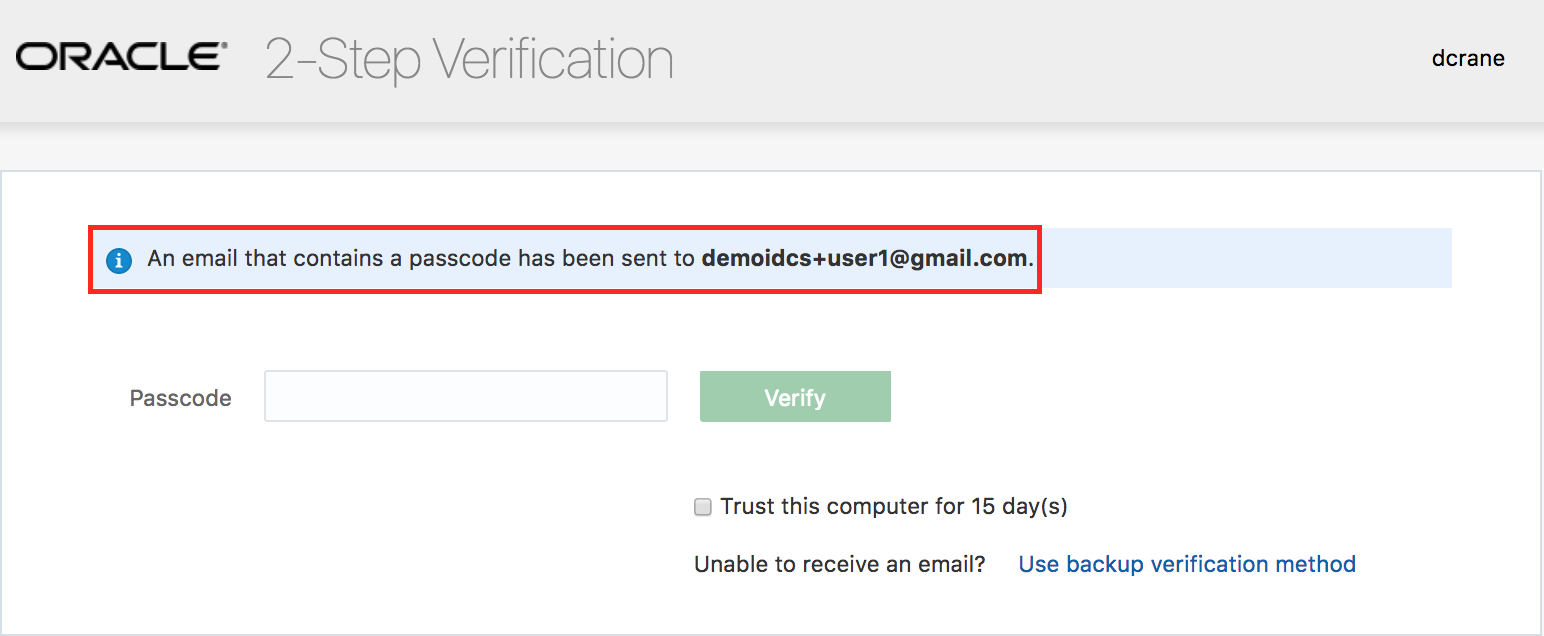
- On the Enable 2-Step Verification page, click on Enable.
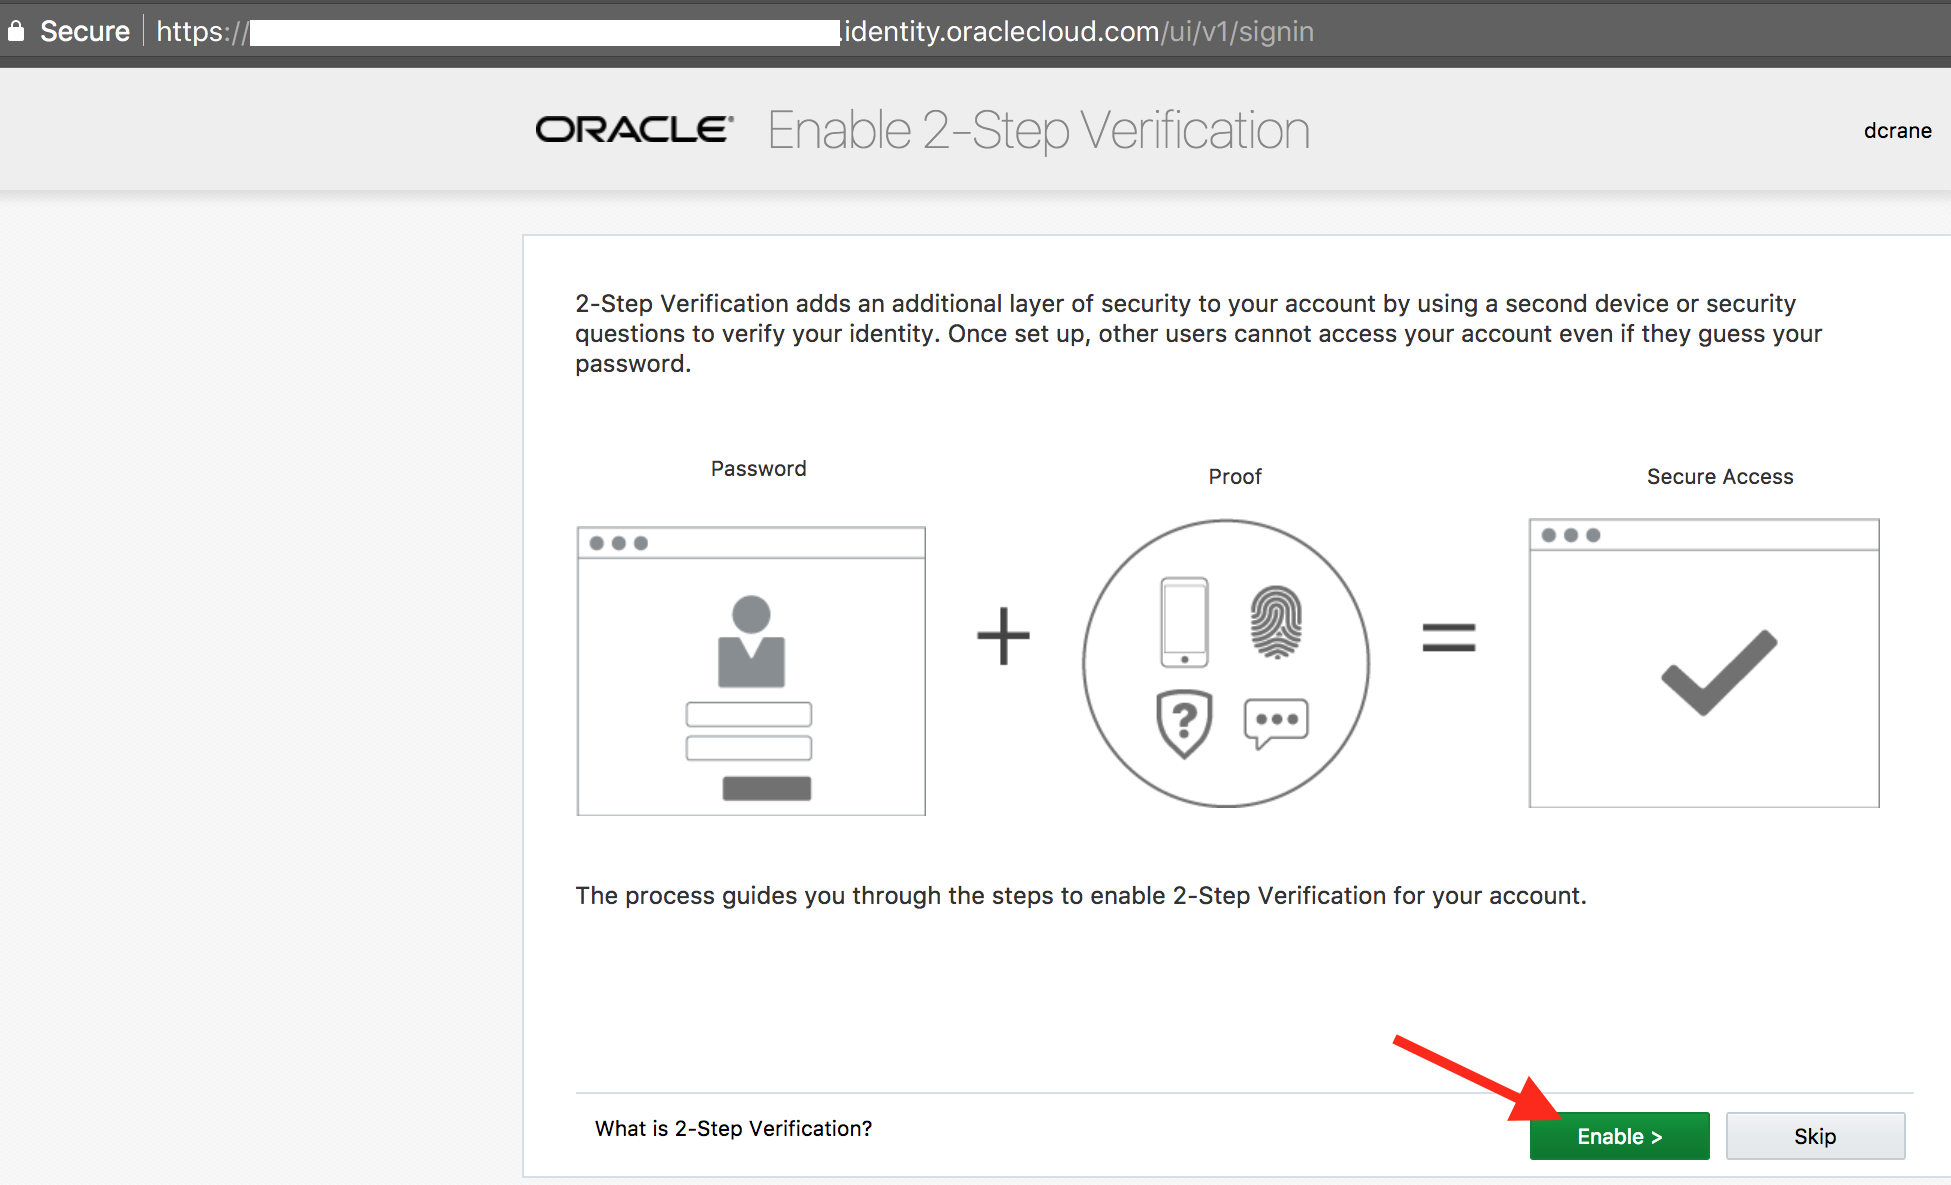
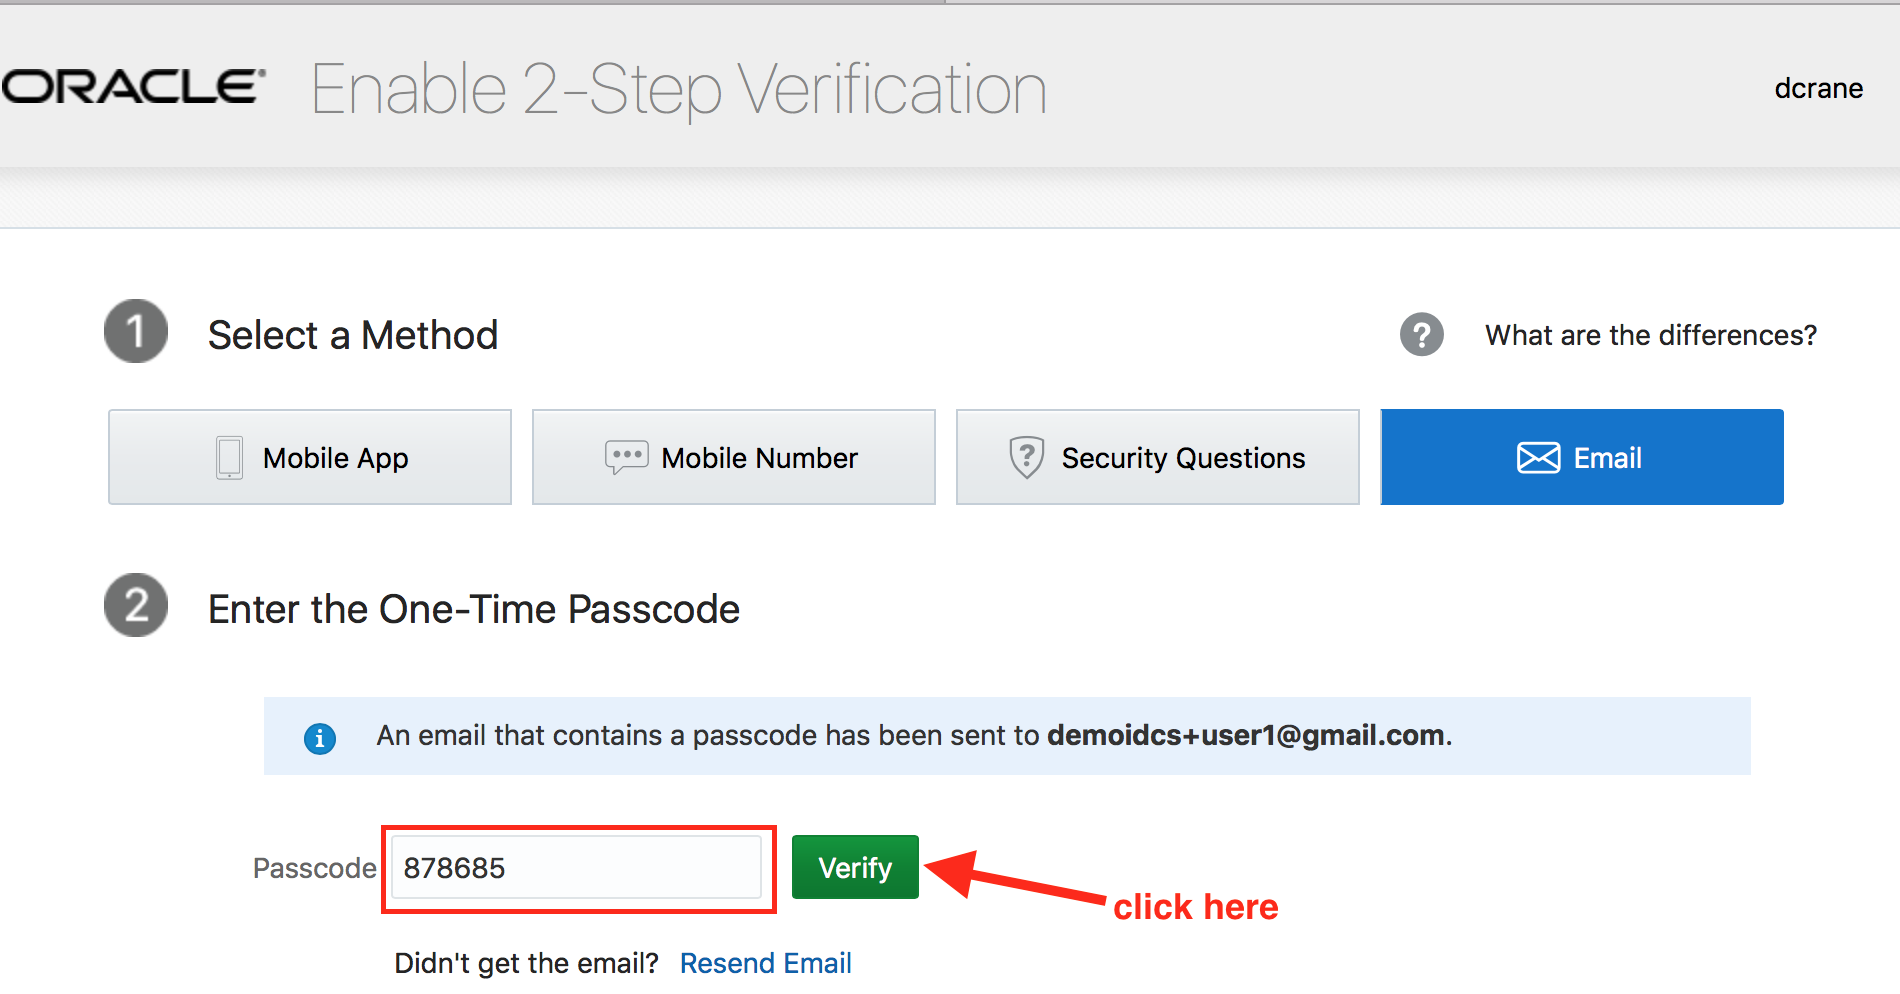
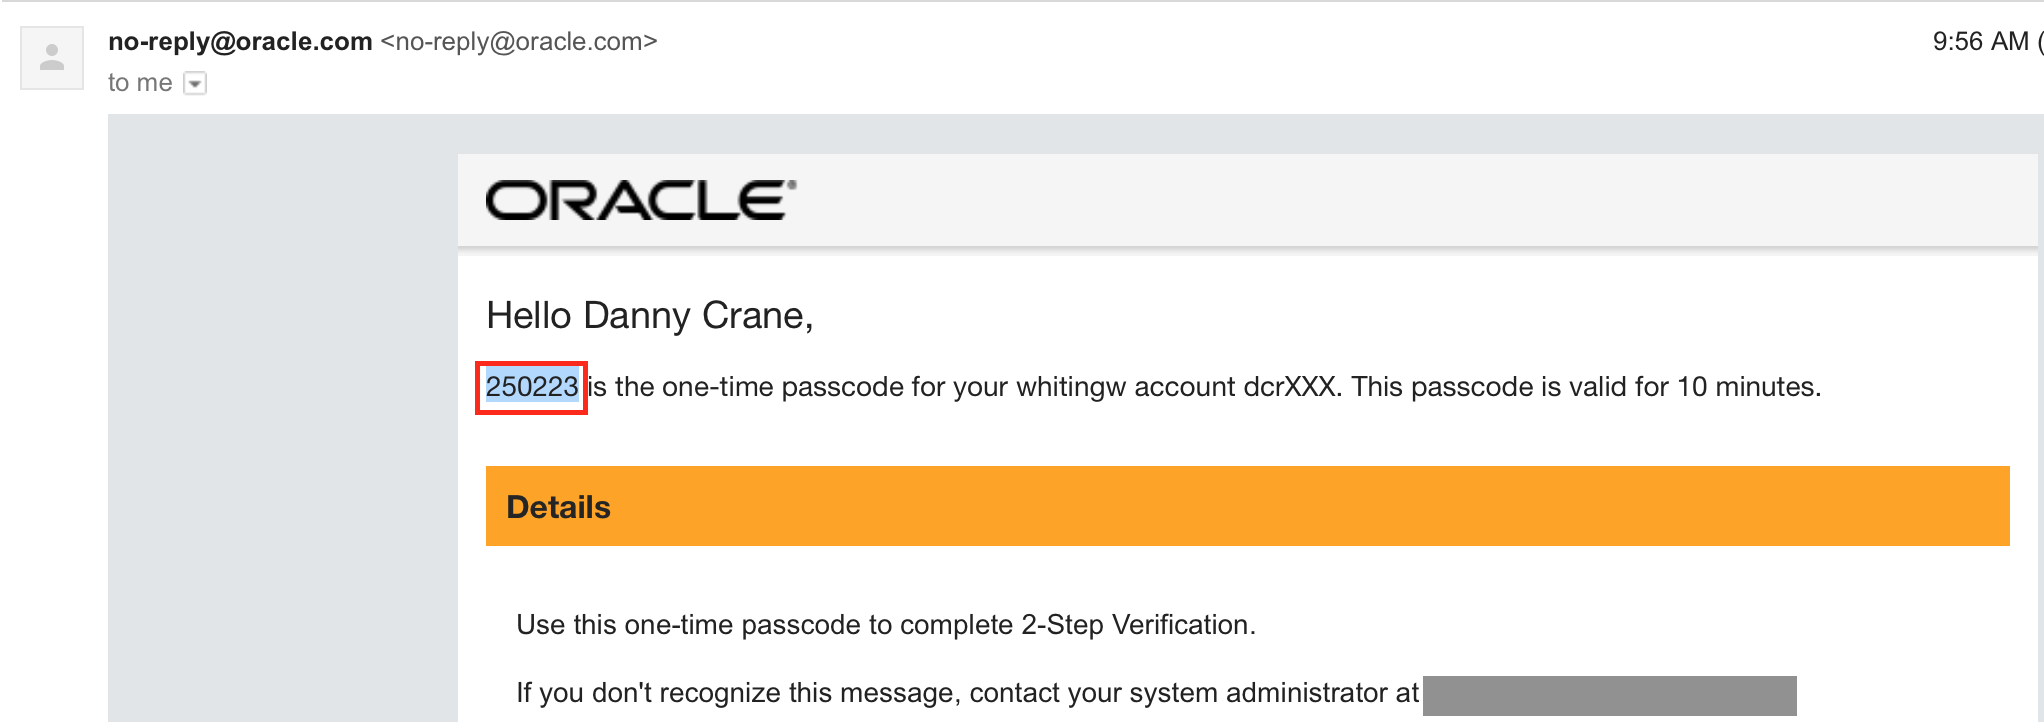
- Select the method Email.

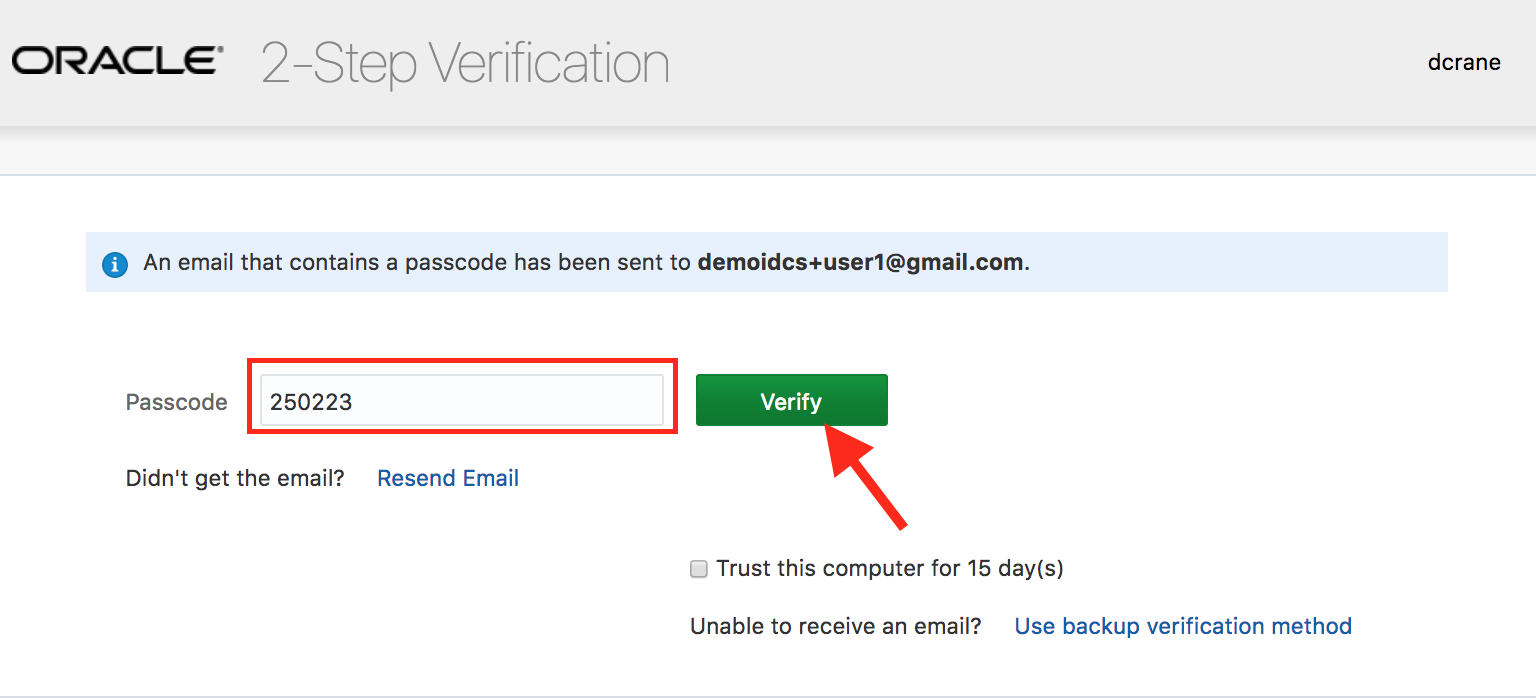
- Access your email to obtain the one-time passcode .
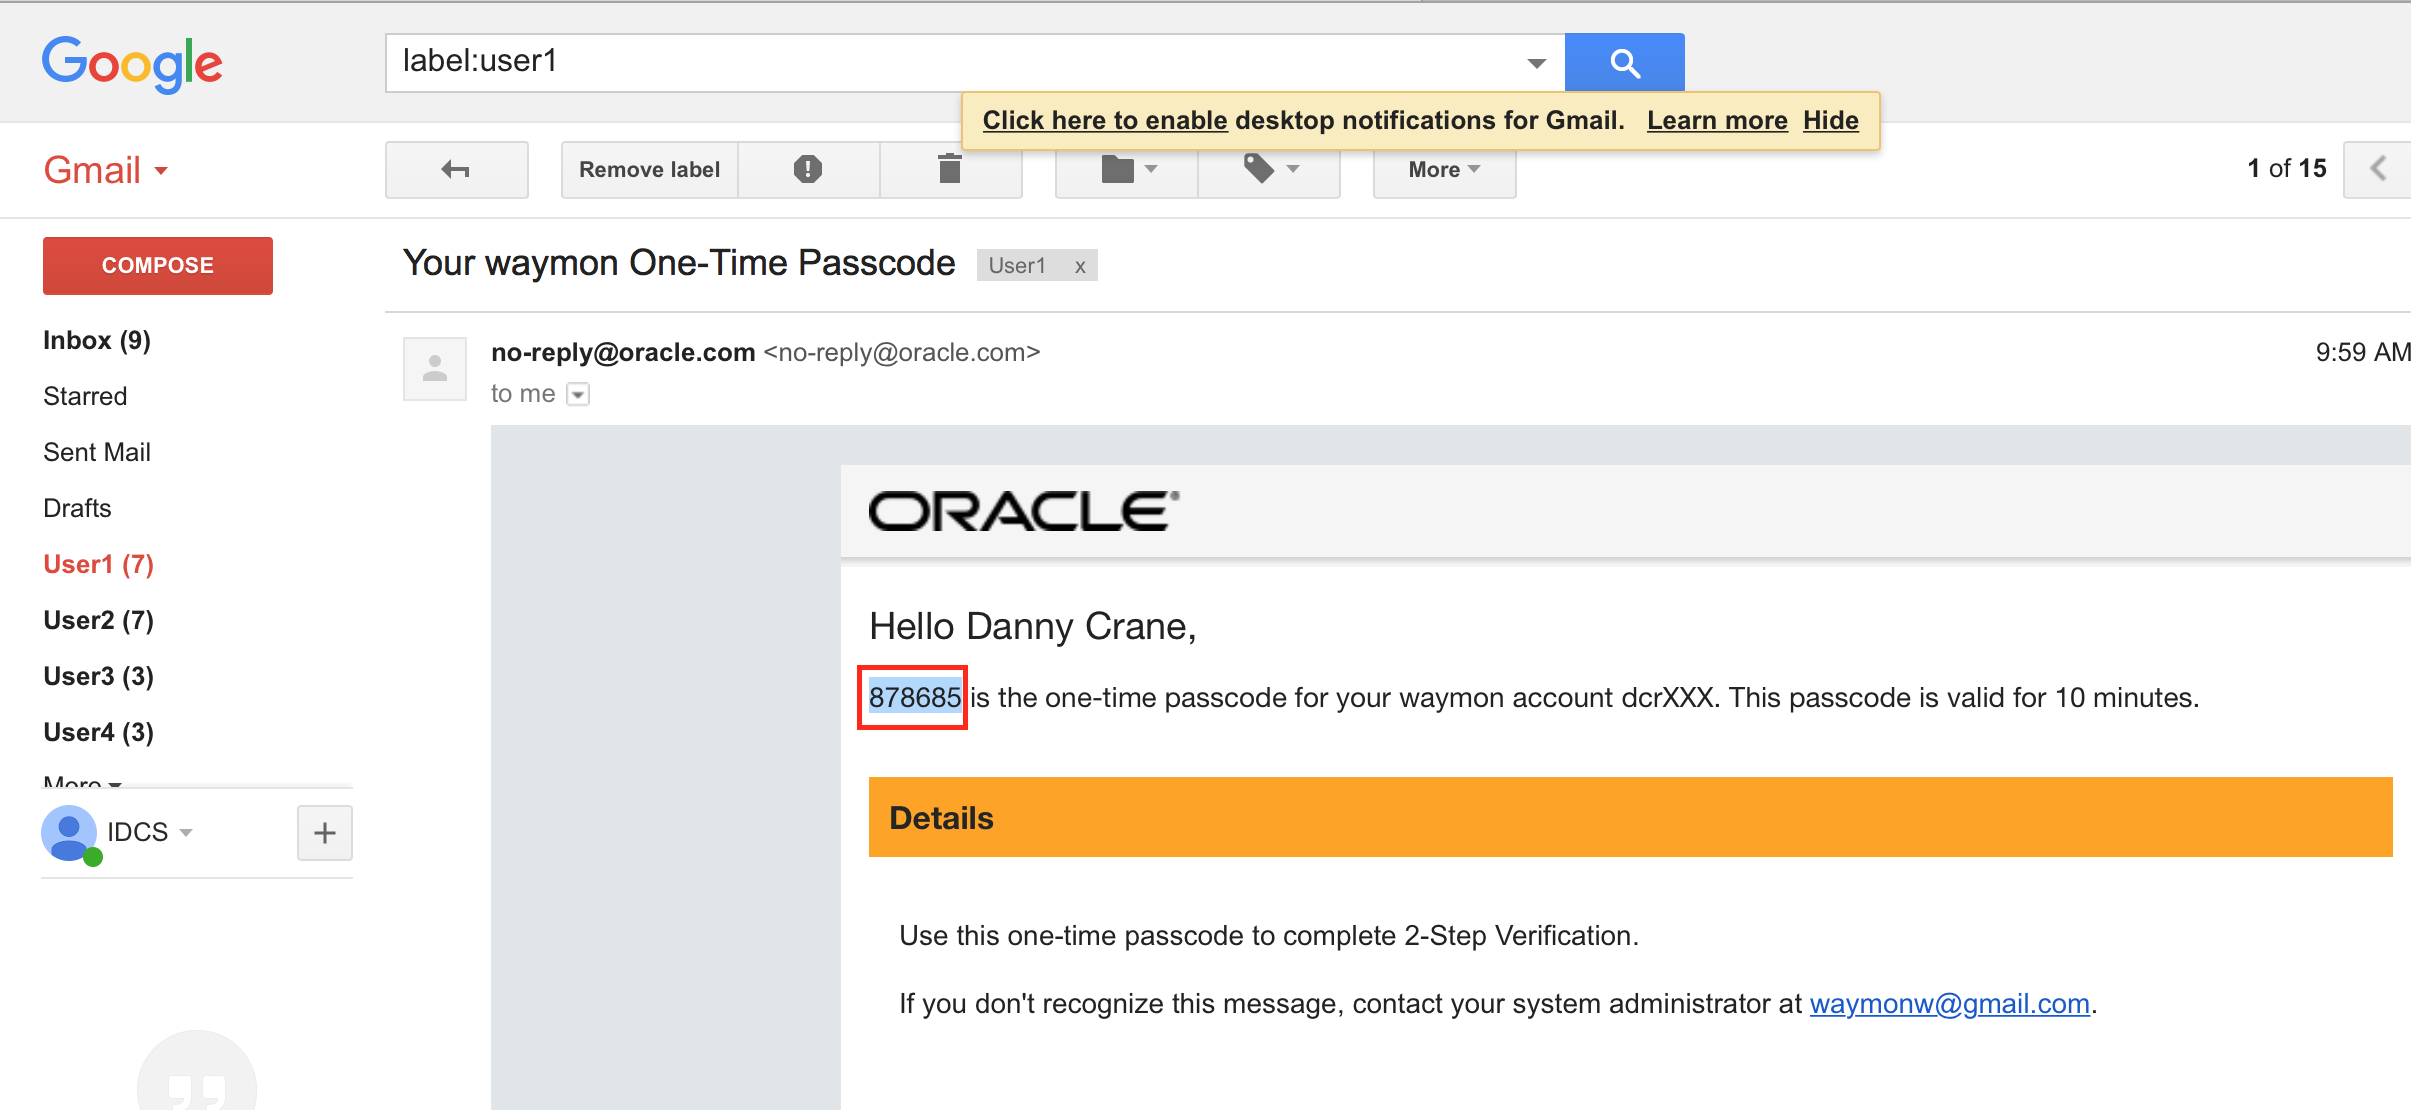
- Provide the 6-digit code on the enrollment page and click on Verify.
- Ensure that the success enrollment message is displayed. Click on Done.
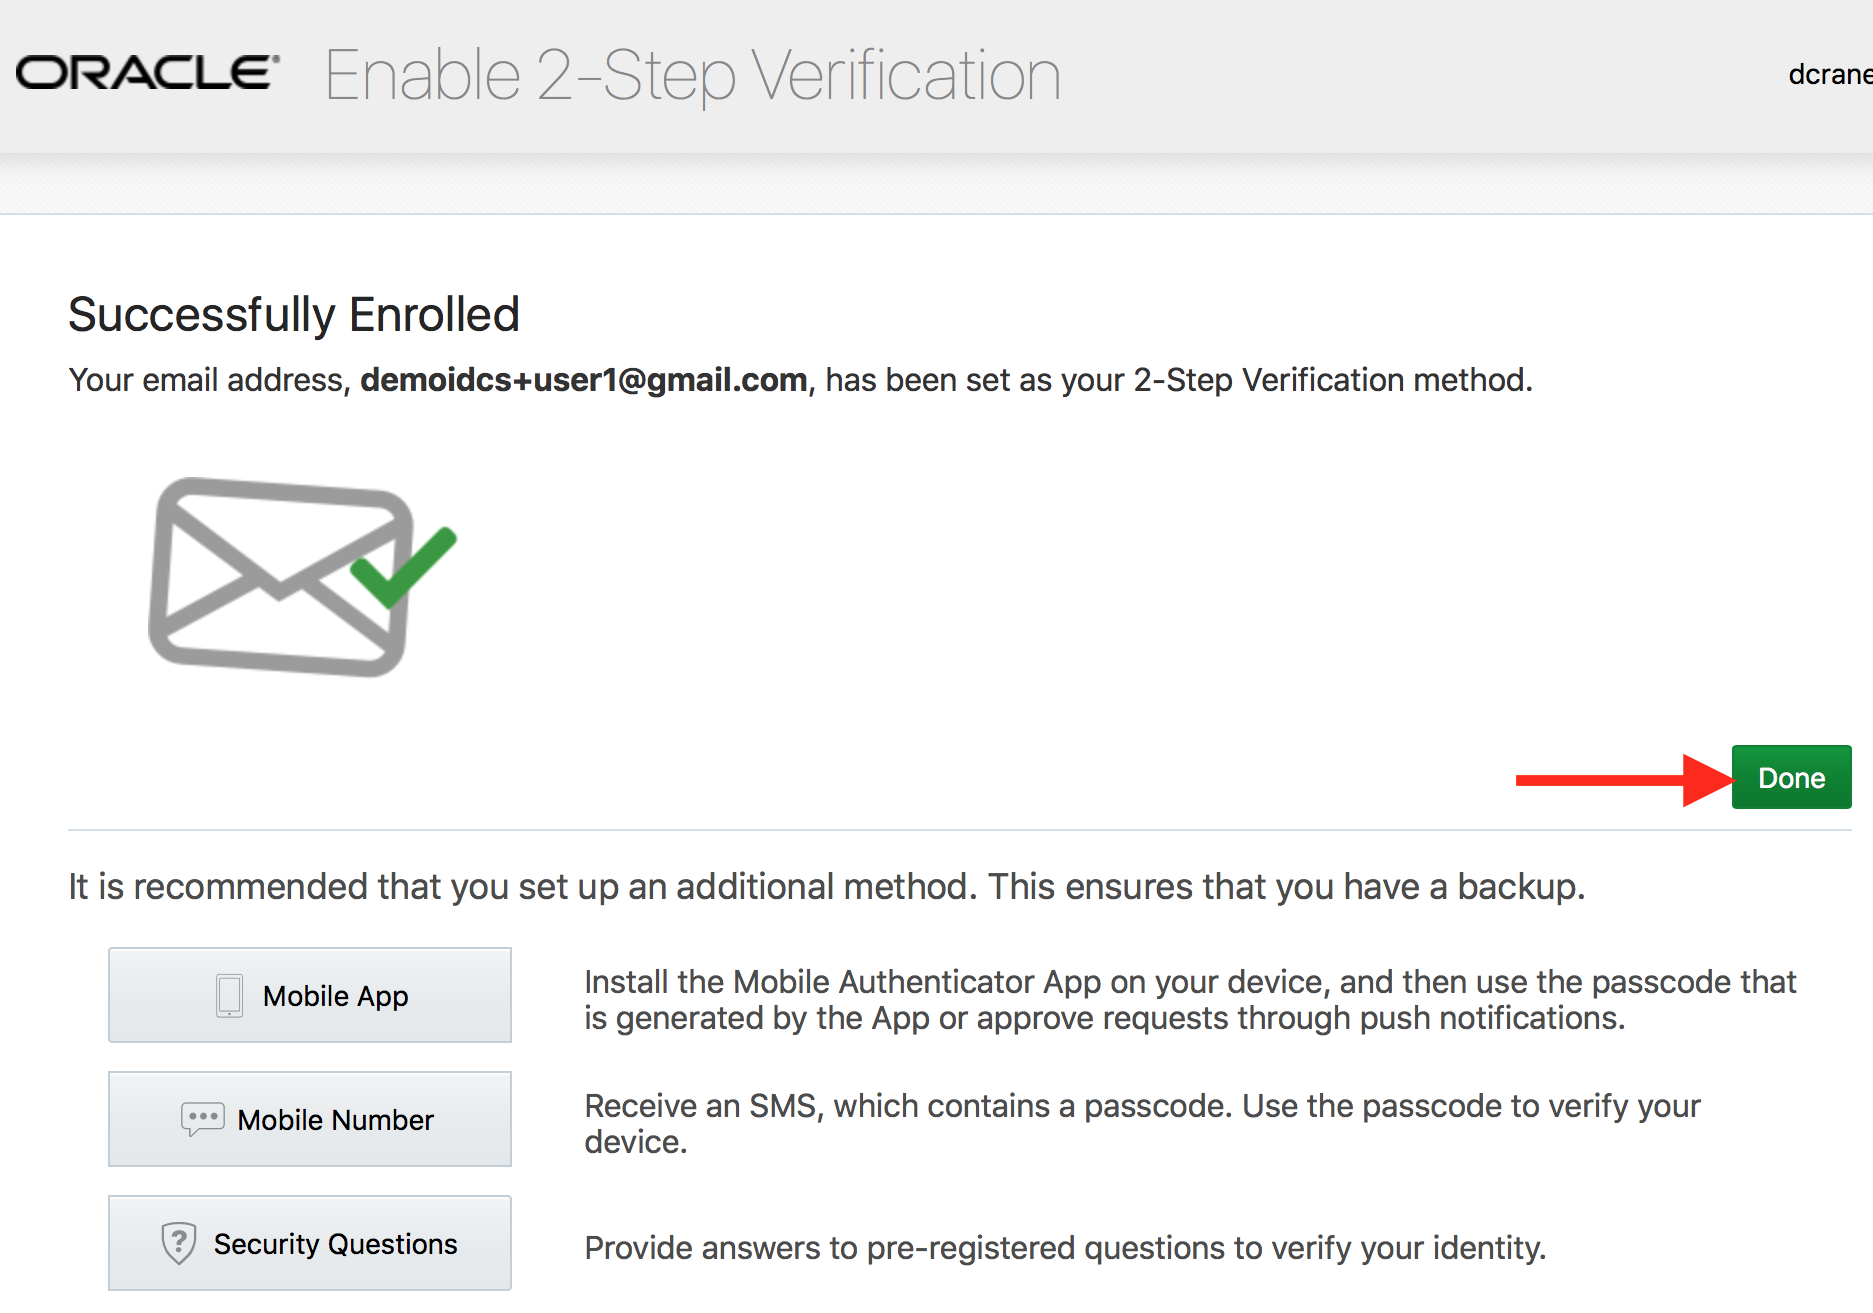
- Verify that you are redirected to the empty My Apps page.
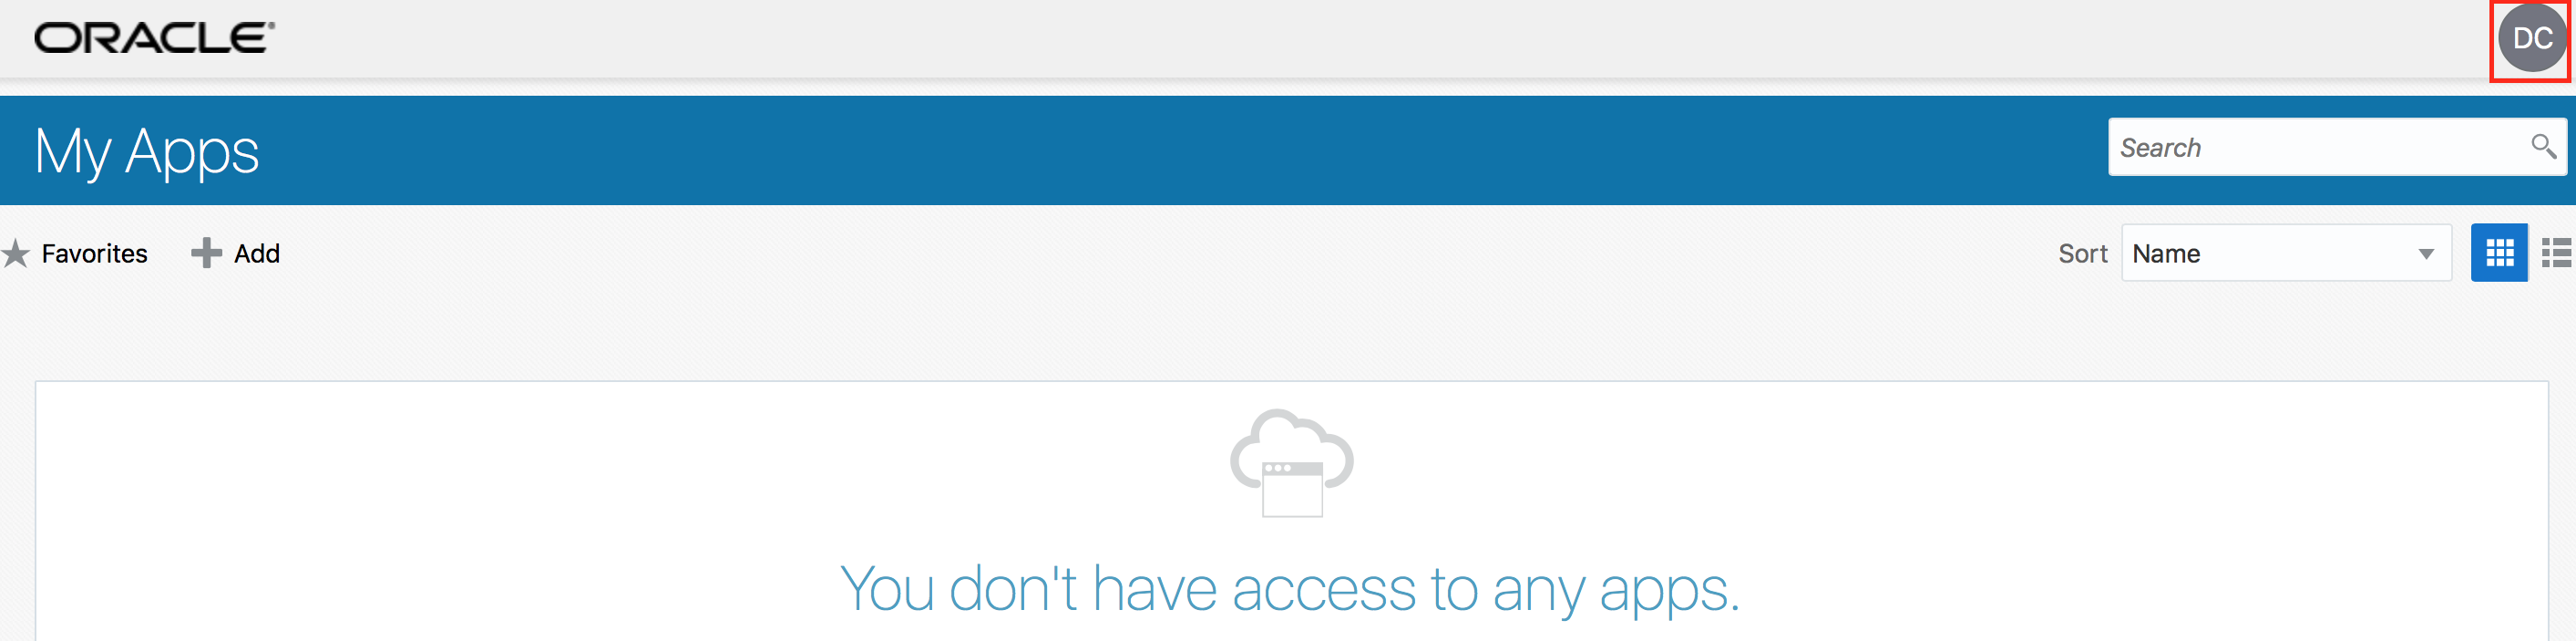
- Sign out from IDCS and re-login with your credentials.
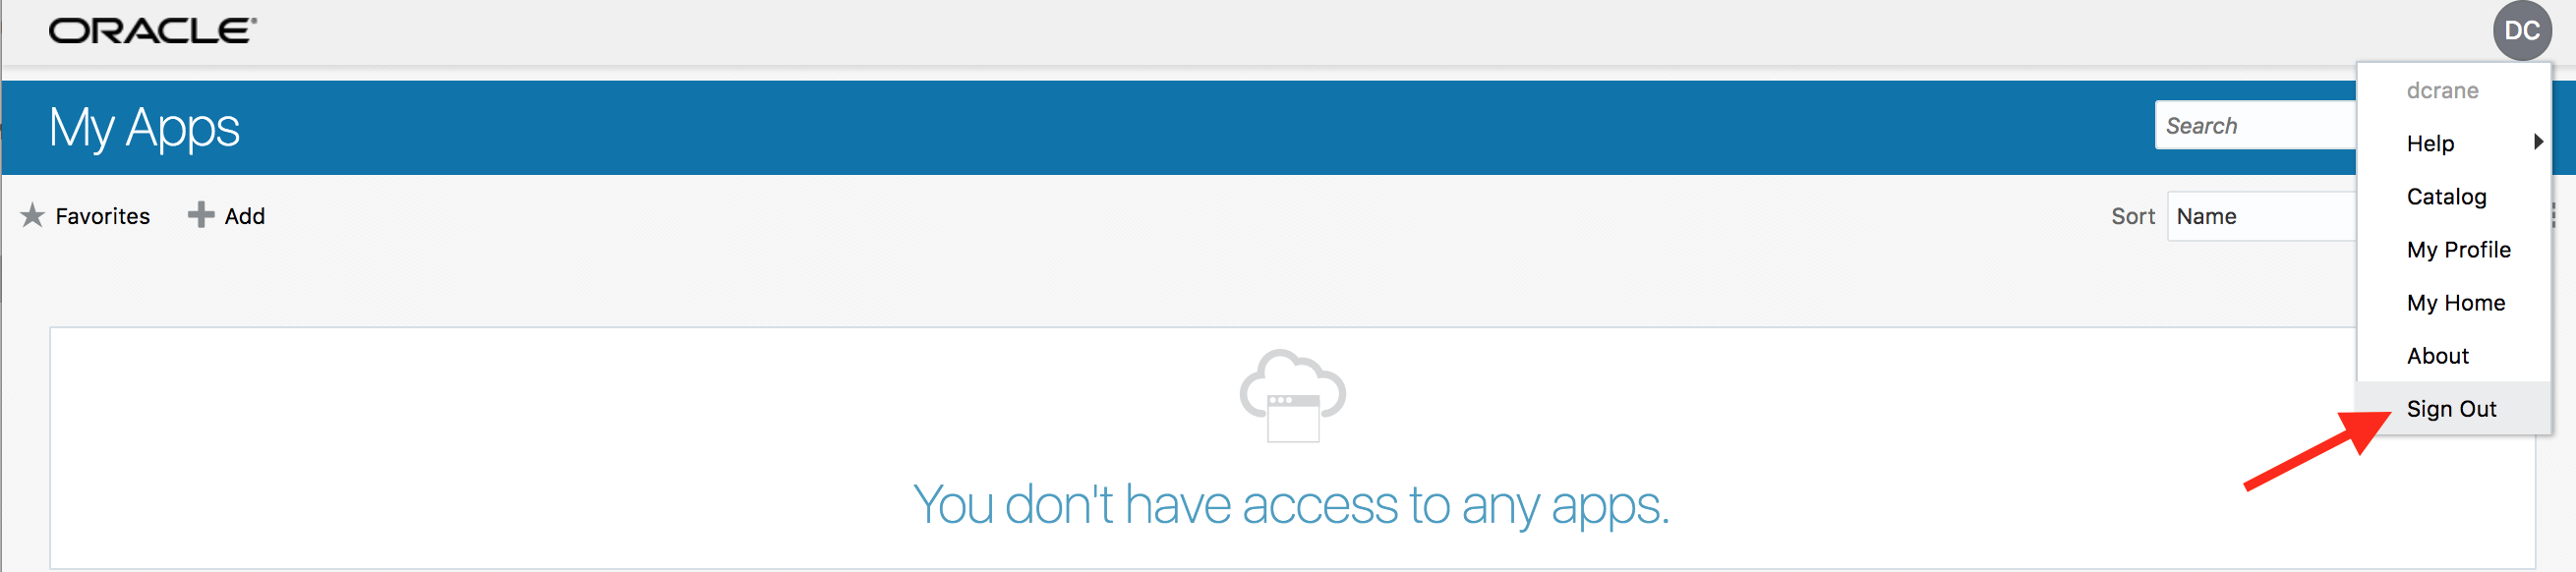
- Ensure that you are challenged by 2-Factor authentication and have received a new email containing a new 6-digit one time code.
- Provide the new 6-digit code on the challenge screen for verification.
- On successful verification, ensure that you are logged in to the My Apps page.
Integration with Oracle Cloud Services
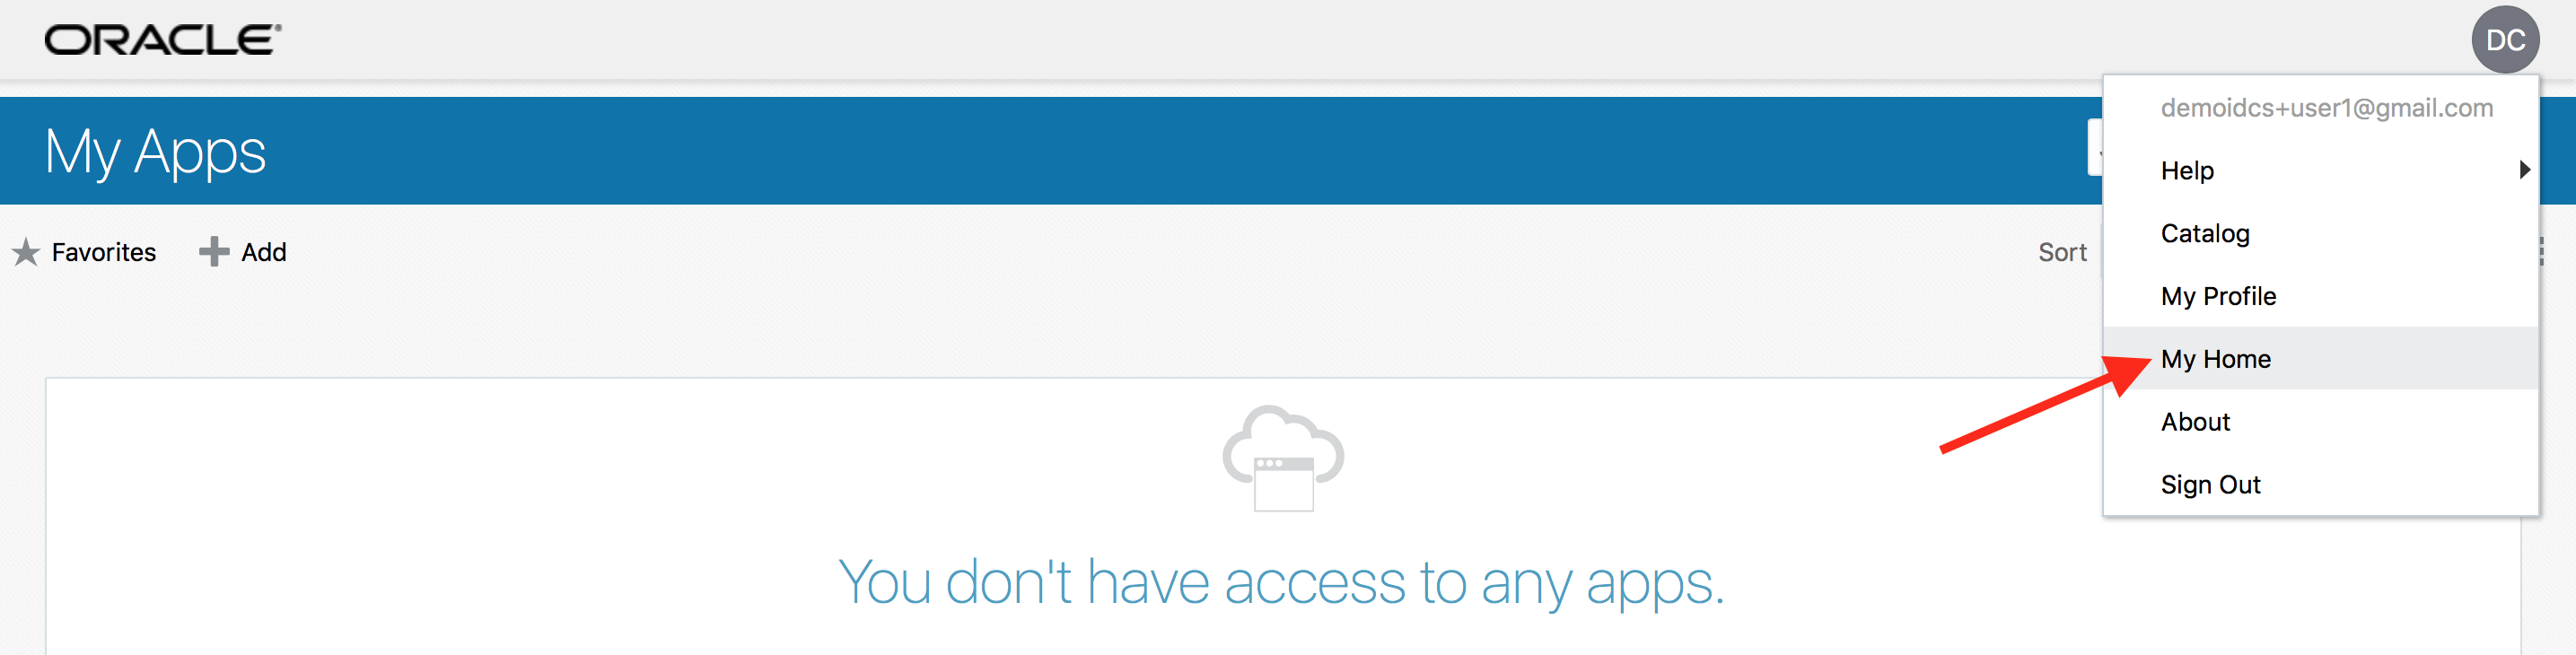
- From the drop-down associated with the displayed logged-in user in the upper right hand corner of IDCS My Apps page, choose My Home to come back to the cloud home page.
- Display the sidebar by clicking on the hamburger menu in the upper left hand corner. Then expand Services to display available Oracle cloud services.
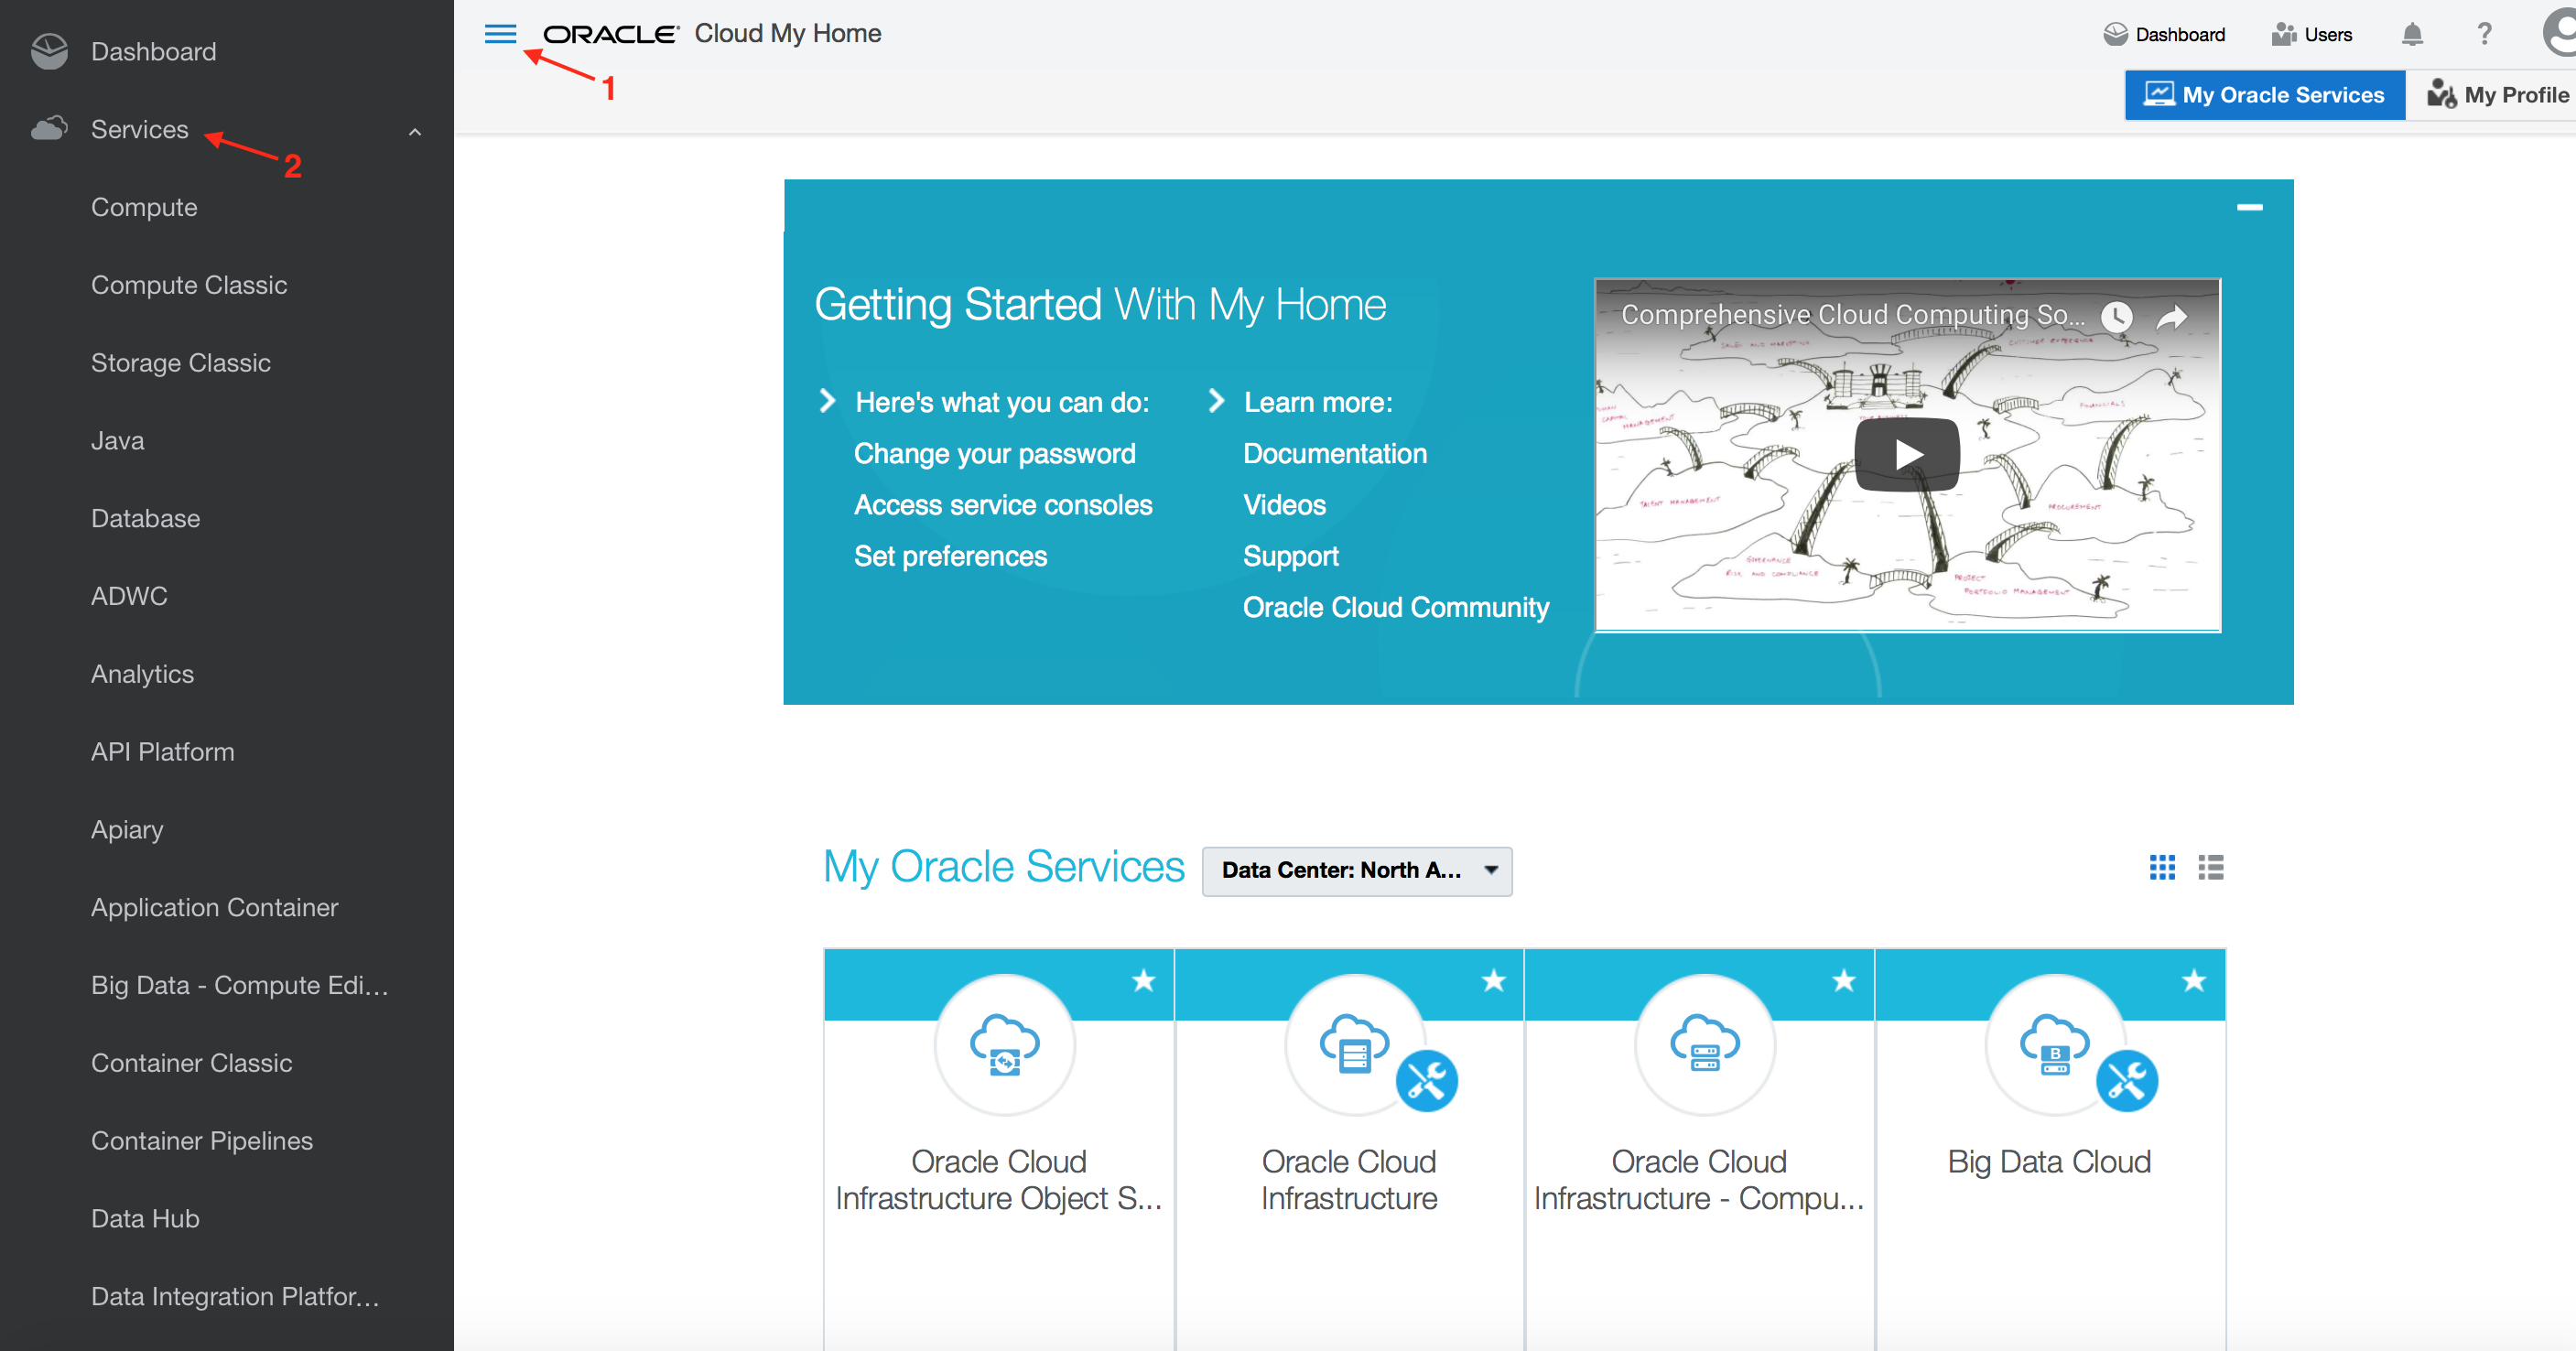
- Click on the service Compute which is Oracle’s IAAS service (Infrastructure-As-A-Service)
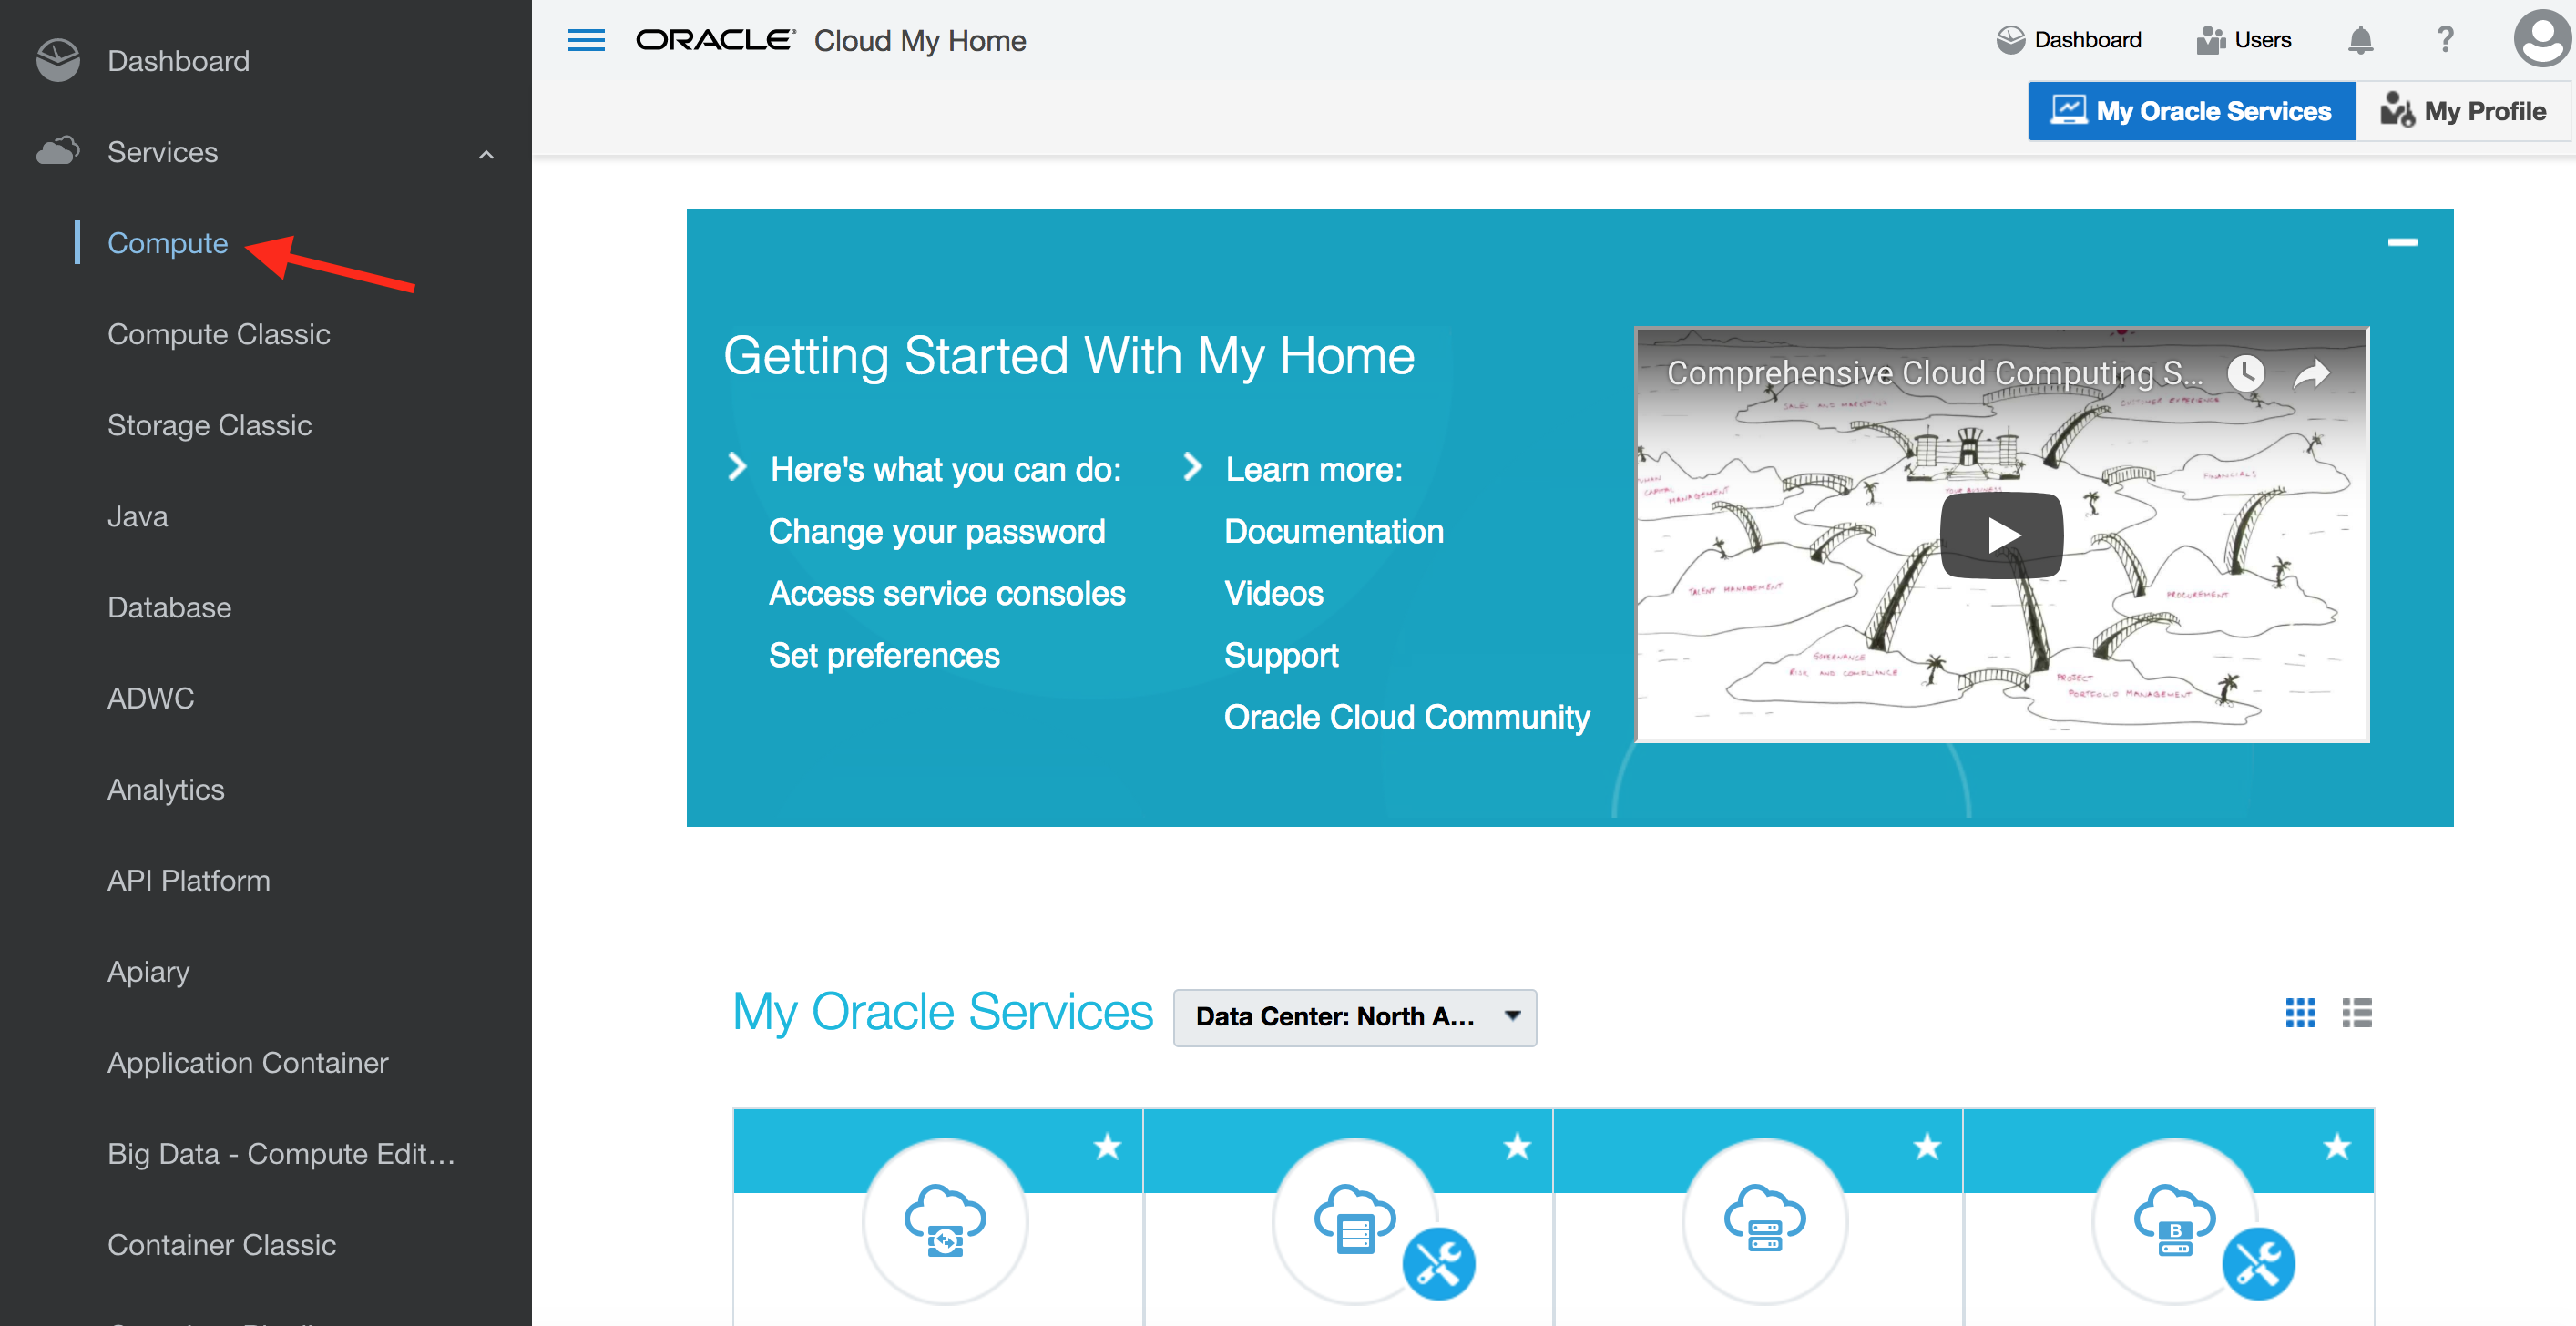
- Observe that the logged in user has successfully single signed-on to Oracle’s IAAS service console.
-
Explore various tabs on the IAAS service console.
-
Congratulations, you completed the IDCS overview hands-on lab.
(Optional) IDCS - advanced
Onboard Users - (Persona: Administrator)
IDCS supports user (also groups) on-boarding from on-premise Active Directory, using file upload, REST API, on-premise Oracle Identity Management solution, or manually from IDCS admin console.
For the exercise we will be using file upload option for users.
STEP 0: Obtain upload CSV file
- Download the CSV file for users from here. Right-click on the link and save the file in your system. Inspect the content of the file from your favorite editor.
STEP 1: Navigate to IDCS User Management
-
From any browser, go to the URL: https://cloud.oracle.com
-
click Sign In in the upper right hand corner of the browser
- Ensure Cloud Account with Identity Cloud Service is selected. Enter your cloud account name. Click on My Services
- On the login page, enter your user name and password and click Sign In
- You will be redirected to the landing page dashboard.
- From the cloud My Services dashboard, click on Users in the upper right hand corner.
- Then click on Identity Console button located towards upper right hand corner again.
- The user management interface is shown up in IDCS admin console.
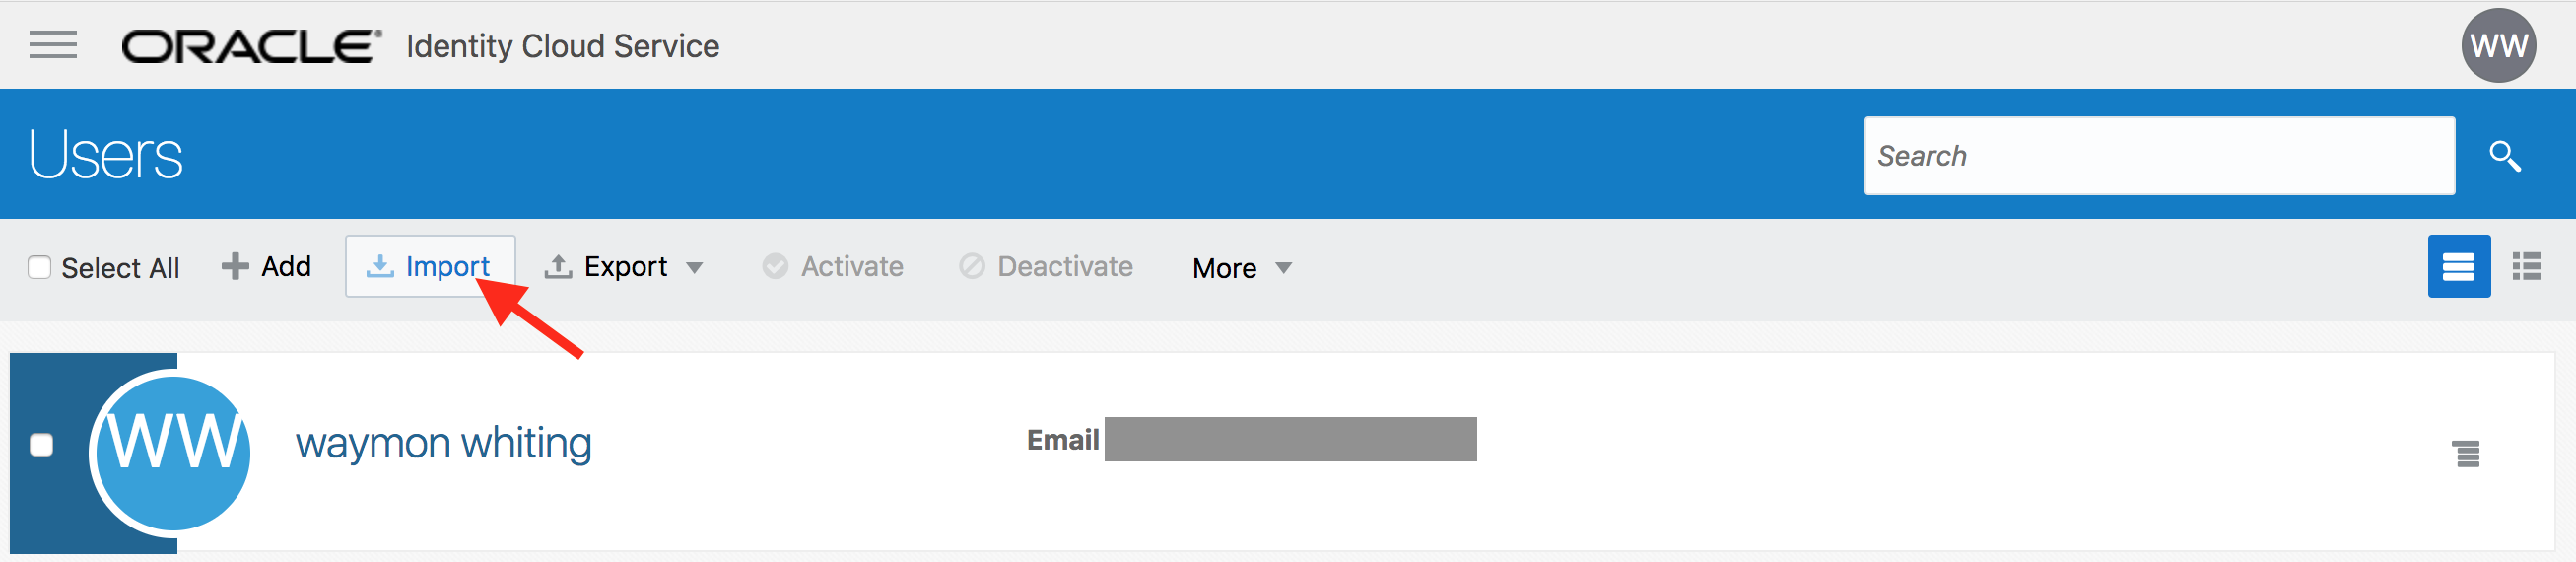
STEP 2: Import users in IDCS
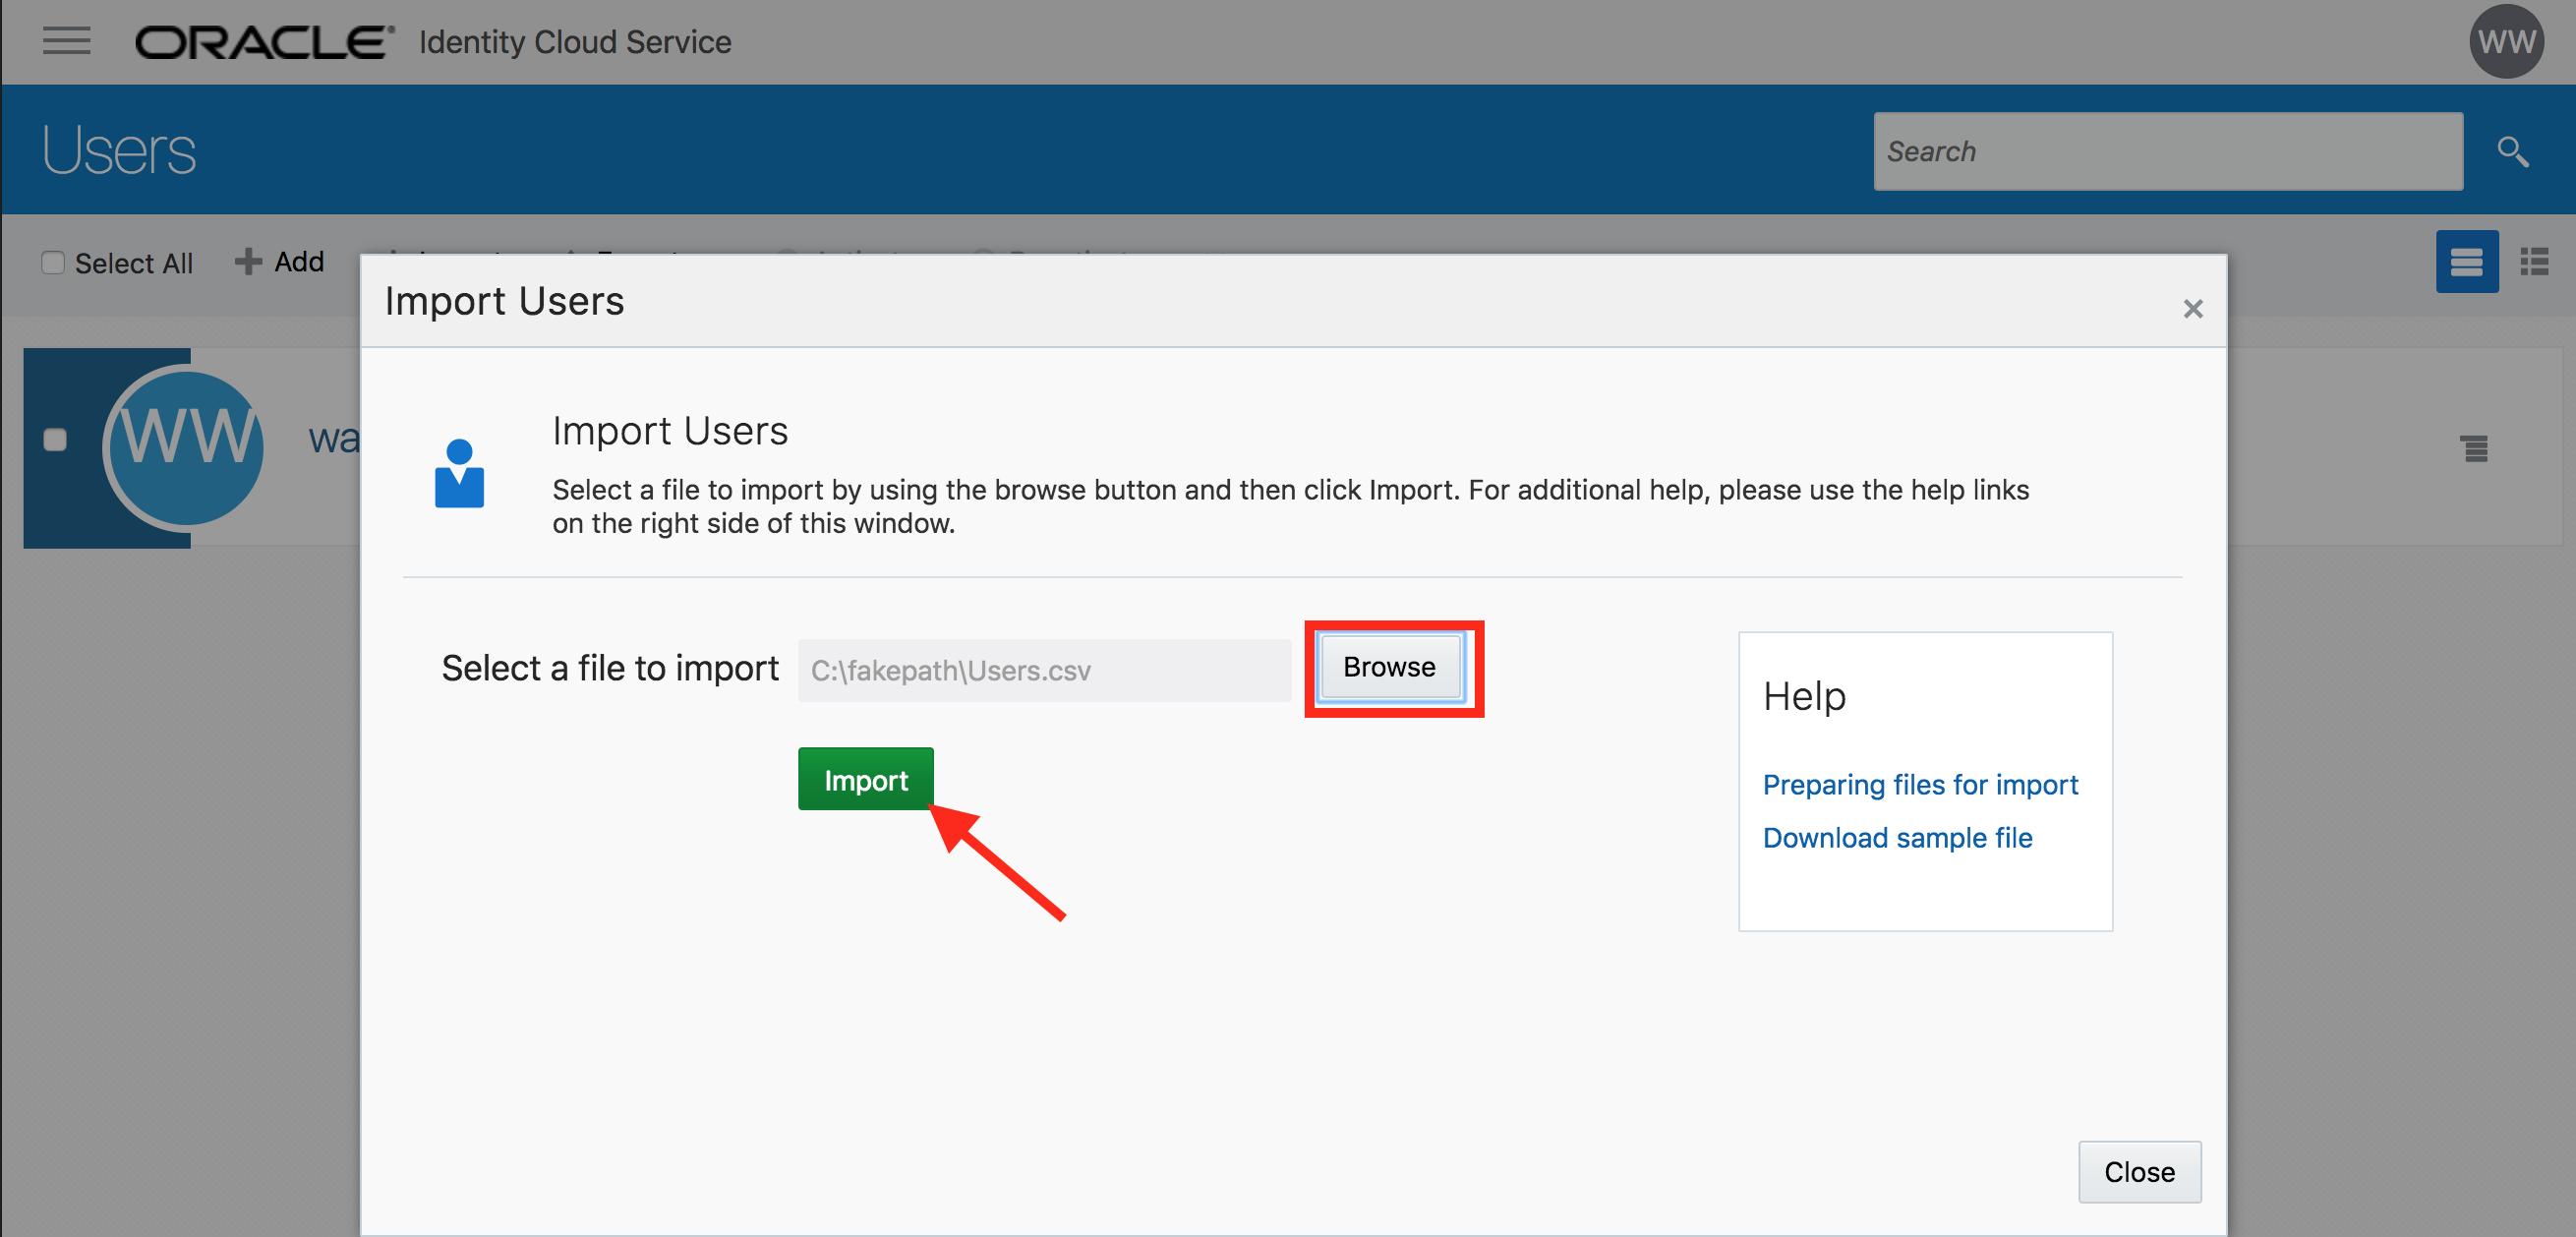
- On the Users page, click on the Import button.
- Select the CSV file that you saved locally. Click on Import
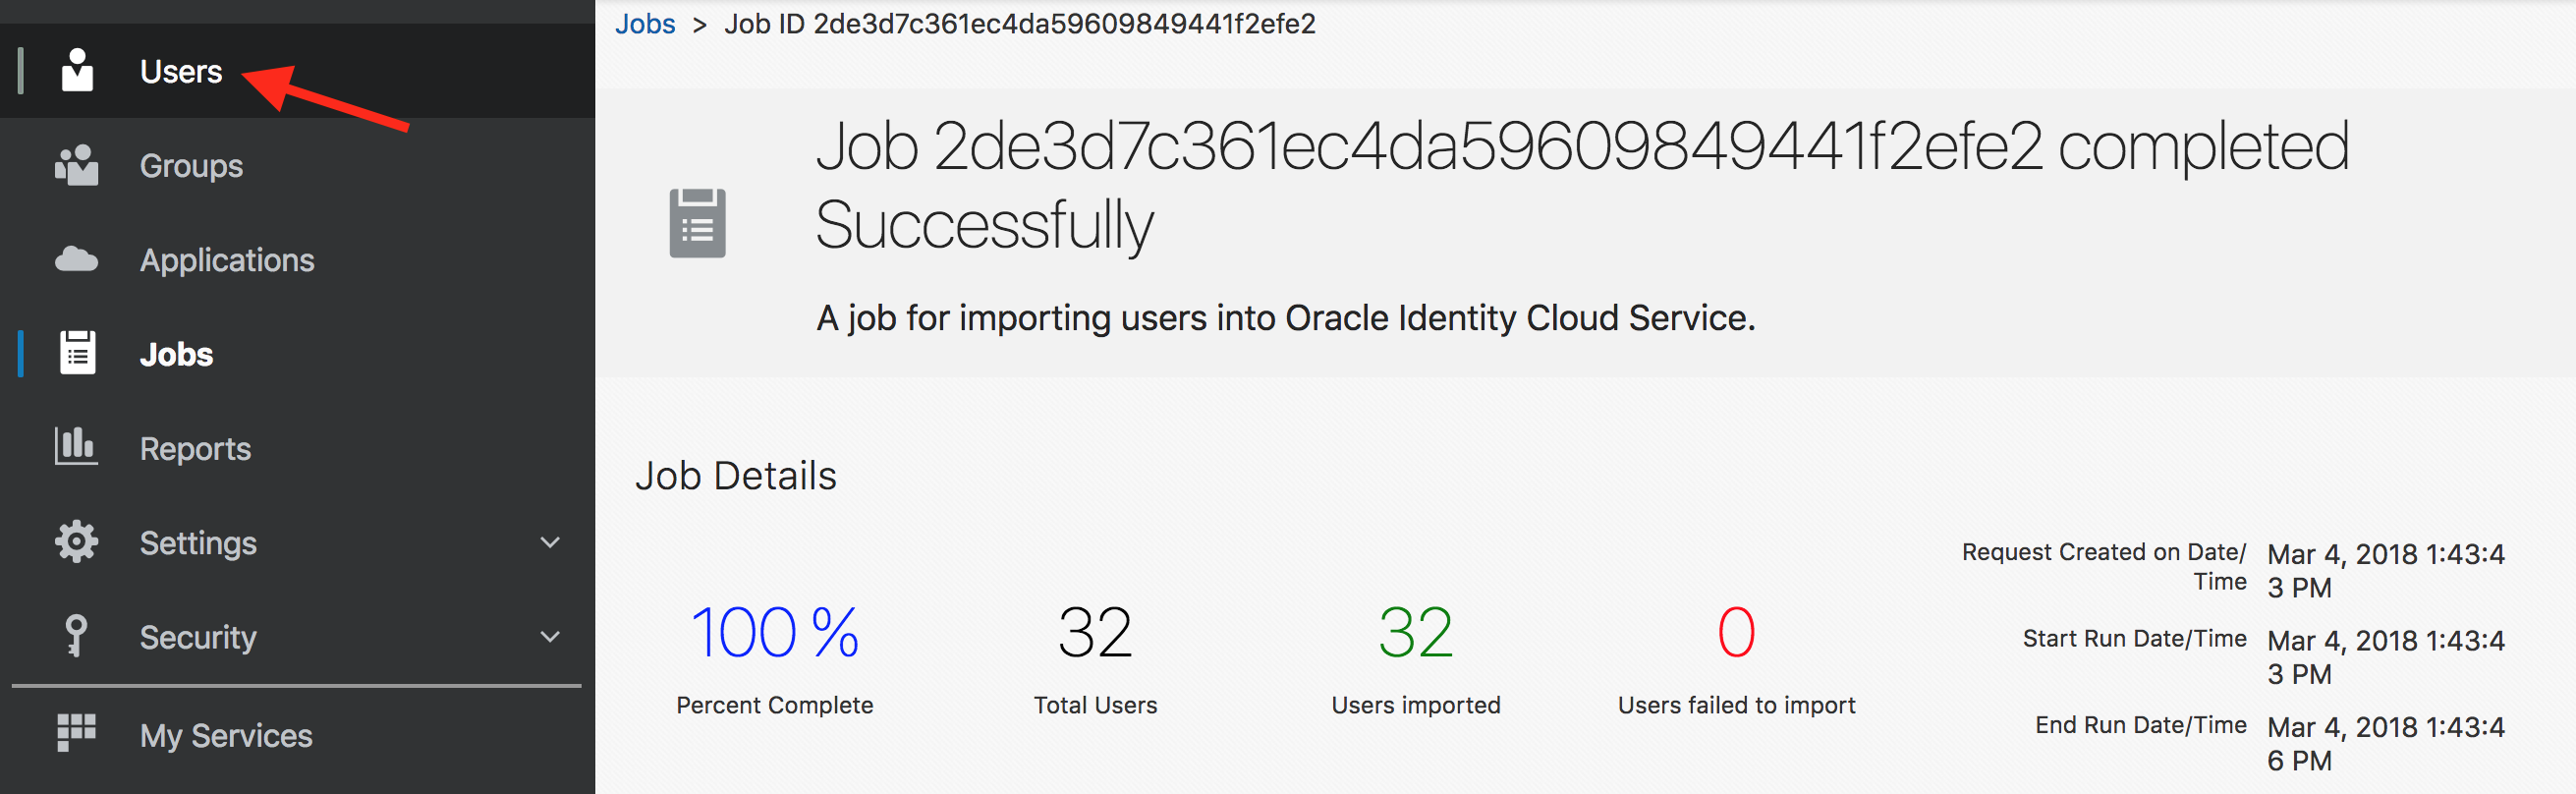
- Go to the Jobs tab in admin console. Verify that the import Job finished successfully. Click on View Details button.
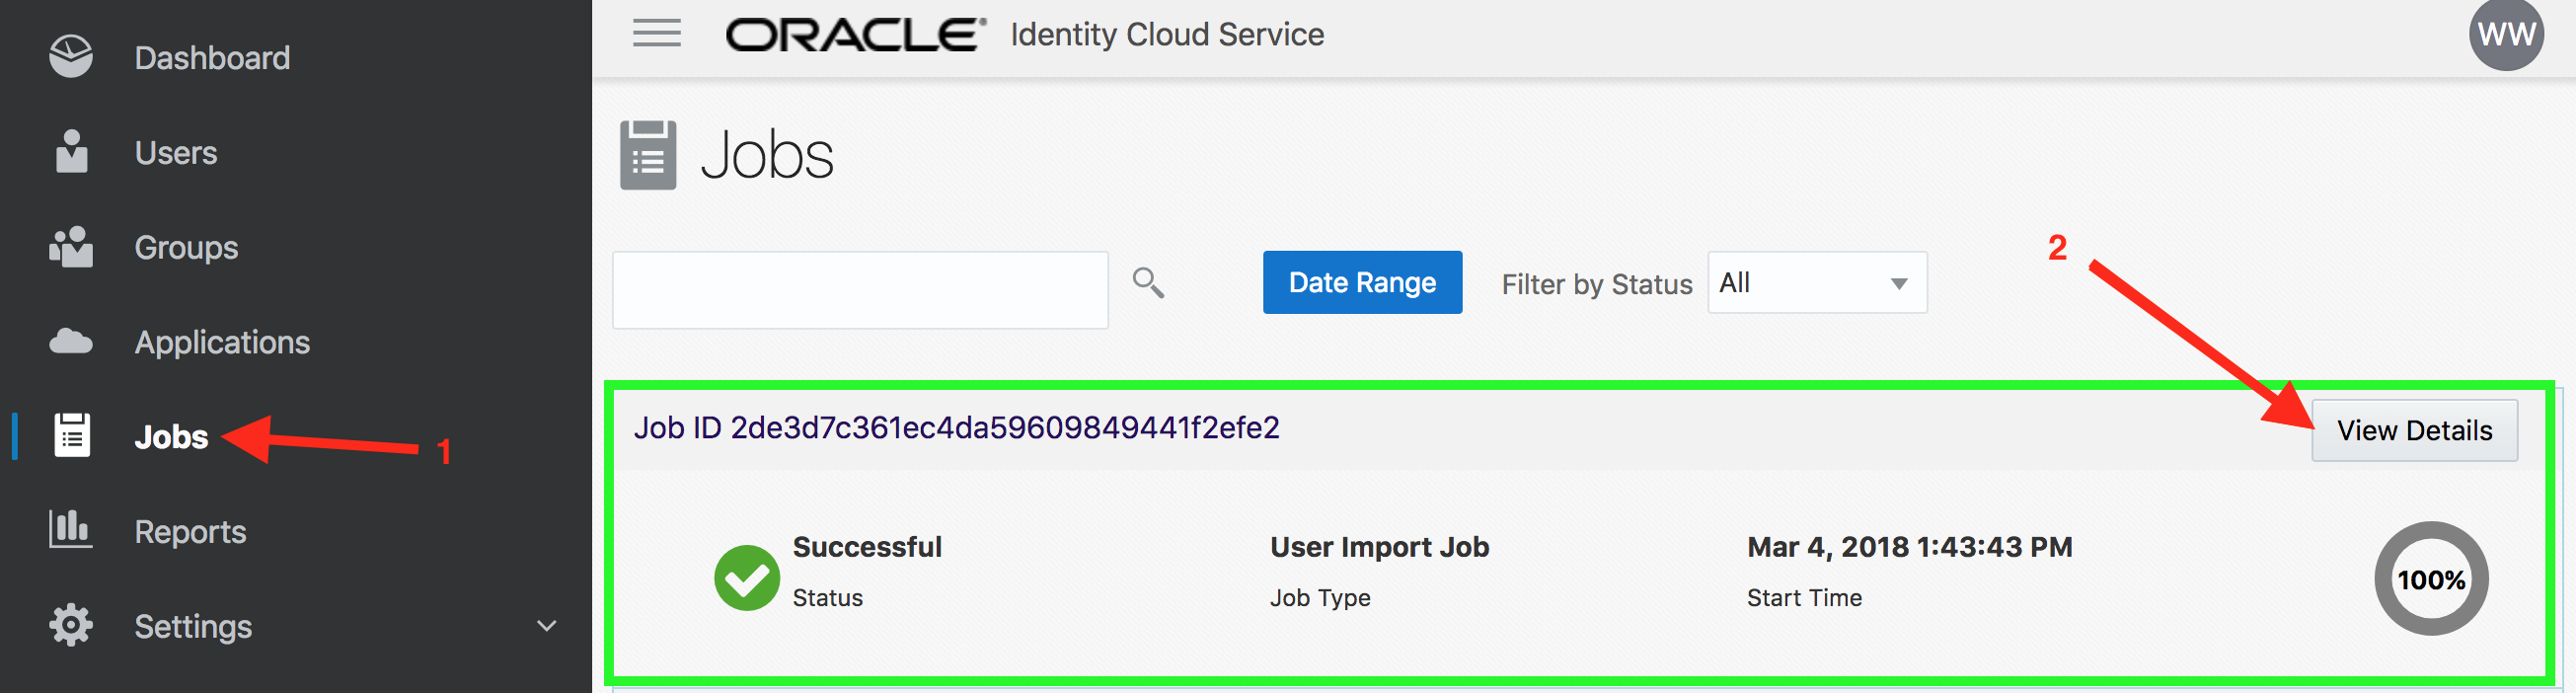
- This will show the detailed information on the Import job. Inspect the details.

- Congratulations, you successfully imported users into IDCS.
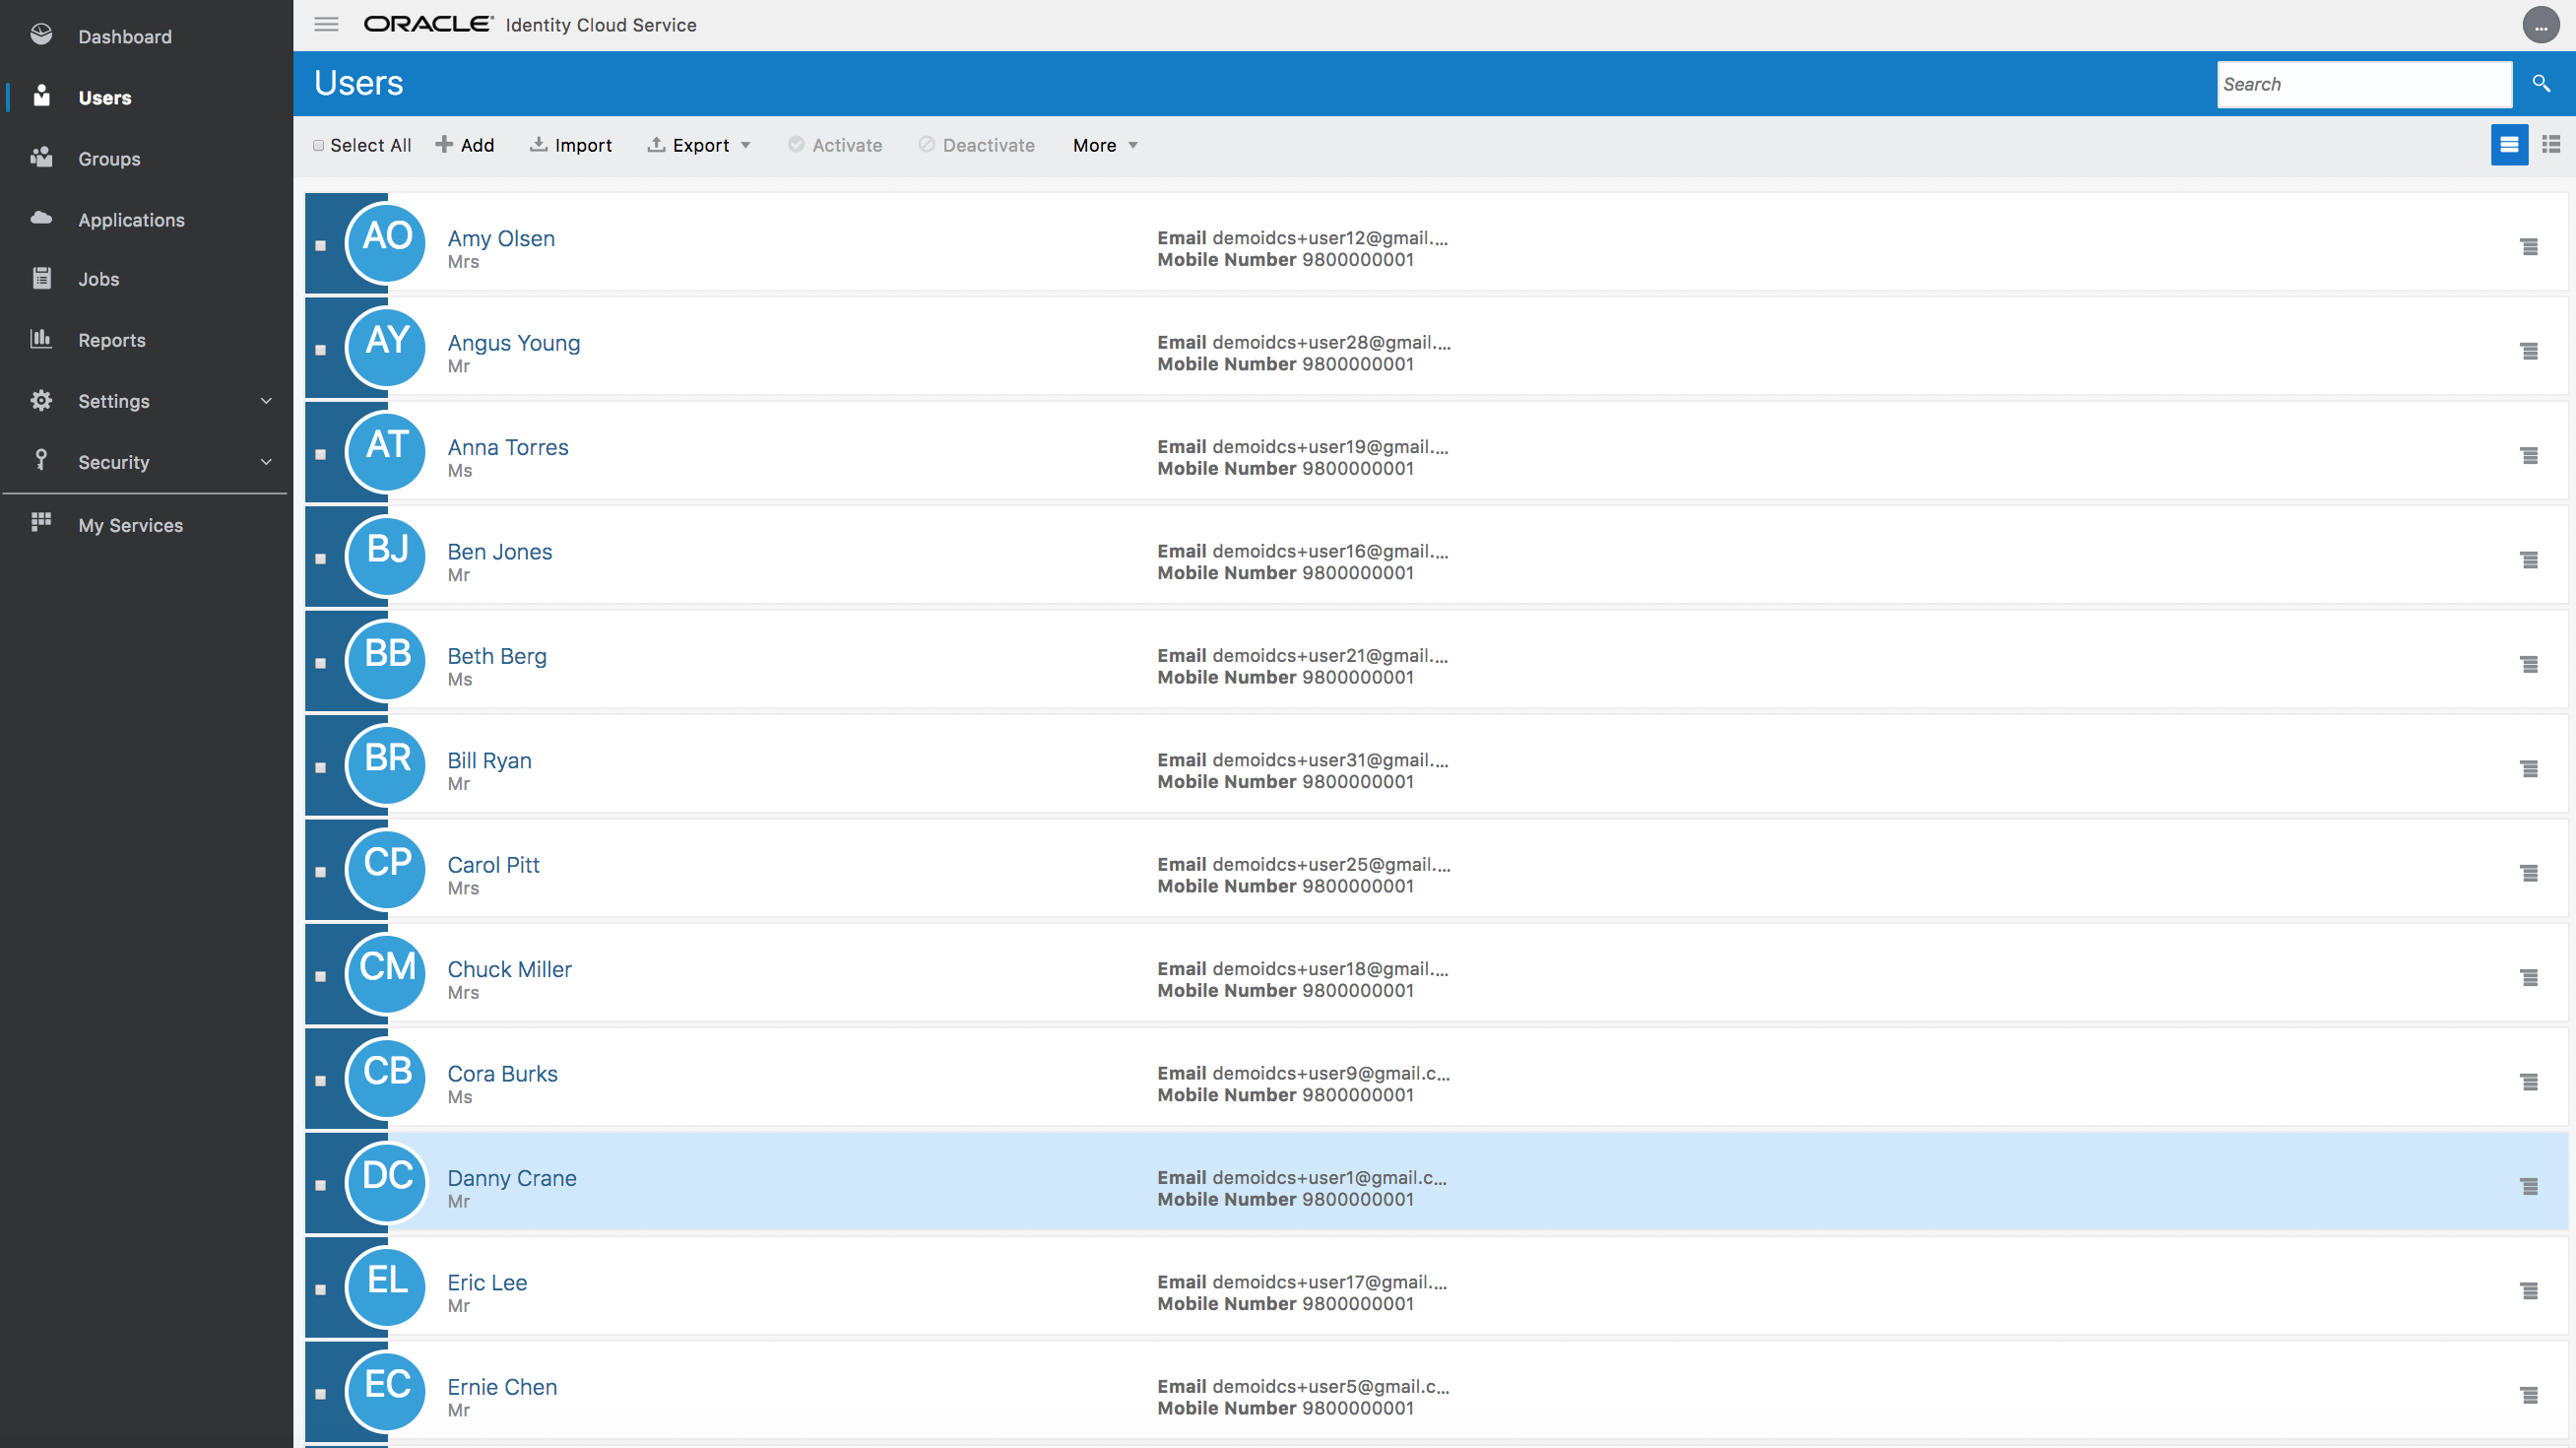
STEP 3: Verify user creation
- Go to the Users menu in admin console. Verify that the new users are visible on the console.
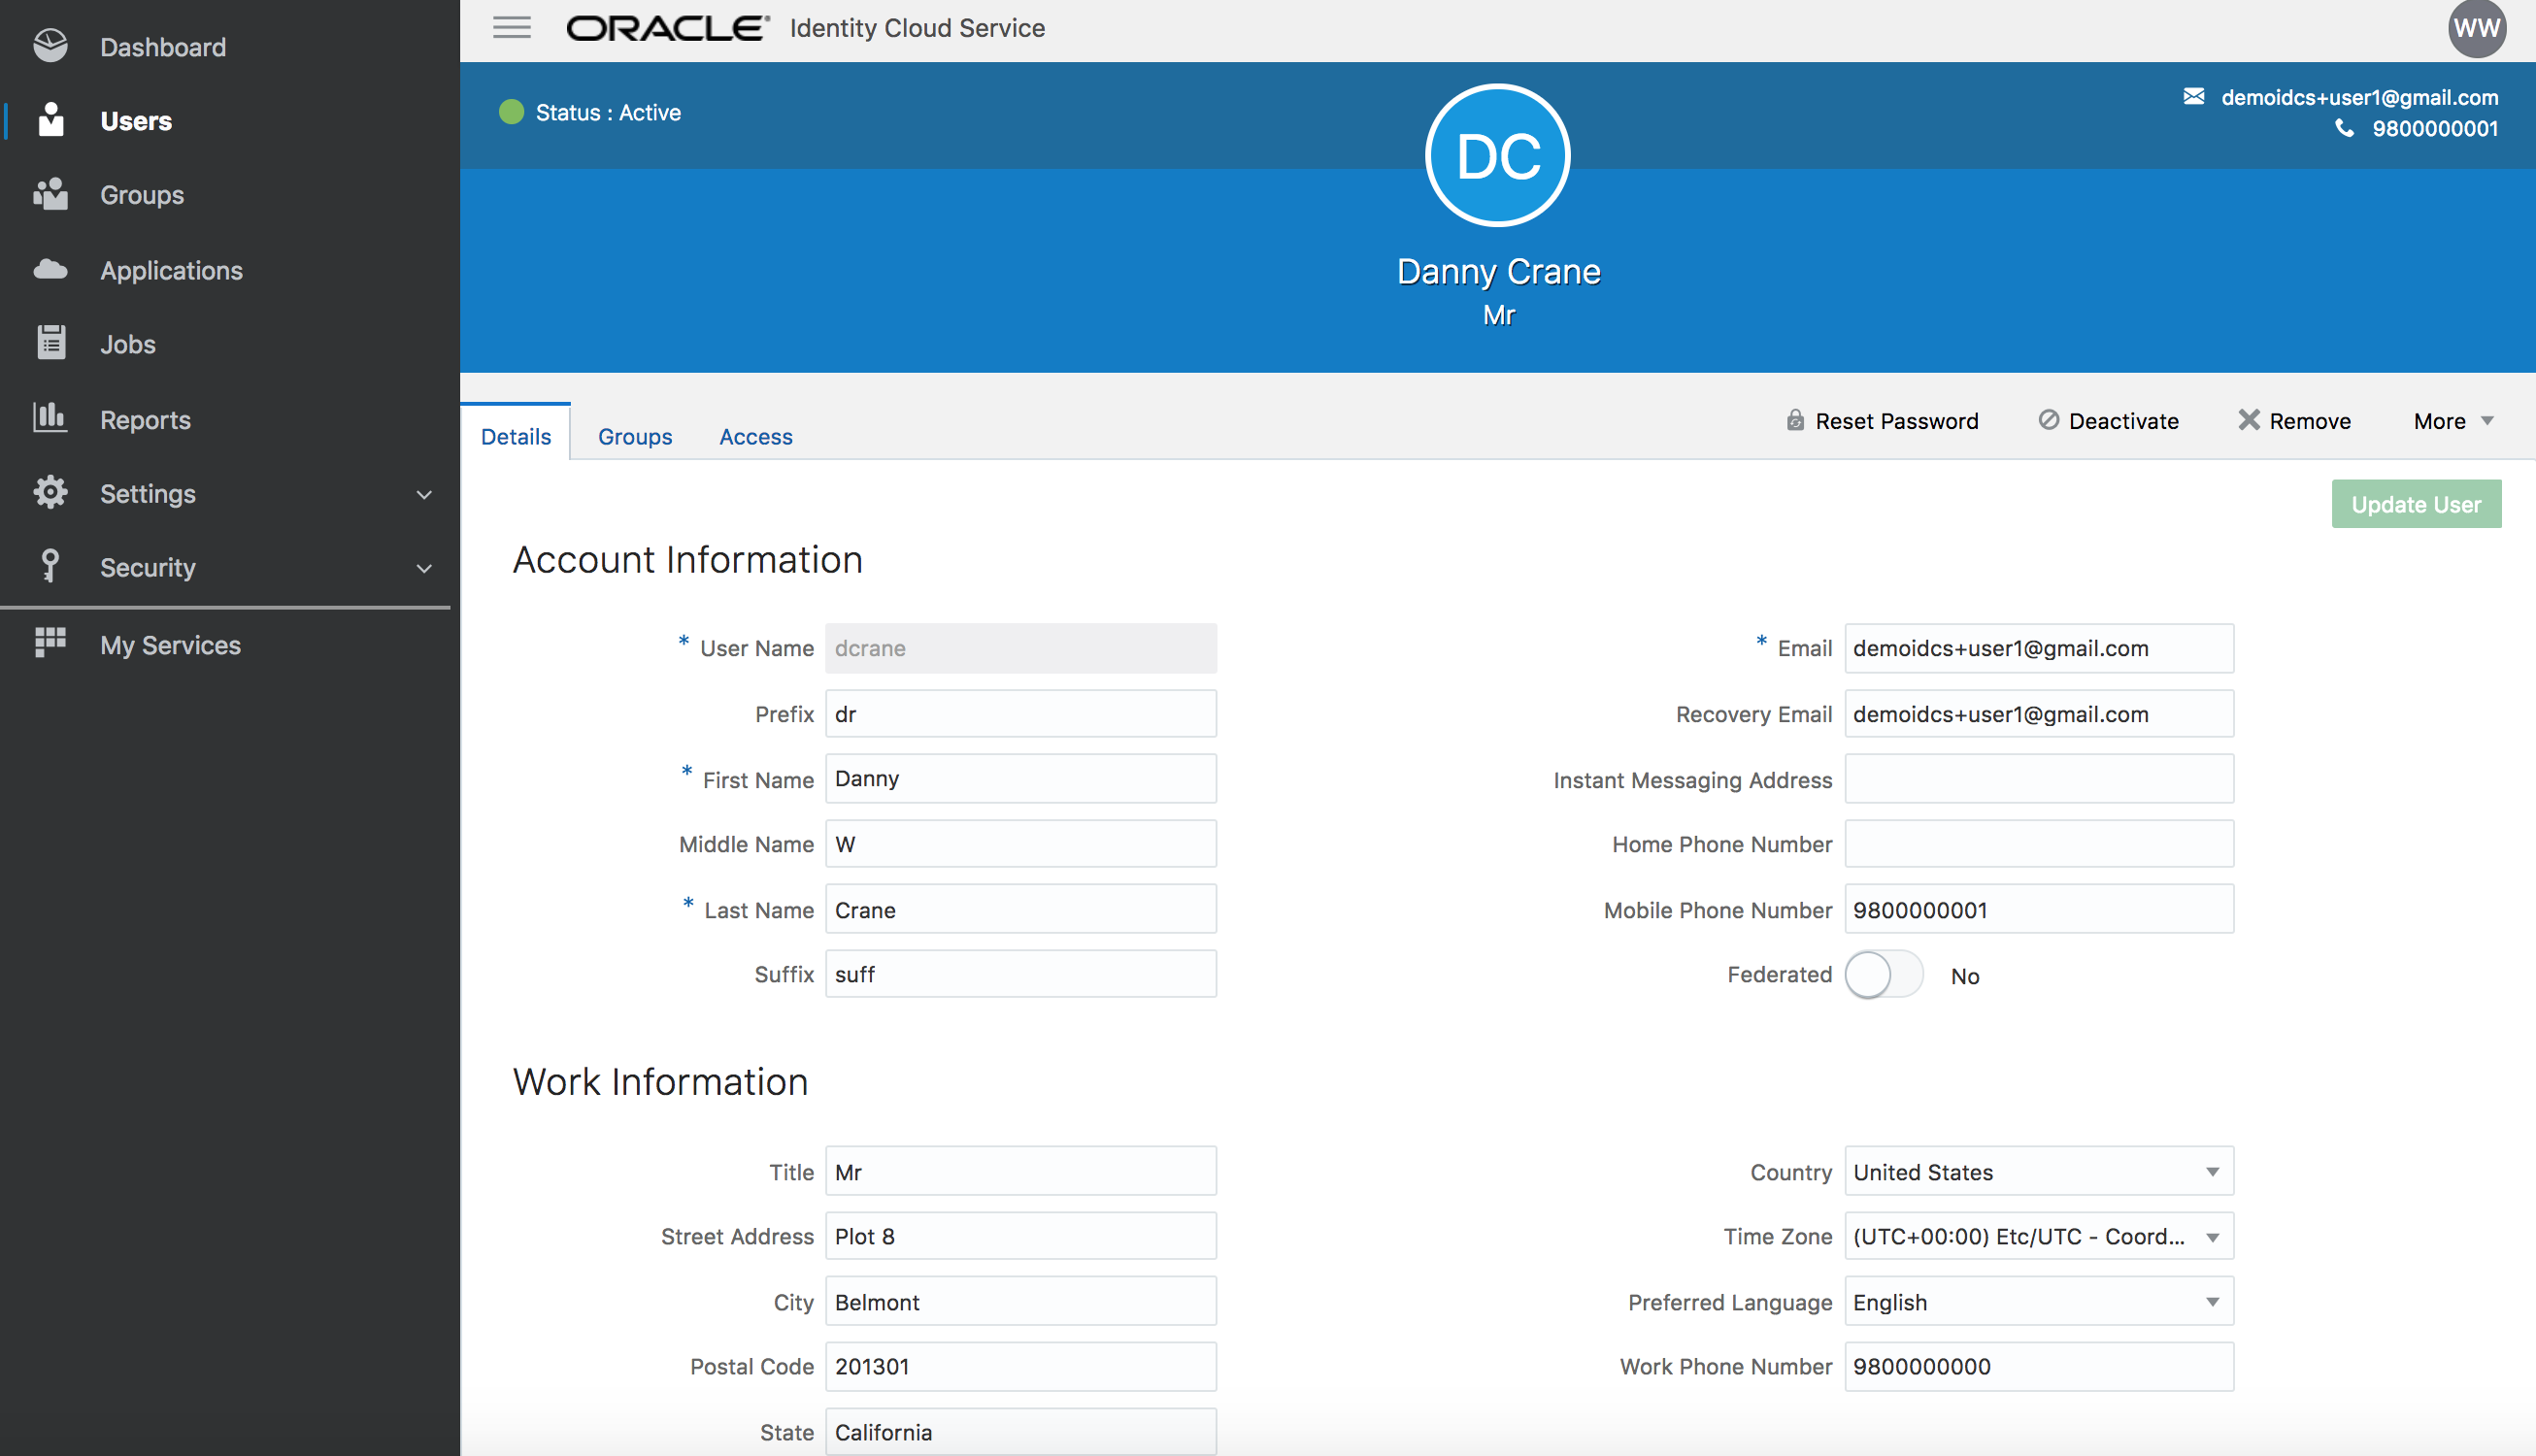
-
Click on your target end-user and verify user’s detailed attribute information.
User assignments will be provided during the session.
Configure SSO for an app - (Persona: Administrator)
Oracle Identity Cloud Service(IDCS) provides integration with any service that can be integrated via SAML (Security Access Markup Language) protocol. Administrations will be able to manage users into various applications via single control panel and end users will be able to get to applications via single click.
IDCS provides support for standard SAML 2.0 browser POST login & logout profiles.
In this hands-on exercise, we will setup integration with Salesforce using SAML. IDCS will act as IdP (Identity Provider) and Salesforce org as SP (Service Provider also known as a Relying Party)
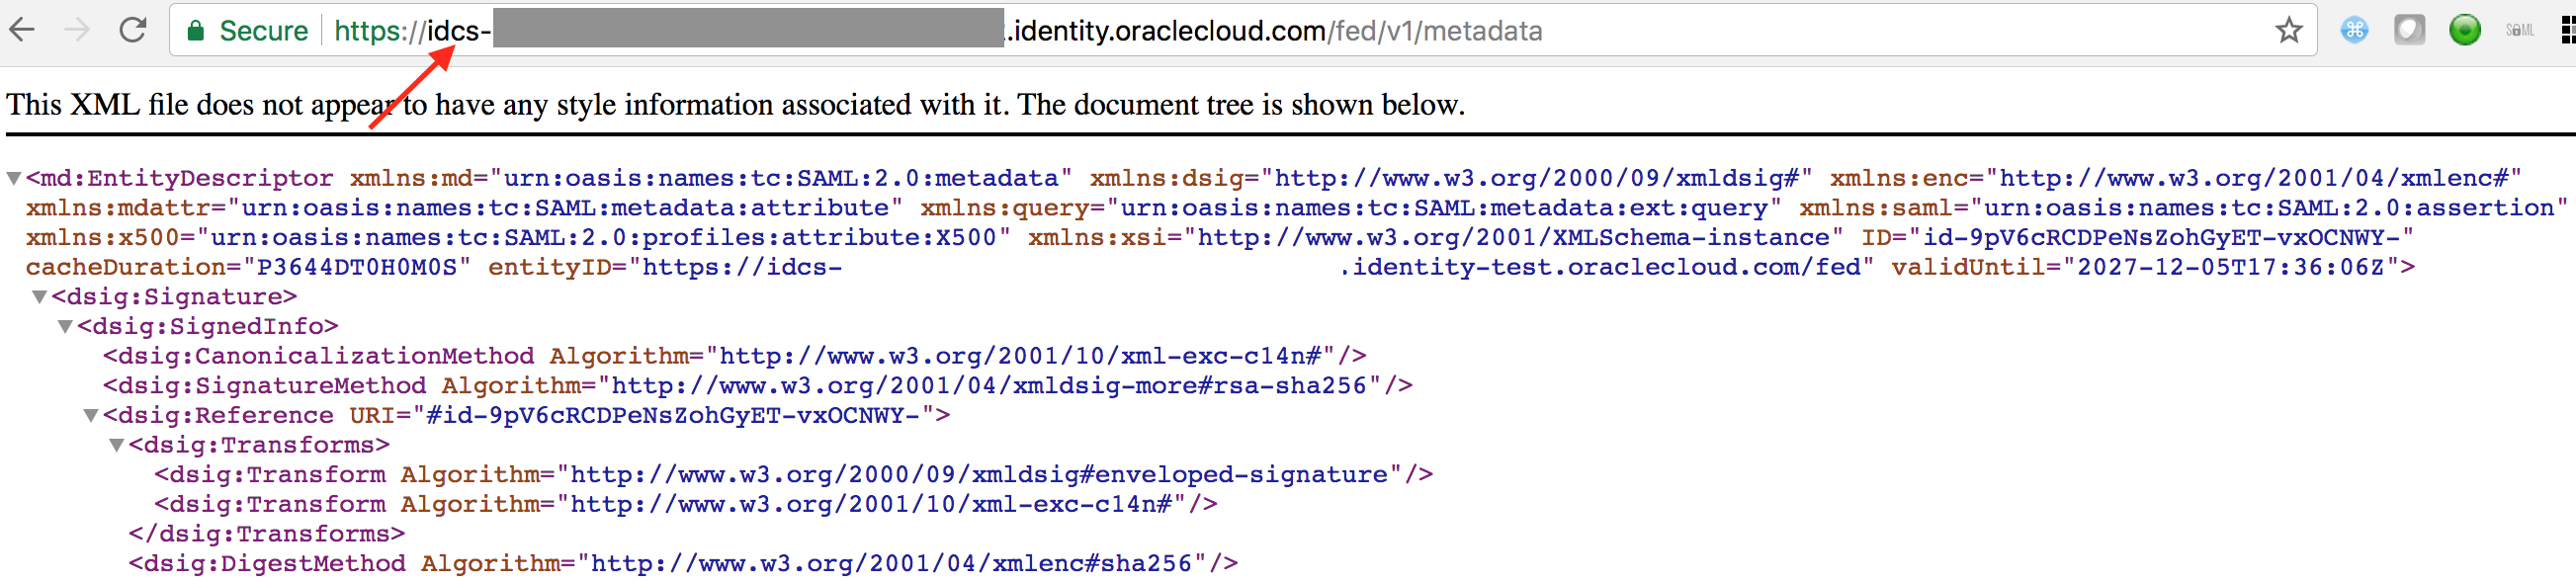
- Download and save IDCS Metadata to a local XML file for your instance. Metadata is available from the following location-
https://idcs-xxxxxx.identity.oraclecloud.com/fed/v1/metadata
where idcs-xxxxxx is your IDCS tenant name that you can grab from the browser URL of your IDCS console. Copy-paste the constructed URL on a new browser tab and save the XML file locally.
Following activities on Salesforce is optional. Email the metadata XML to your proctor.
-
Login to the Salesforce developer account
Credentials will be provided during session.
-
Bring up the setup page.
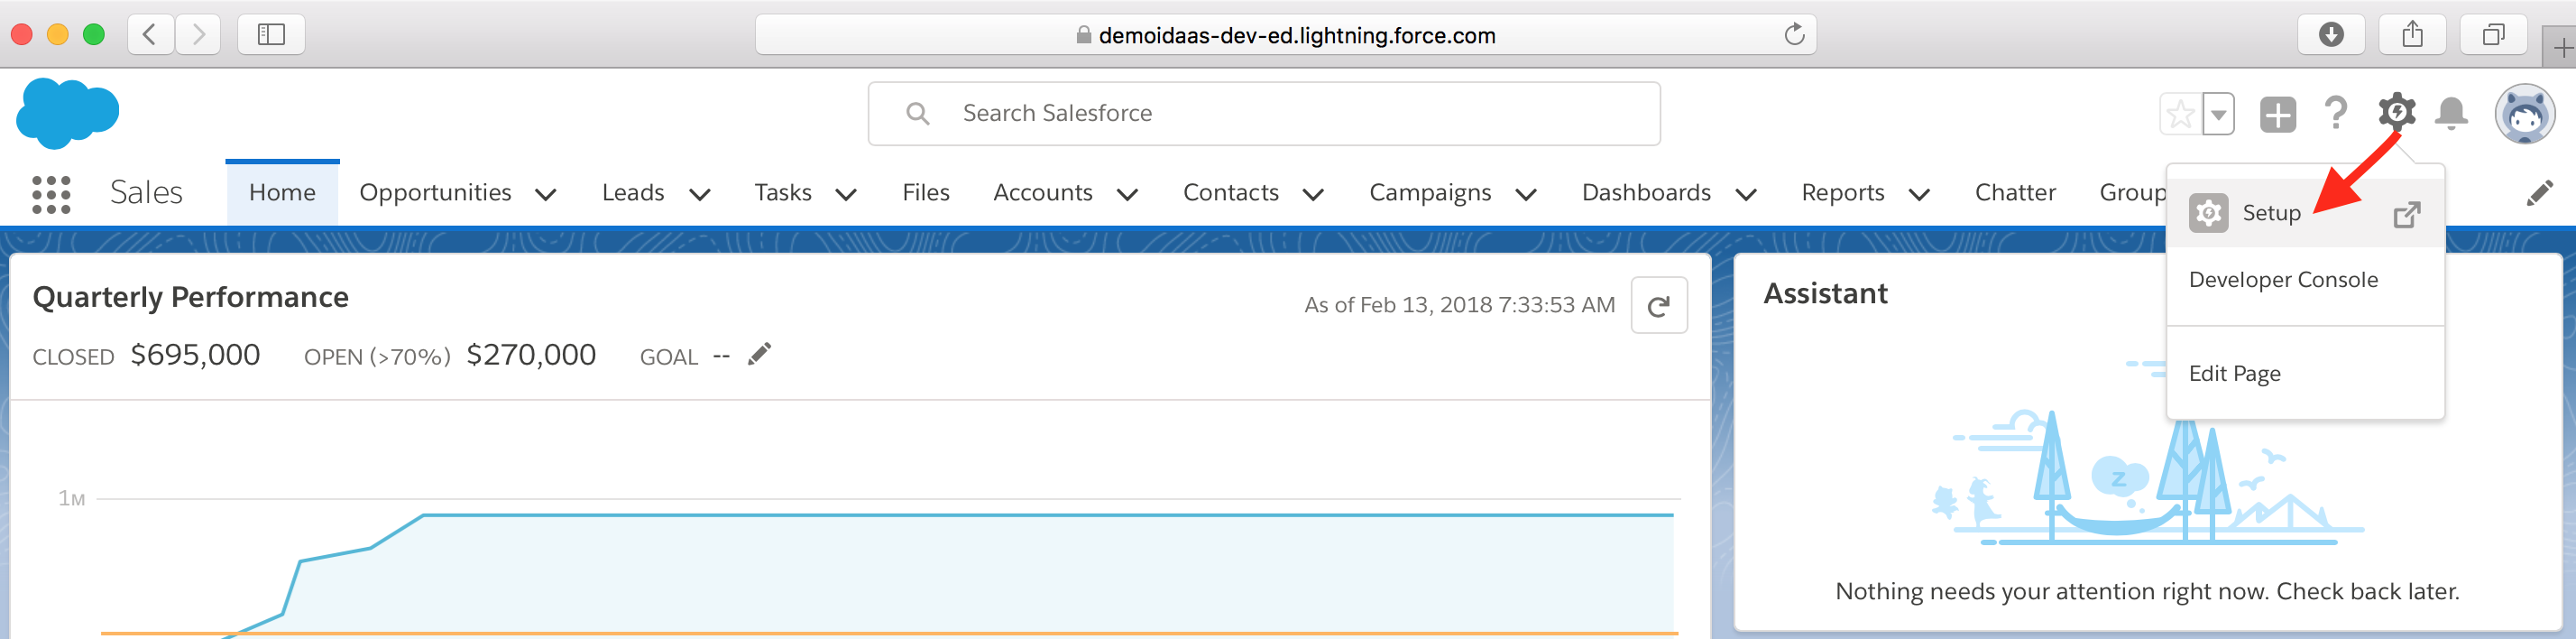
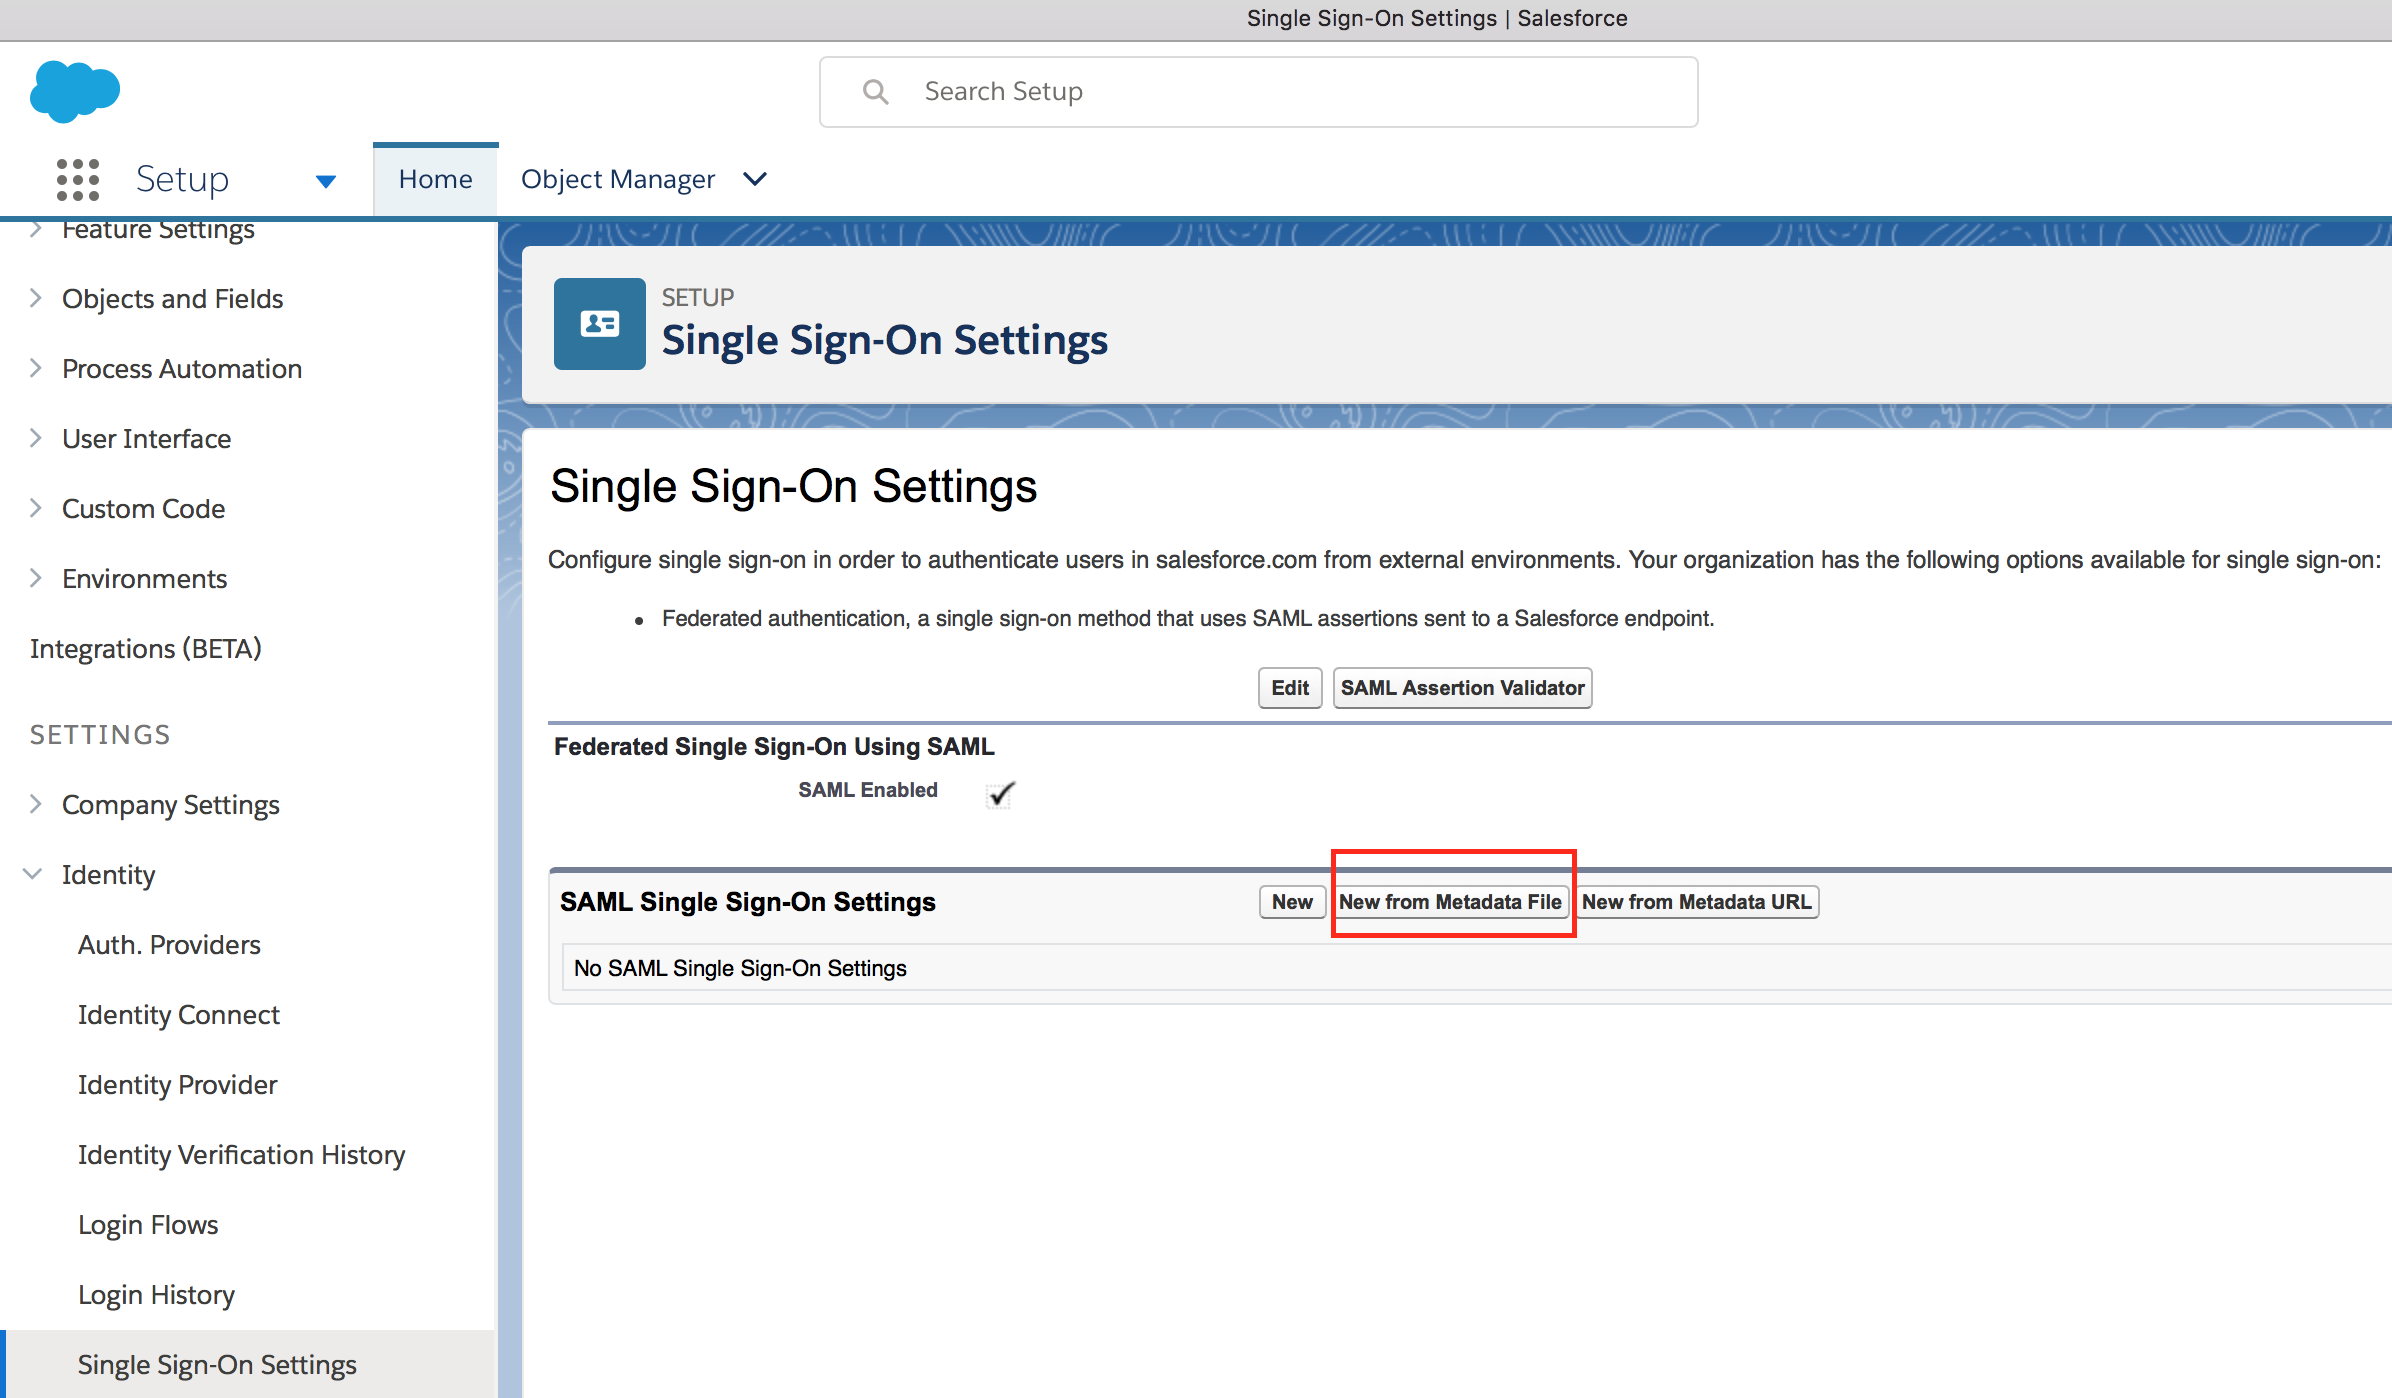
- From side menu bar, go to Settings -> Identity -> Single Sign-On Settings
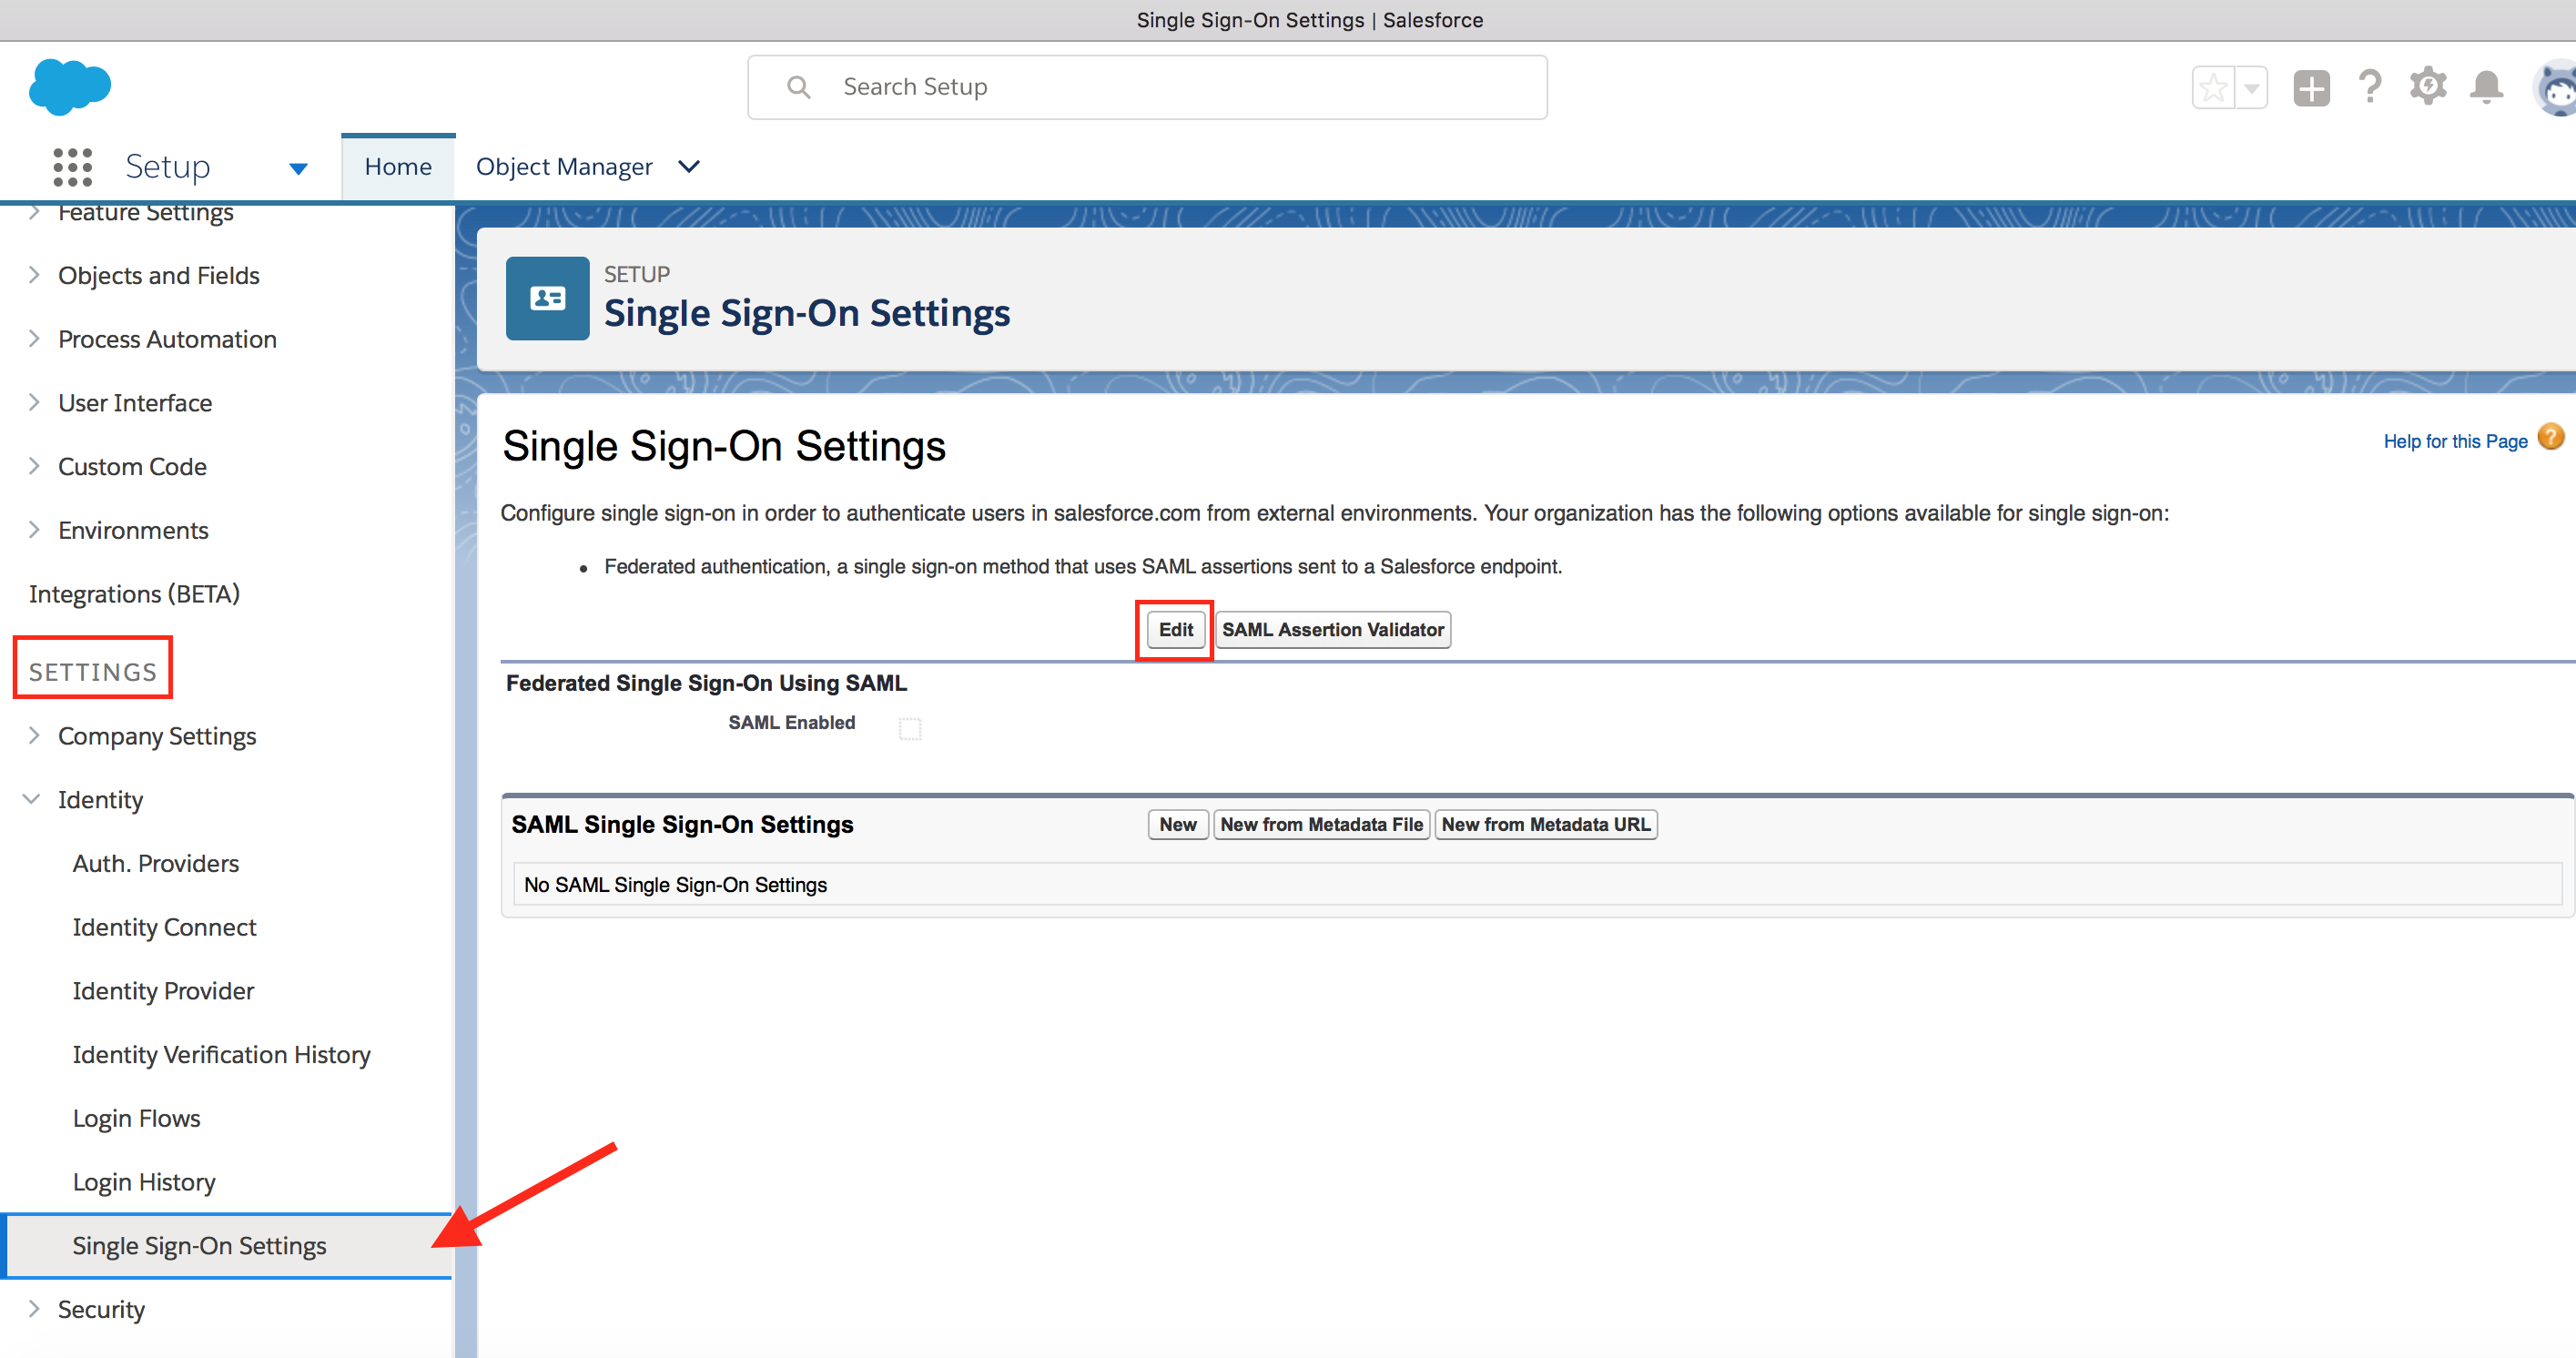
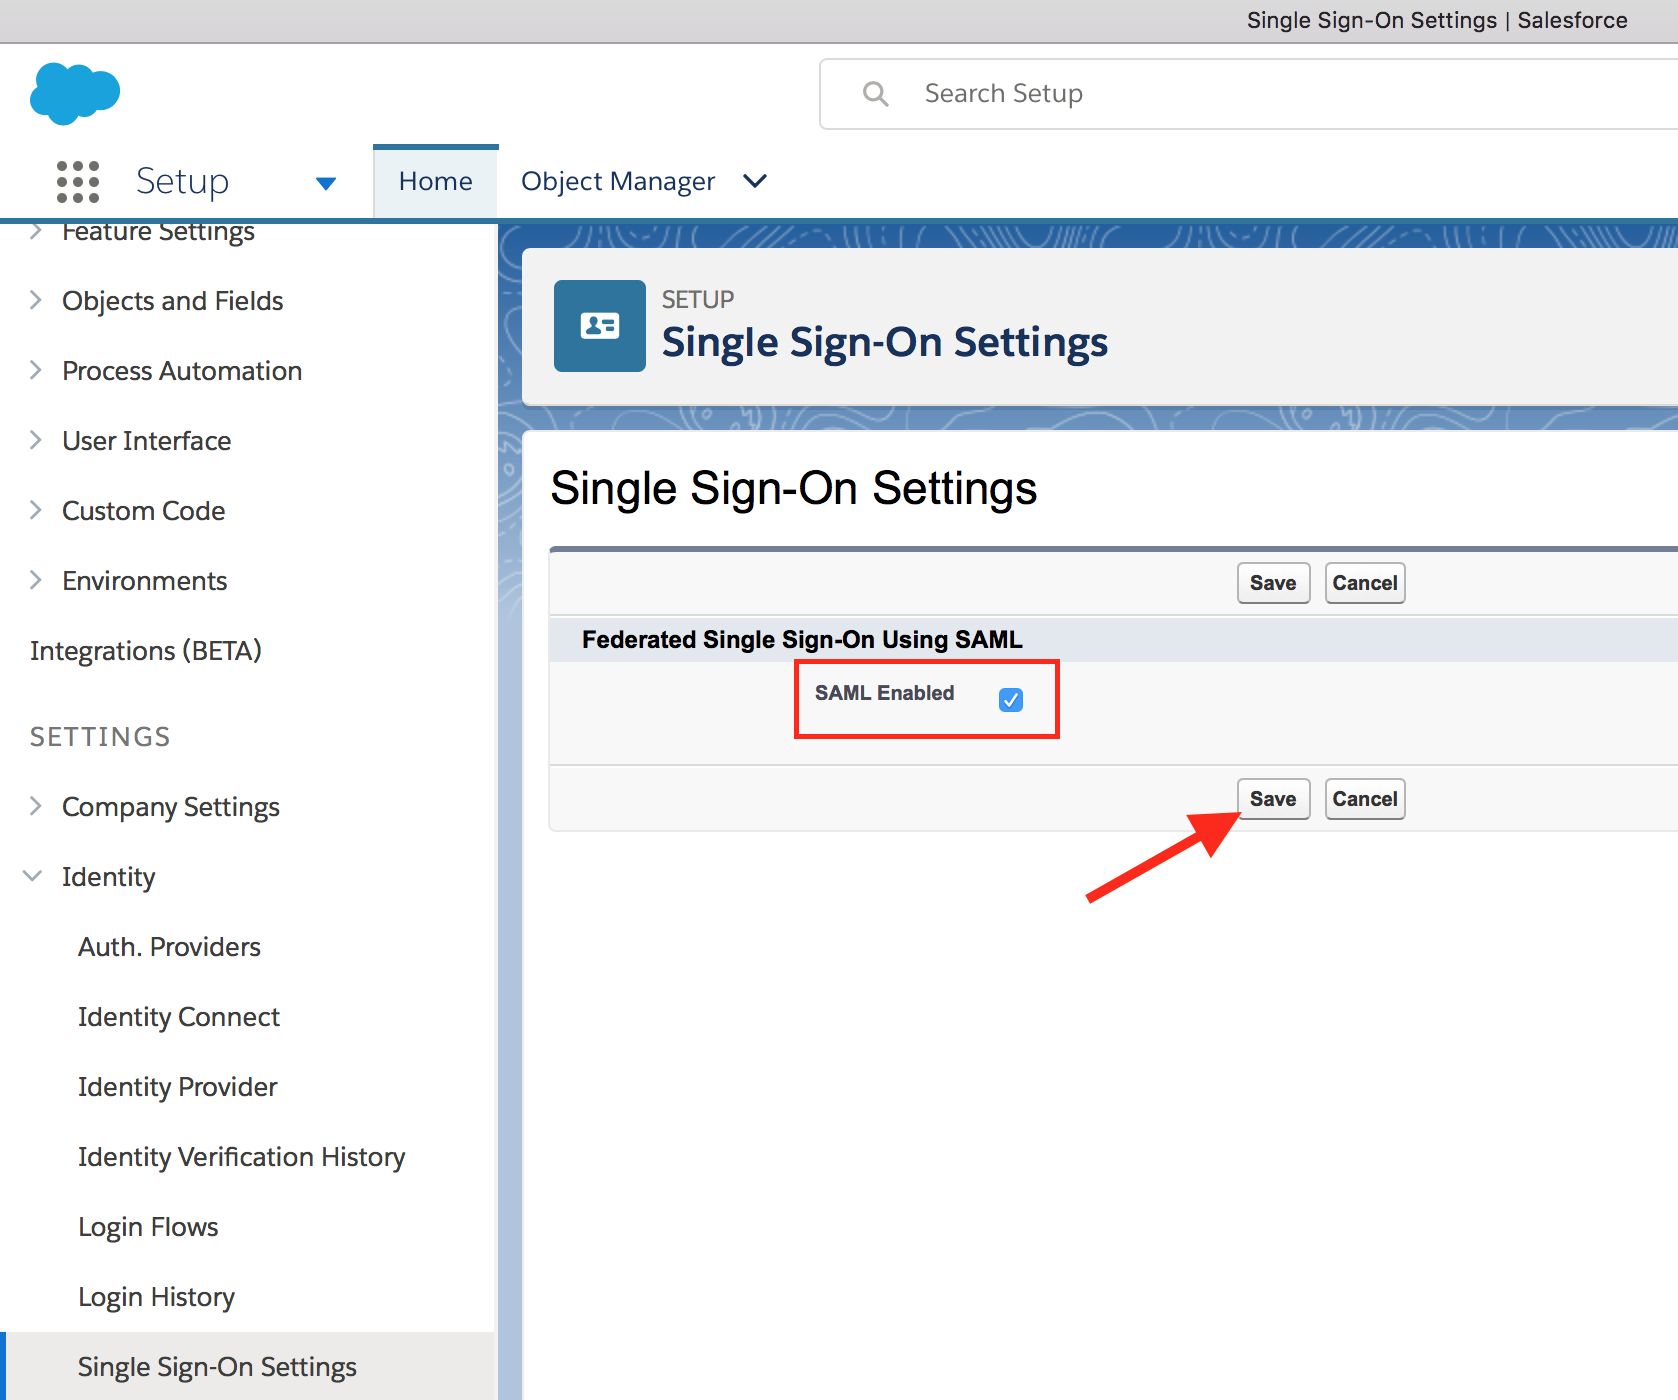
- Click on Edit and enable Federated Single Sign-On Using SAML option. Click on Save.
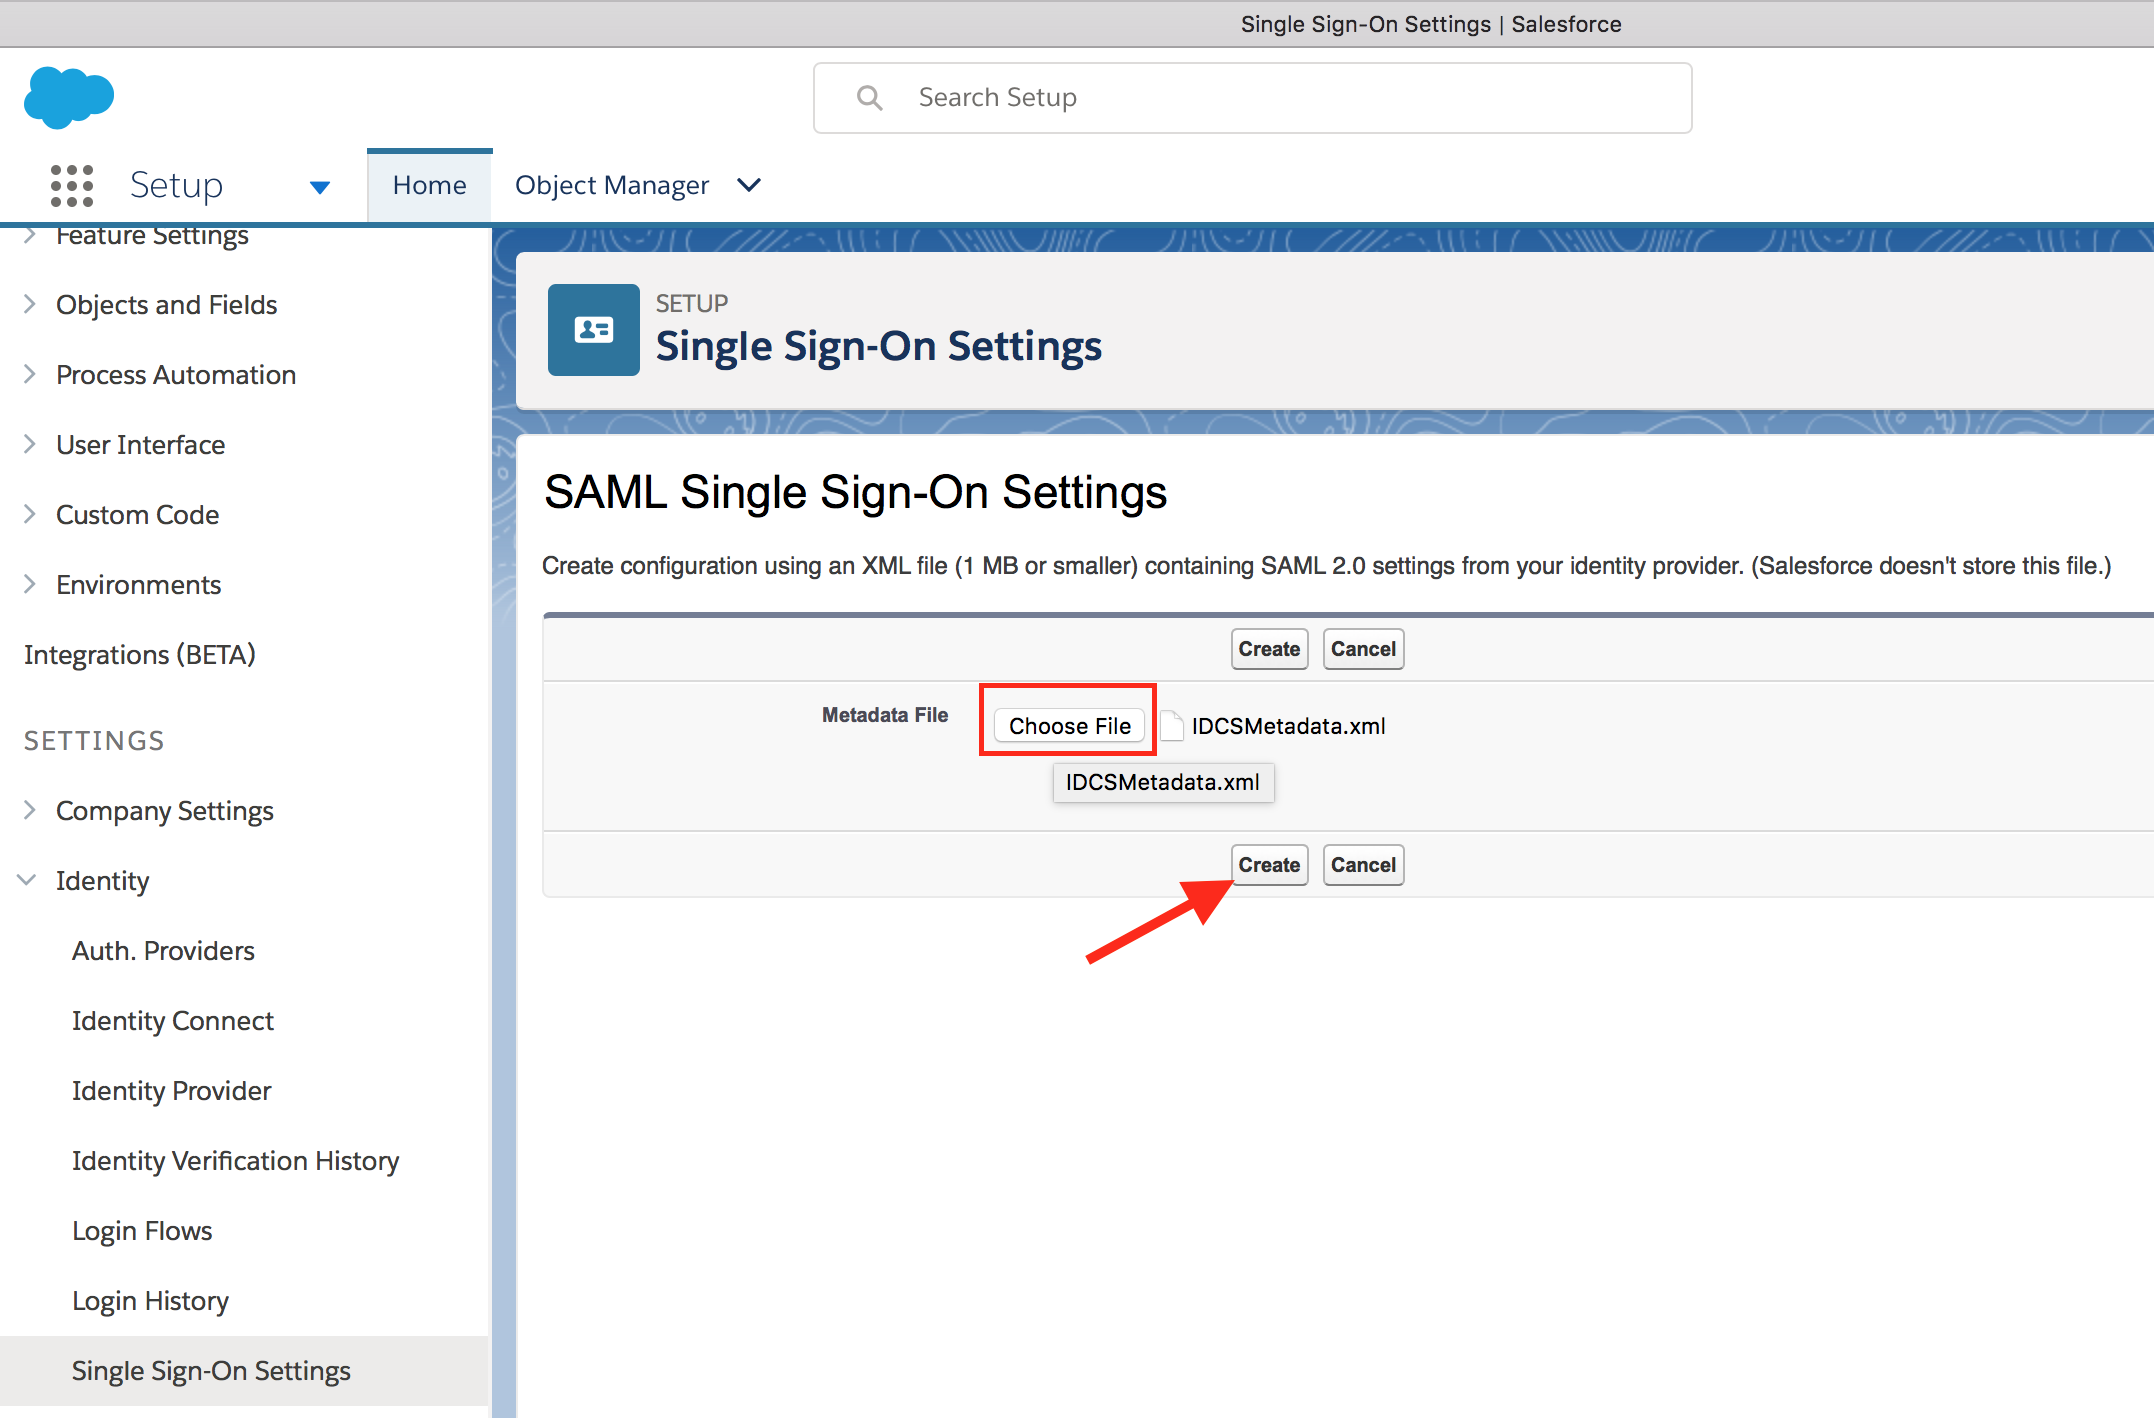
- Click on New from Metadata File button to import IDCS metadata. Select the downloaded metadata XML file using Choose File button. Click on Create.
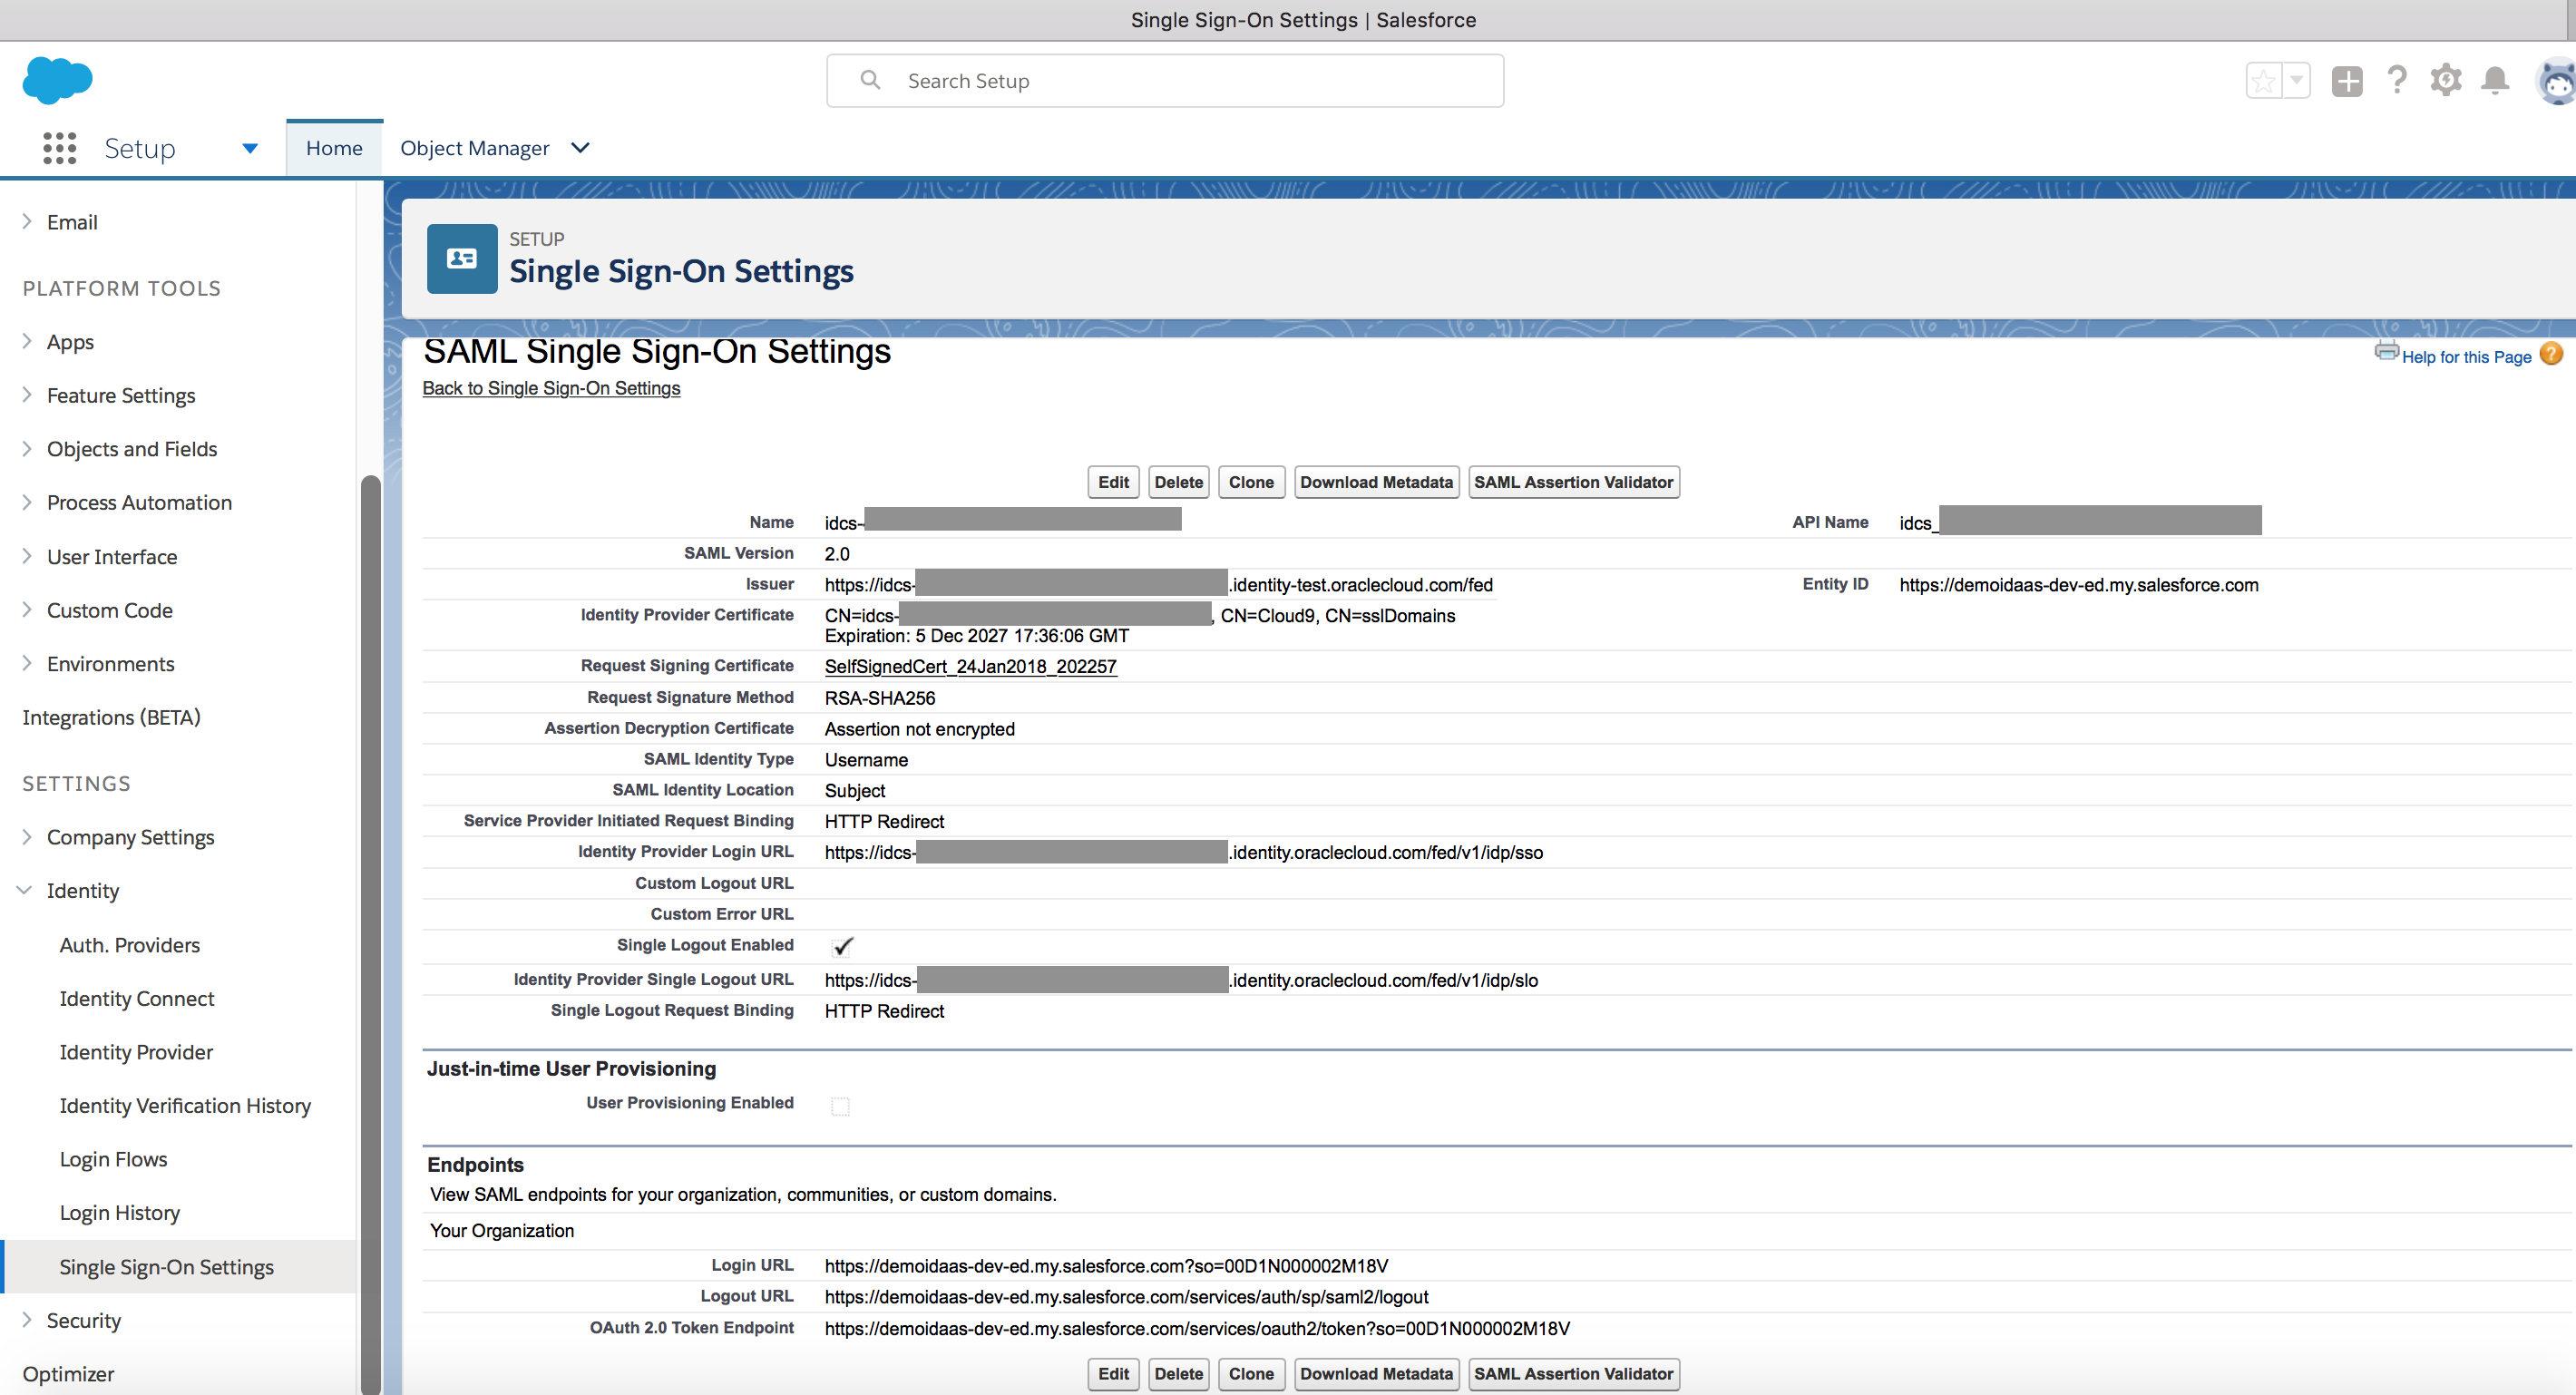
- Keep all the default information and click on Save

- Go to IDCS admin console -> Applications menu

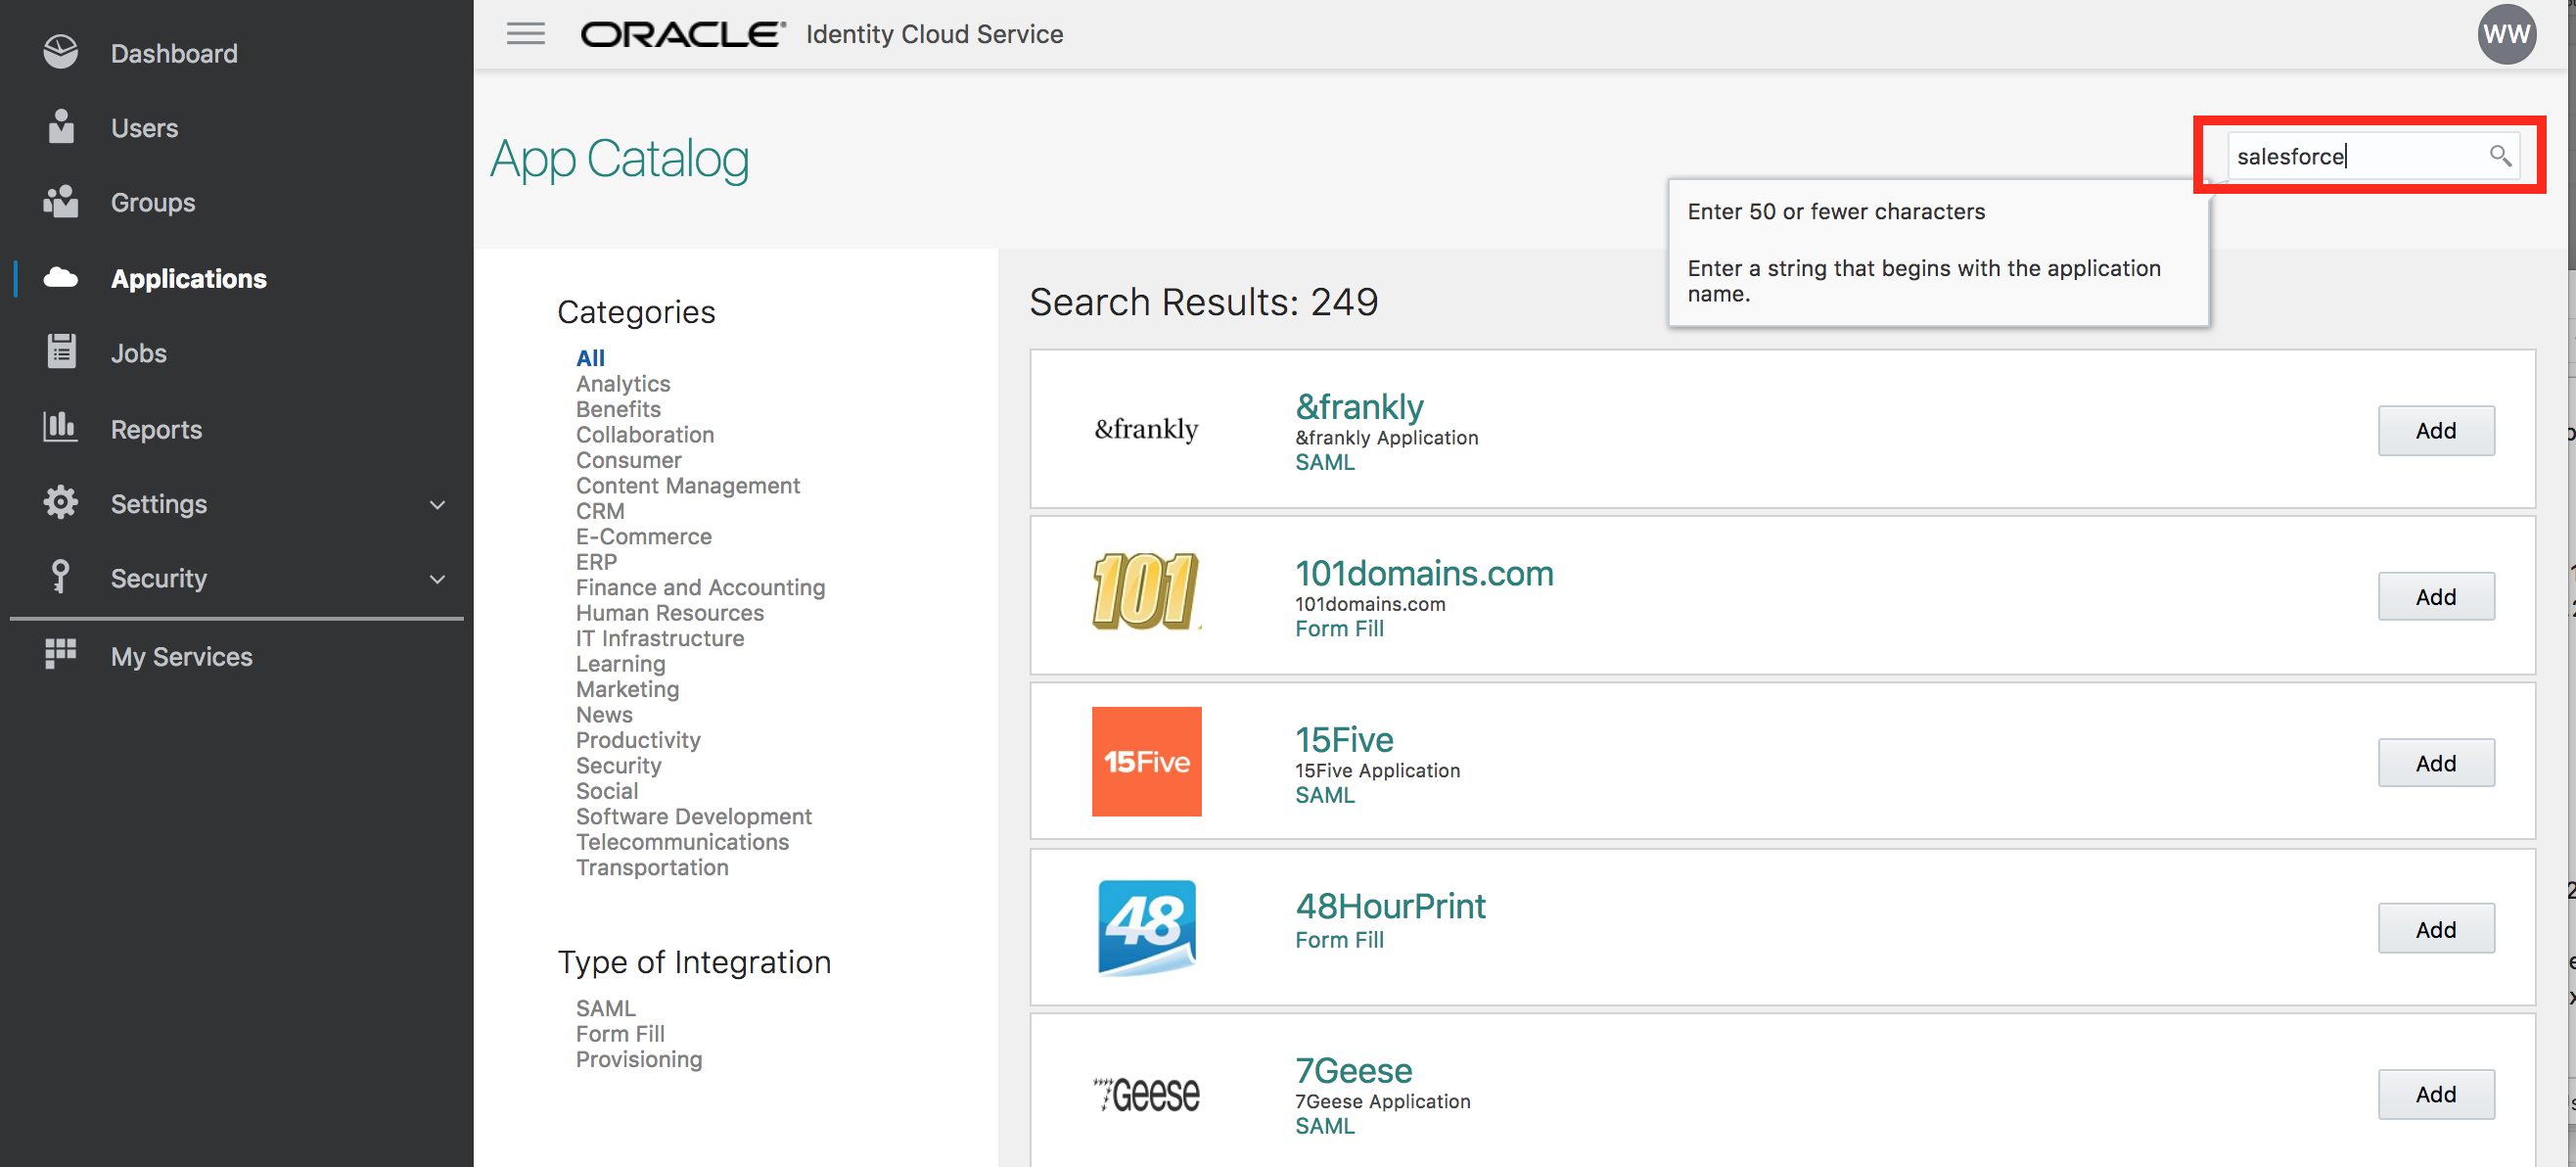
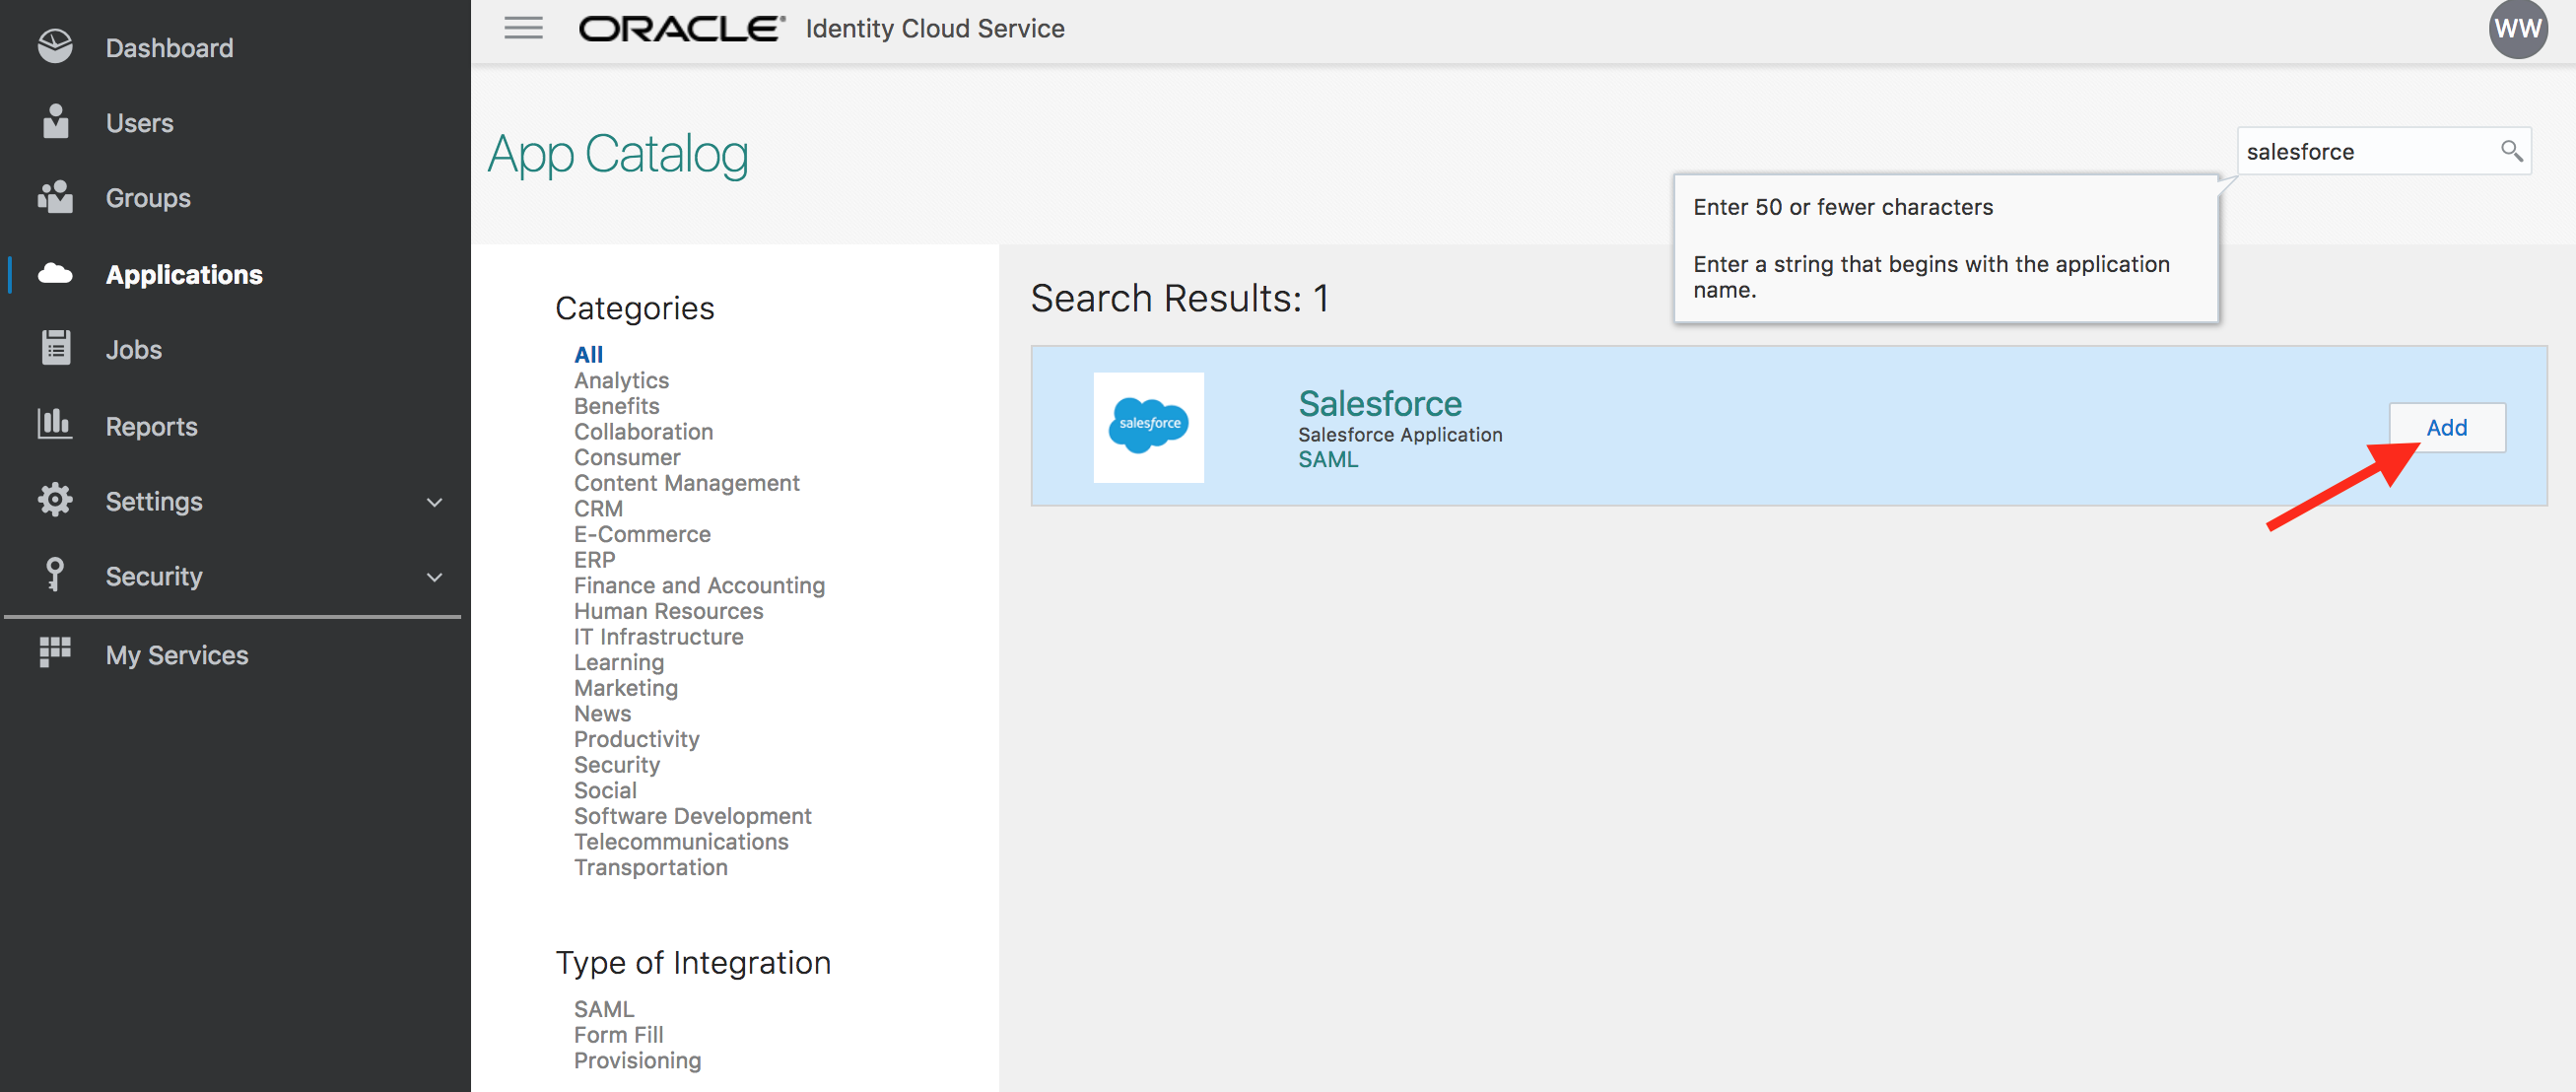
- On the Applications page, click on Add and select App Catalog on the pop-up.
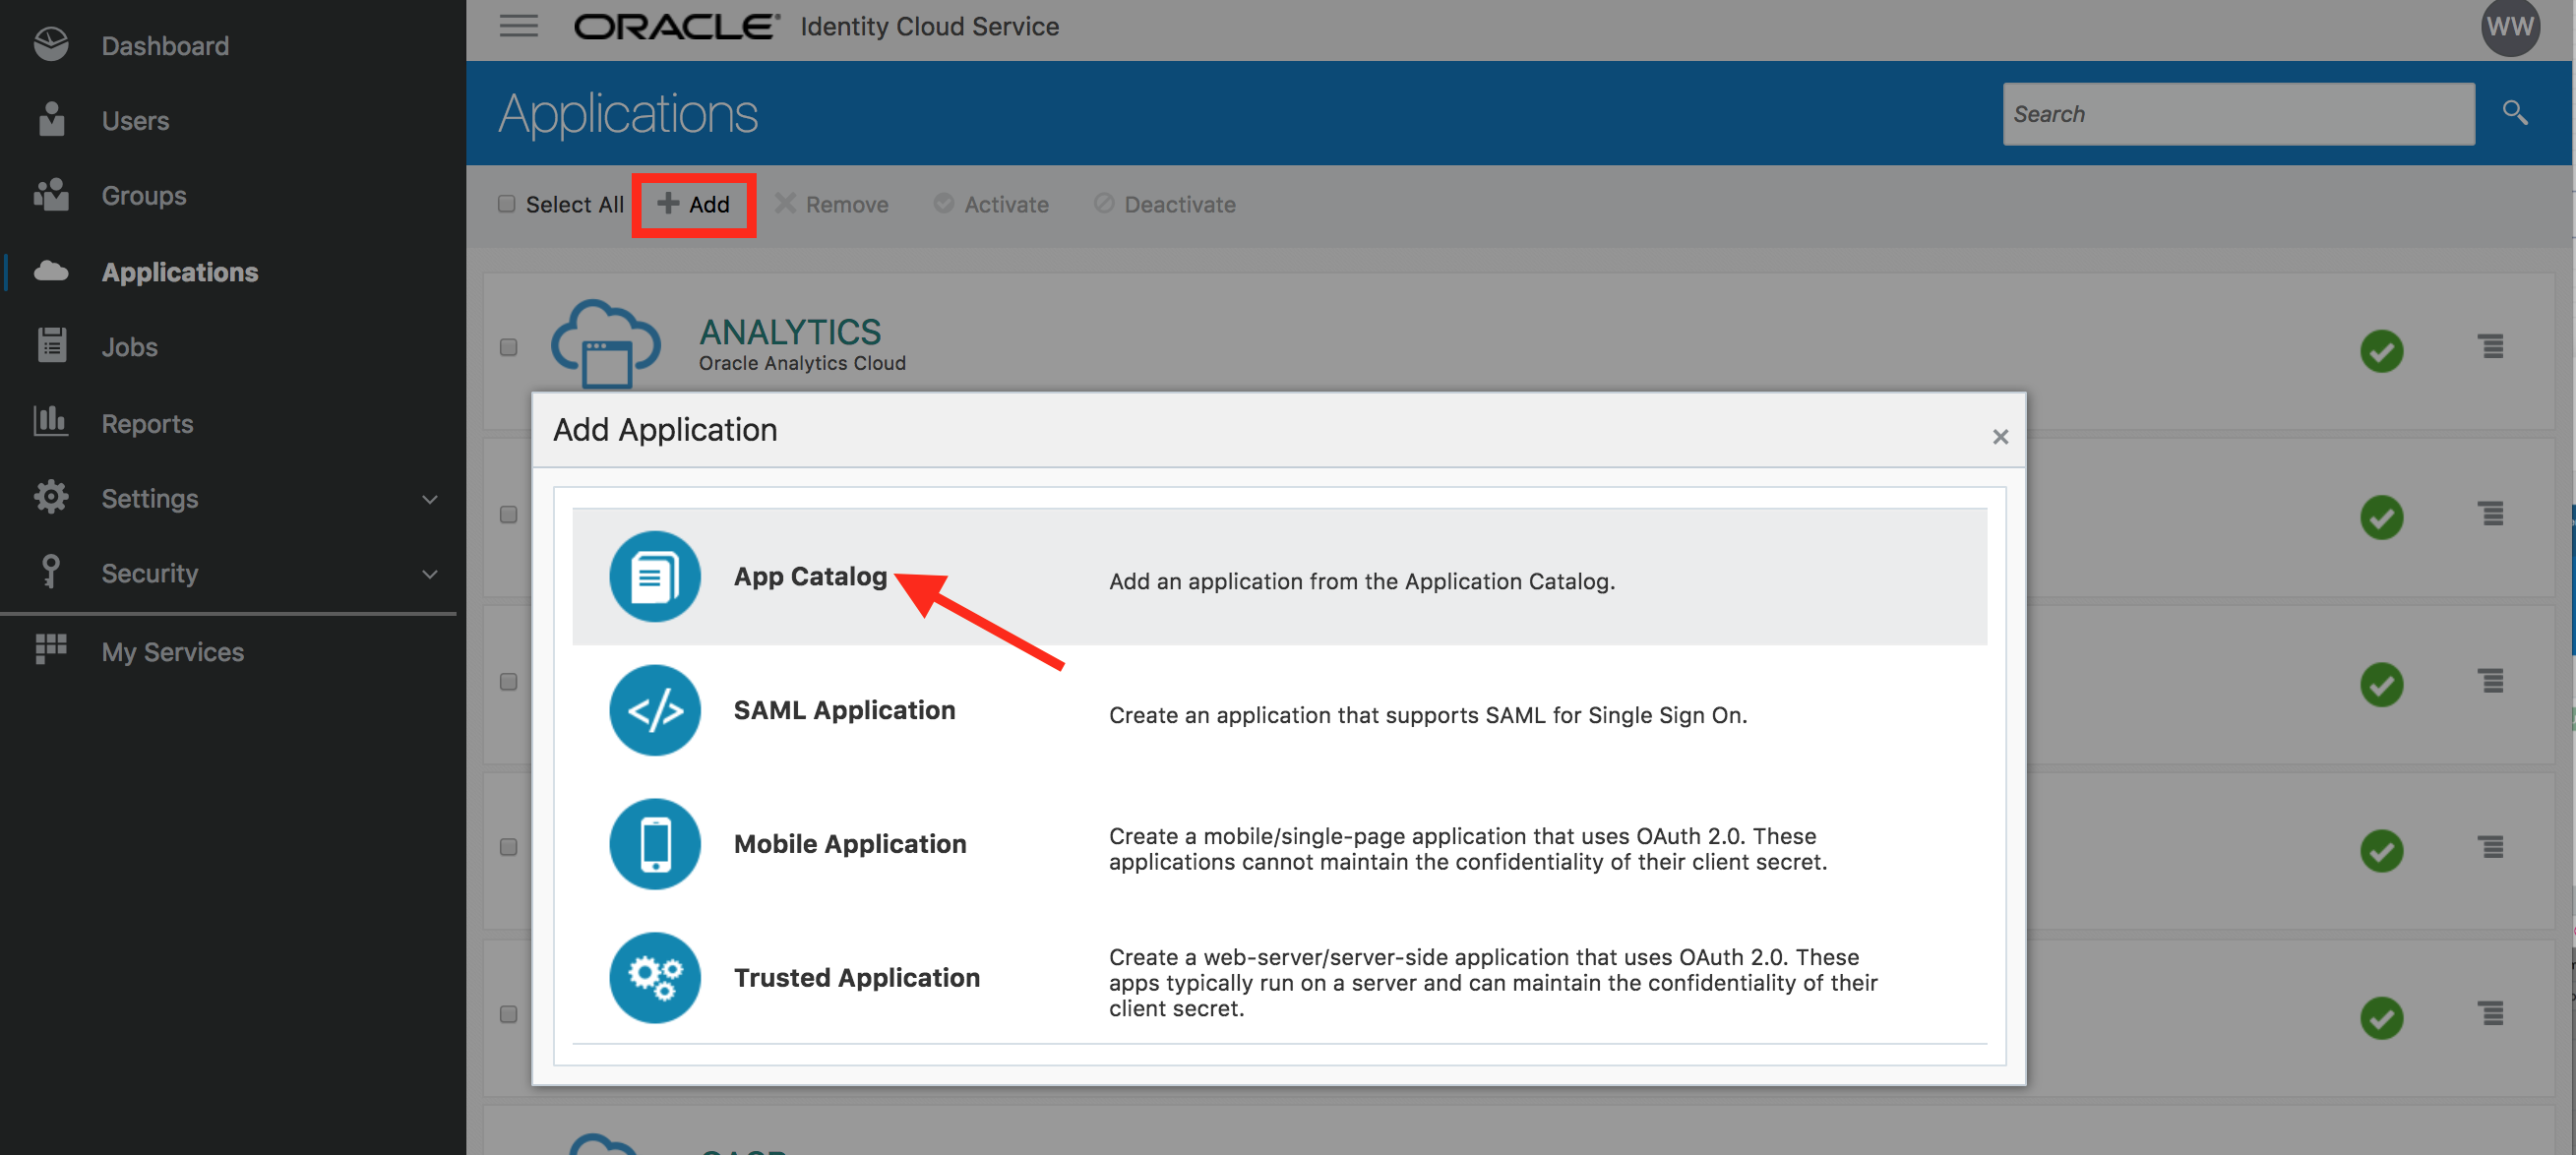
- Search for Salesforce app and click on Add
-
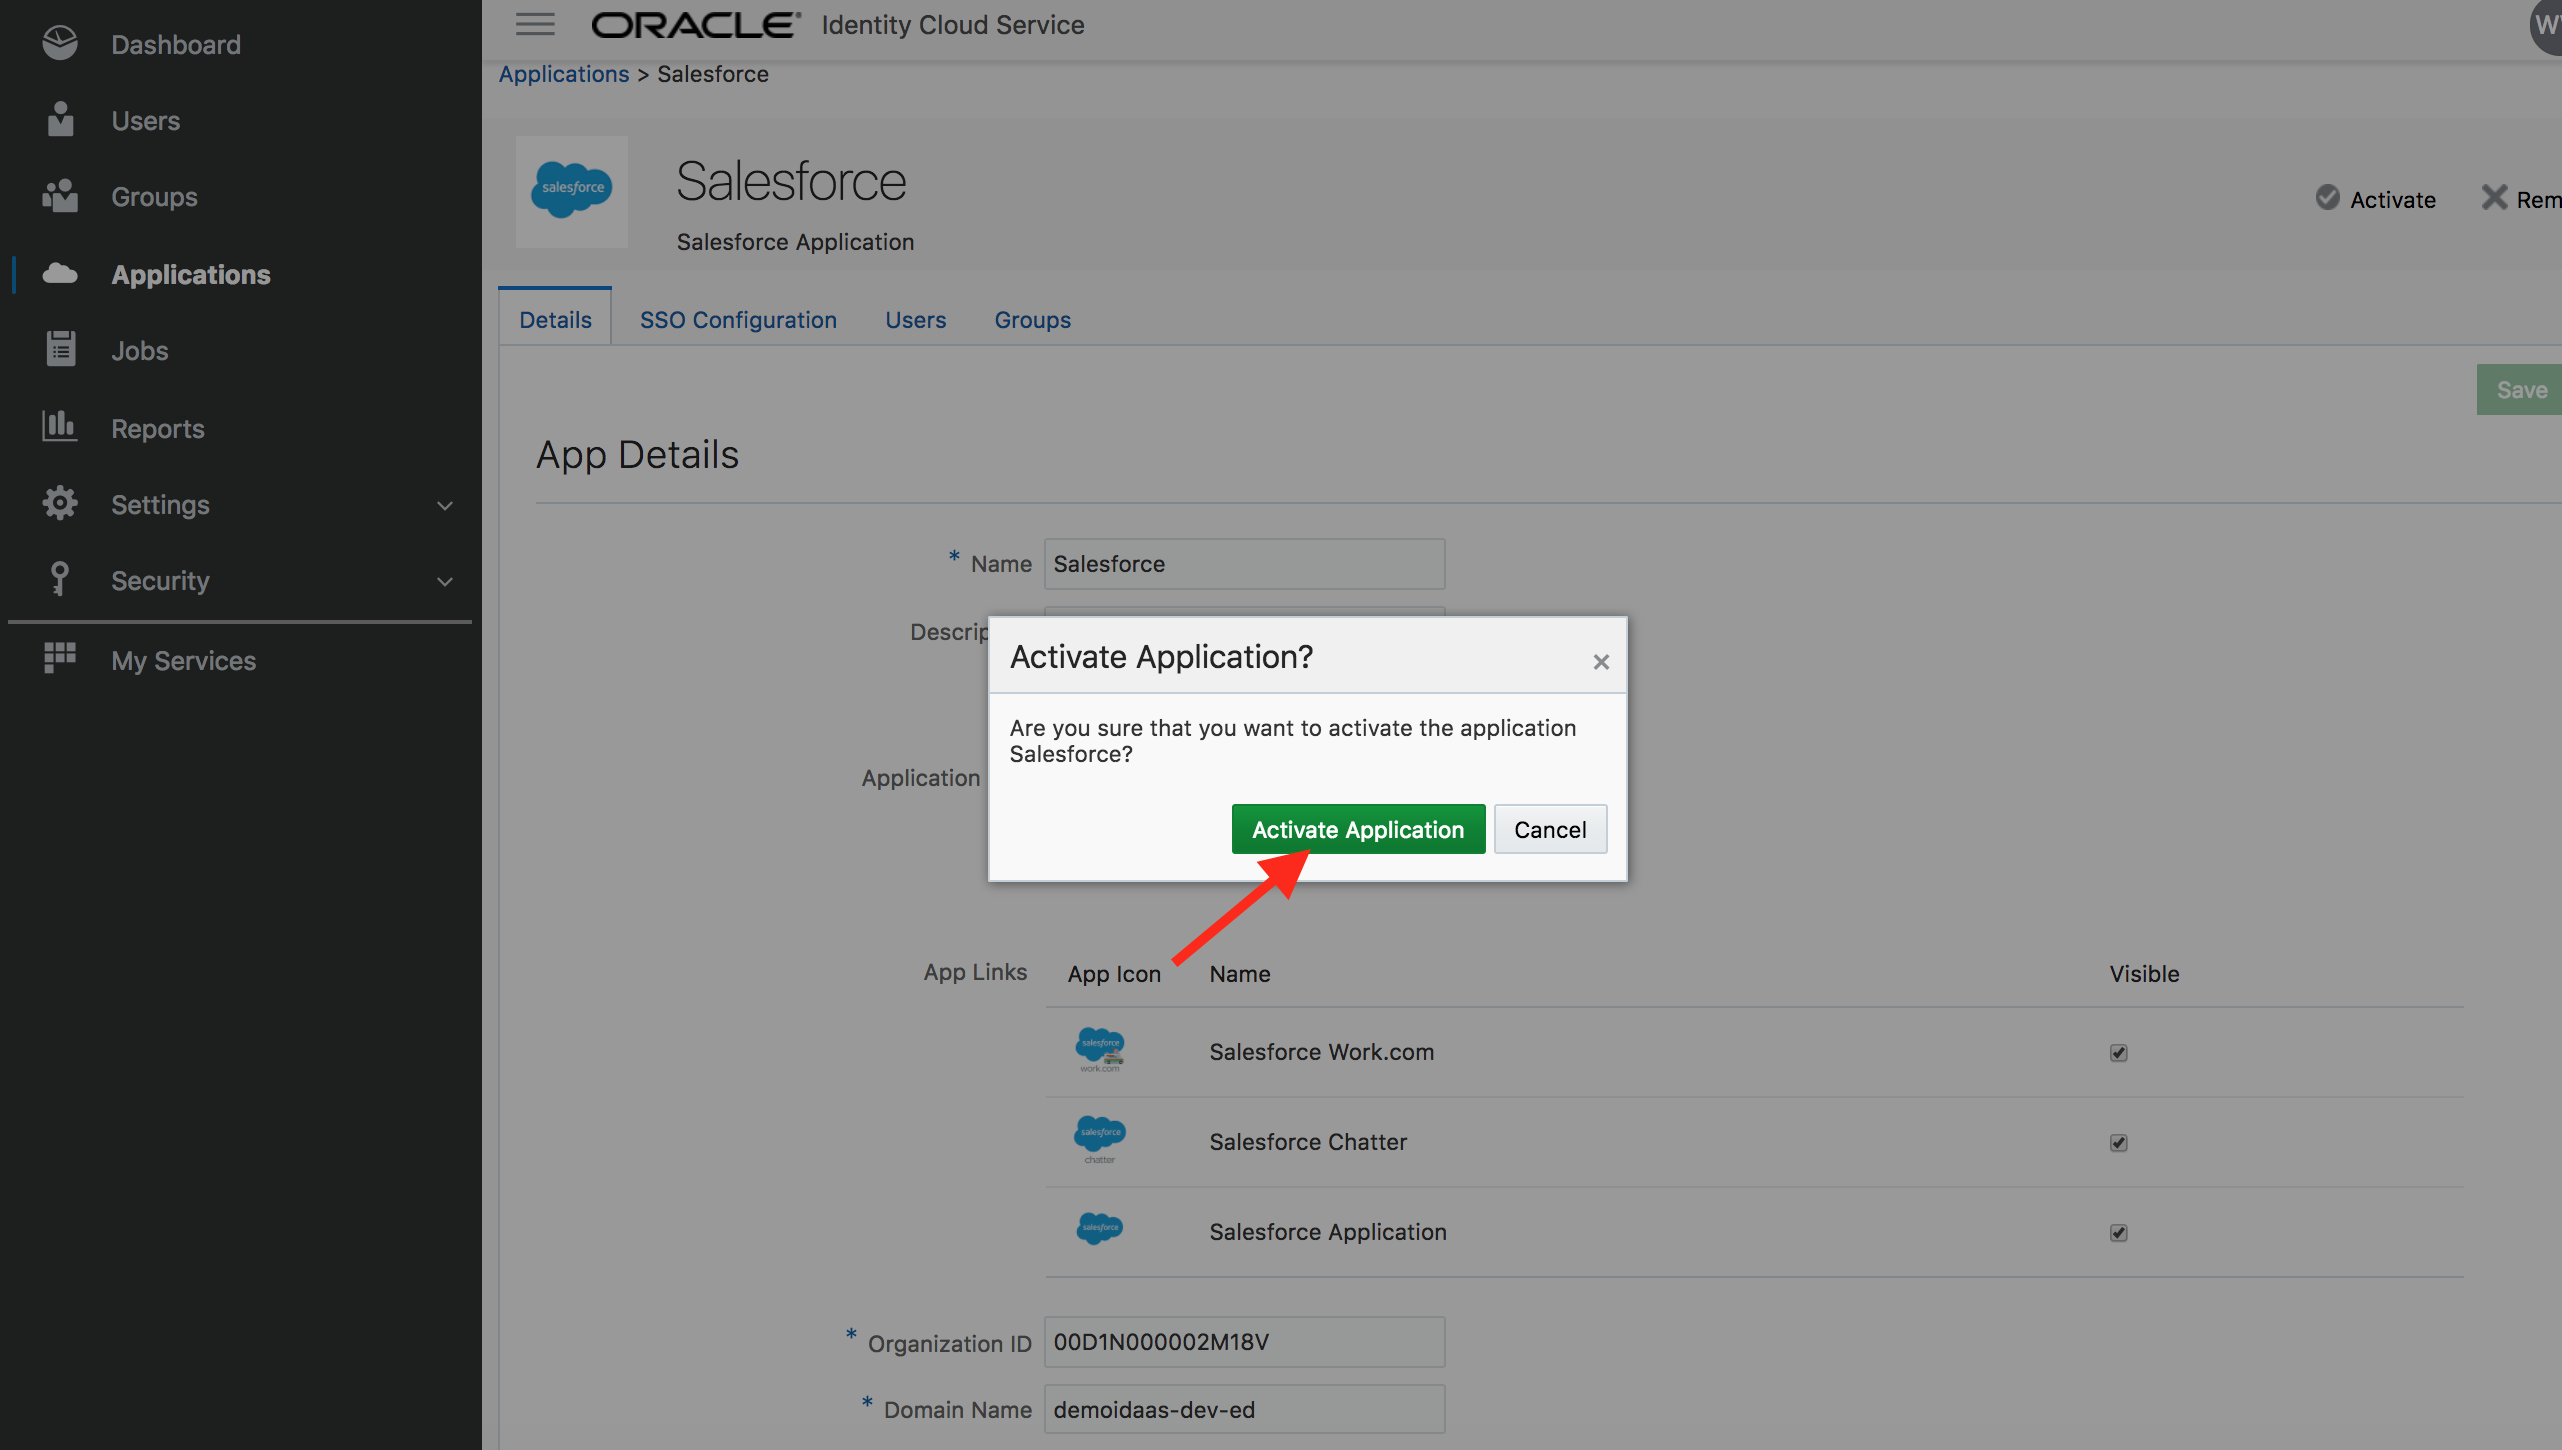
On the first page of configuration screen enter the Organization ID and Domain Name values as provided below. Then click on Next.
These values are exactly same as those found in the IDCS settings in Salesforce you just configured.
Domain Name : demoidaas-dev-ed
Organization ID : 00D1N000002M18V
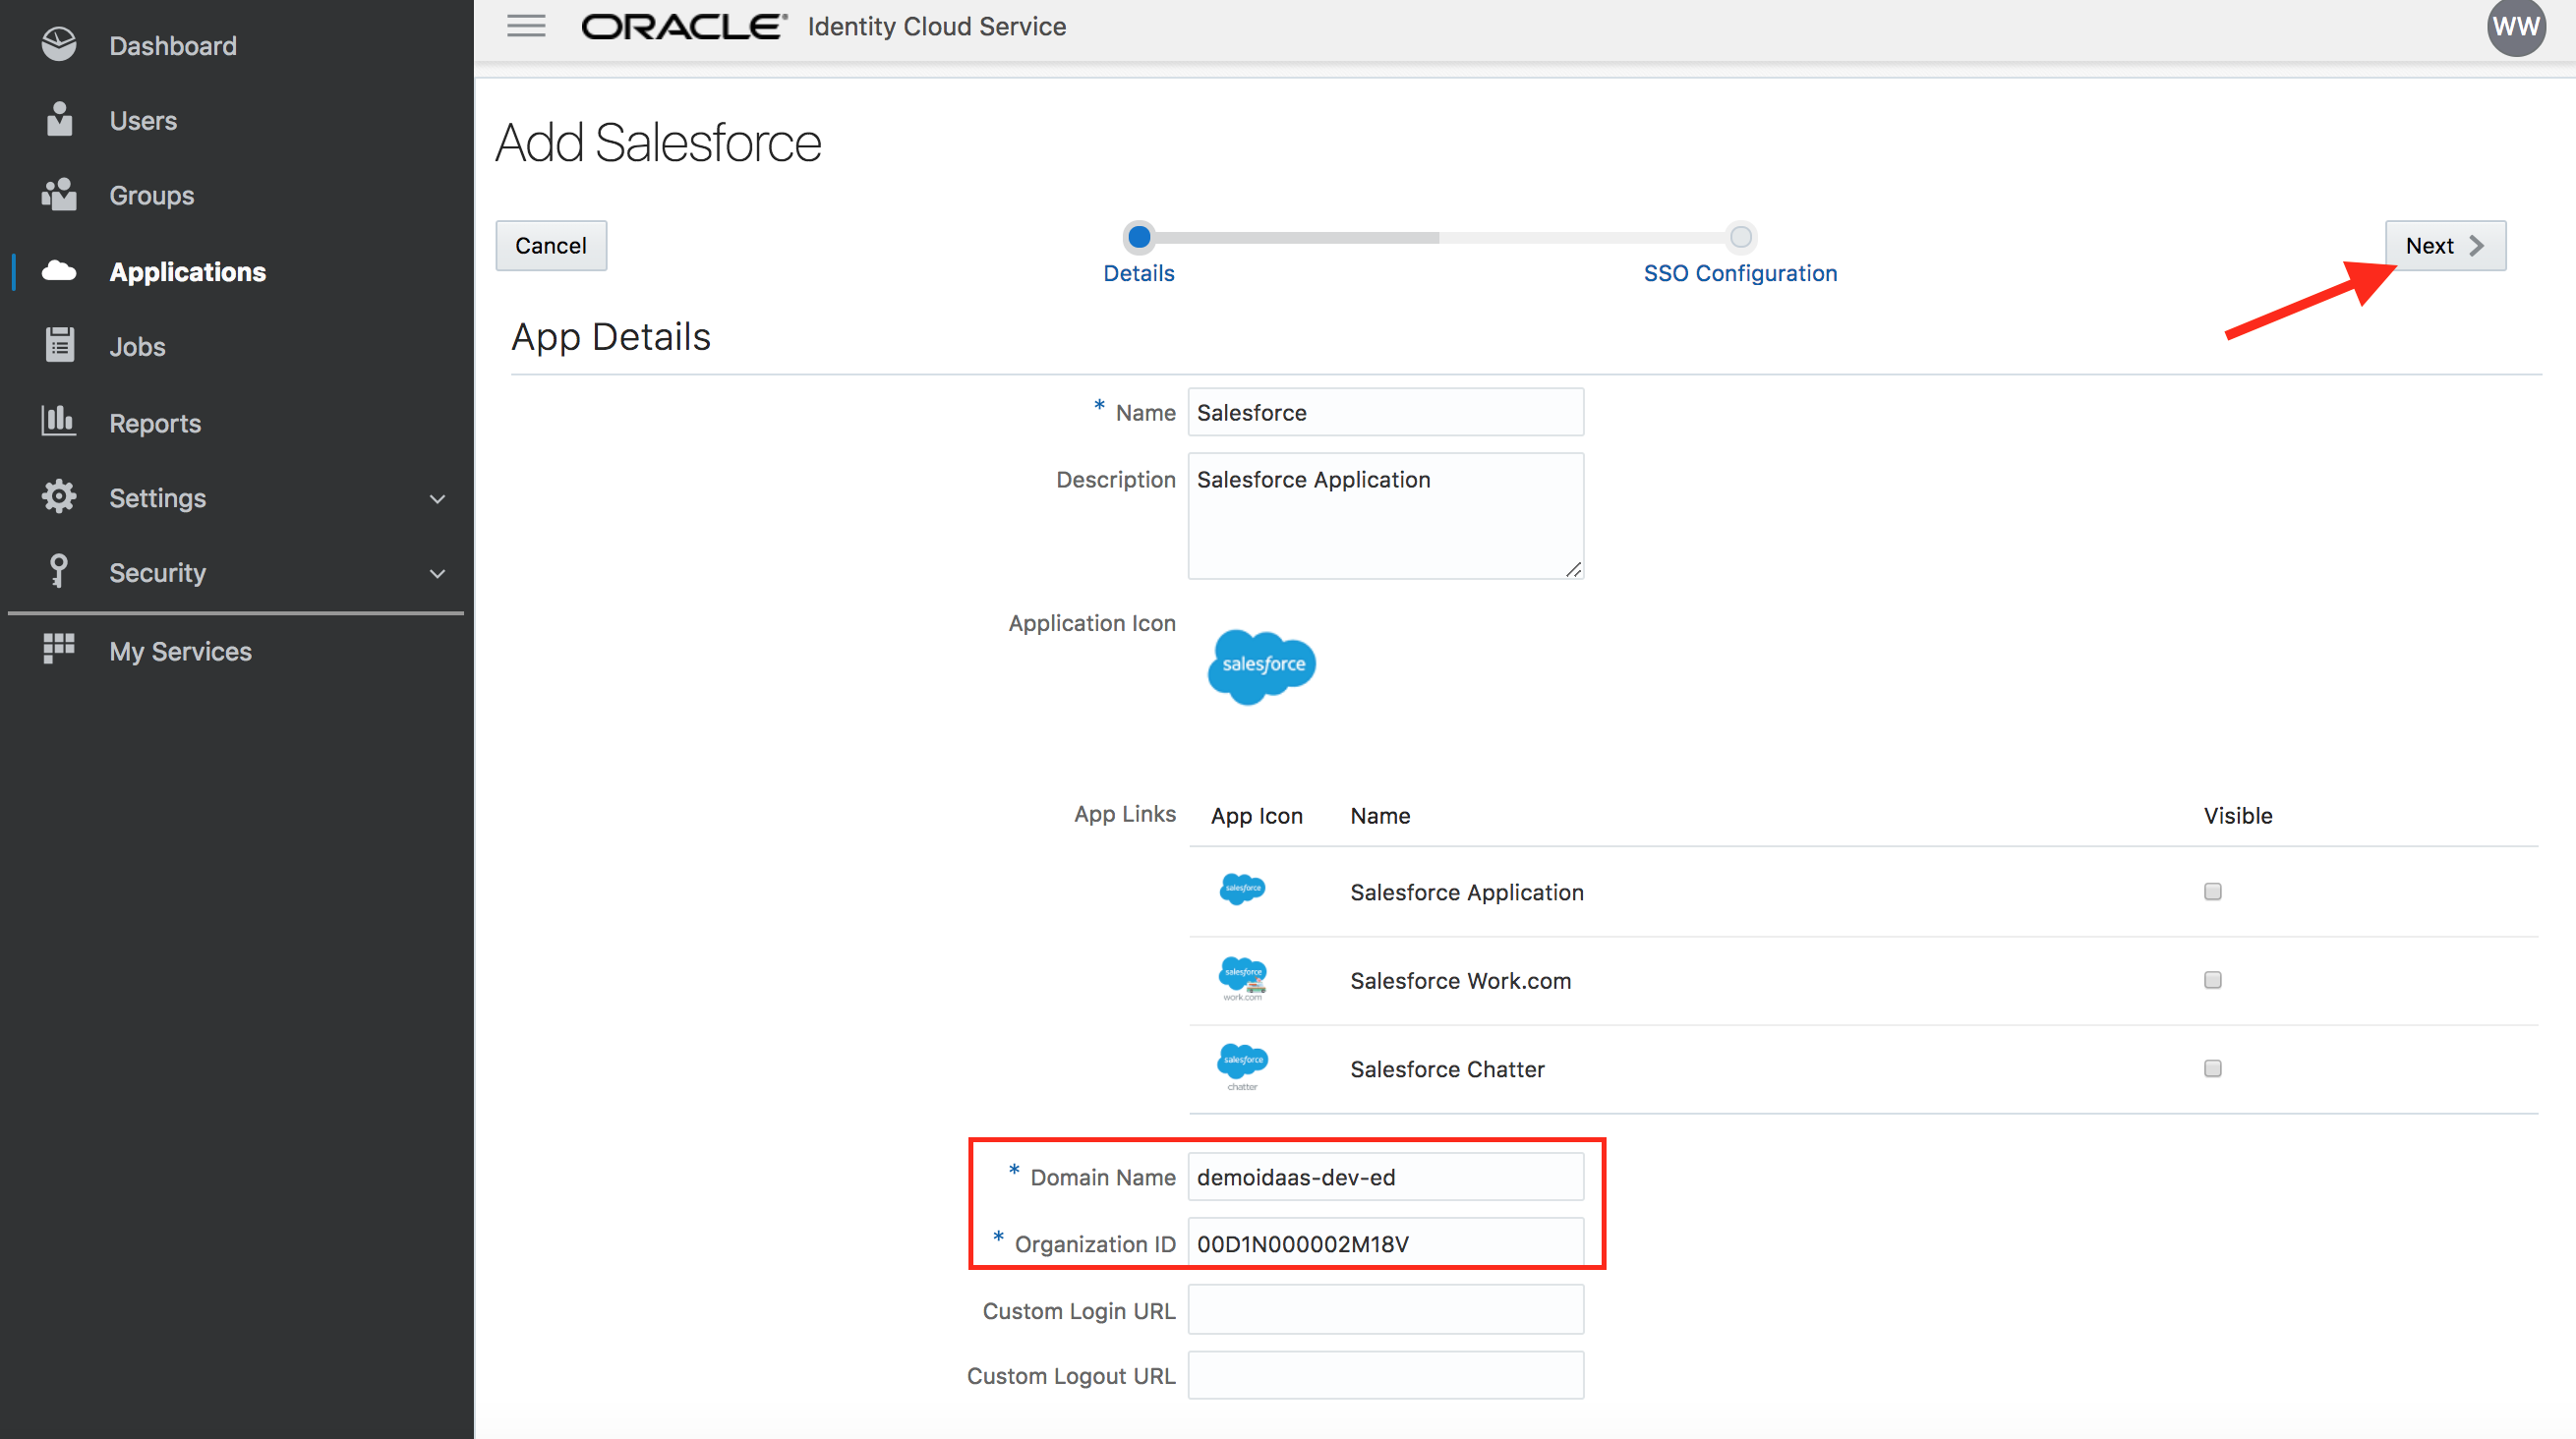
- Click on Finish button
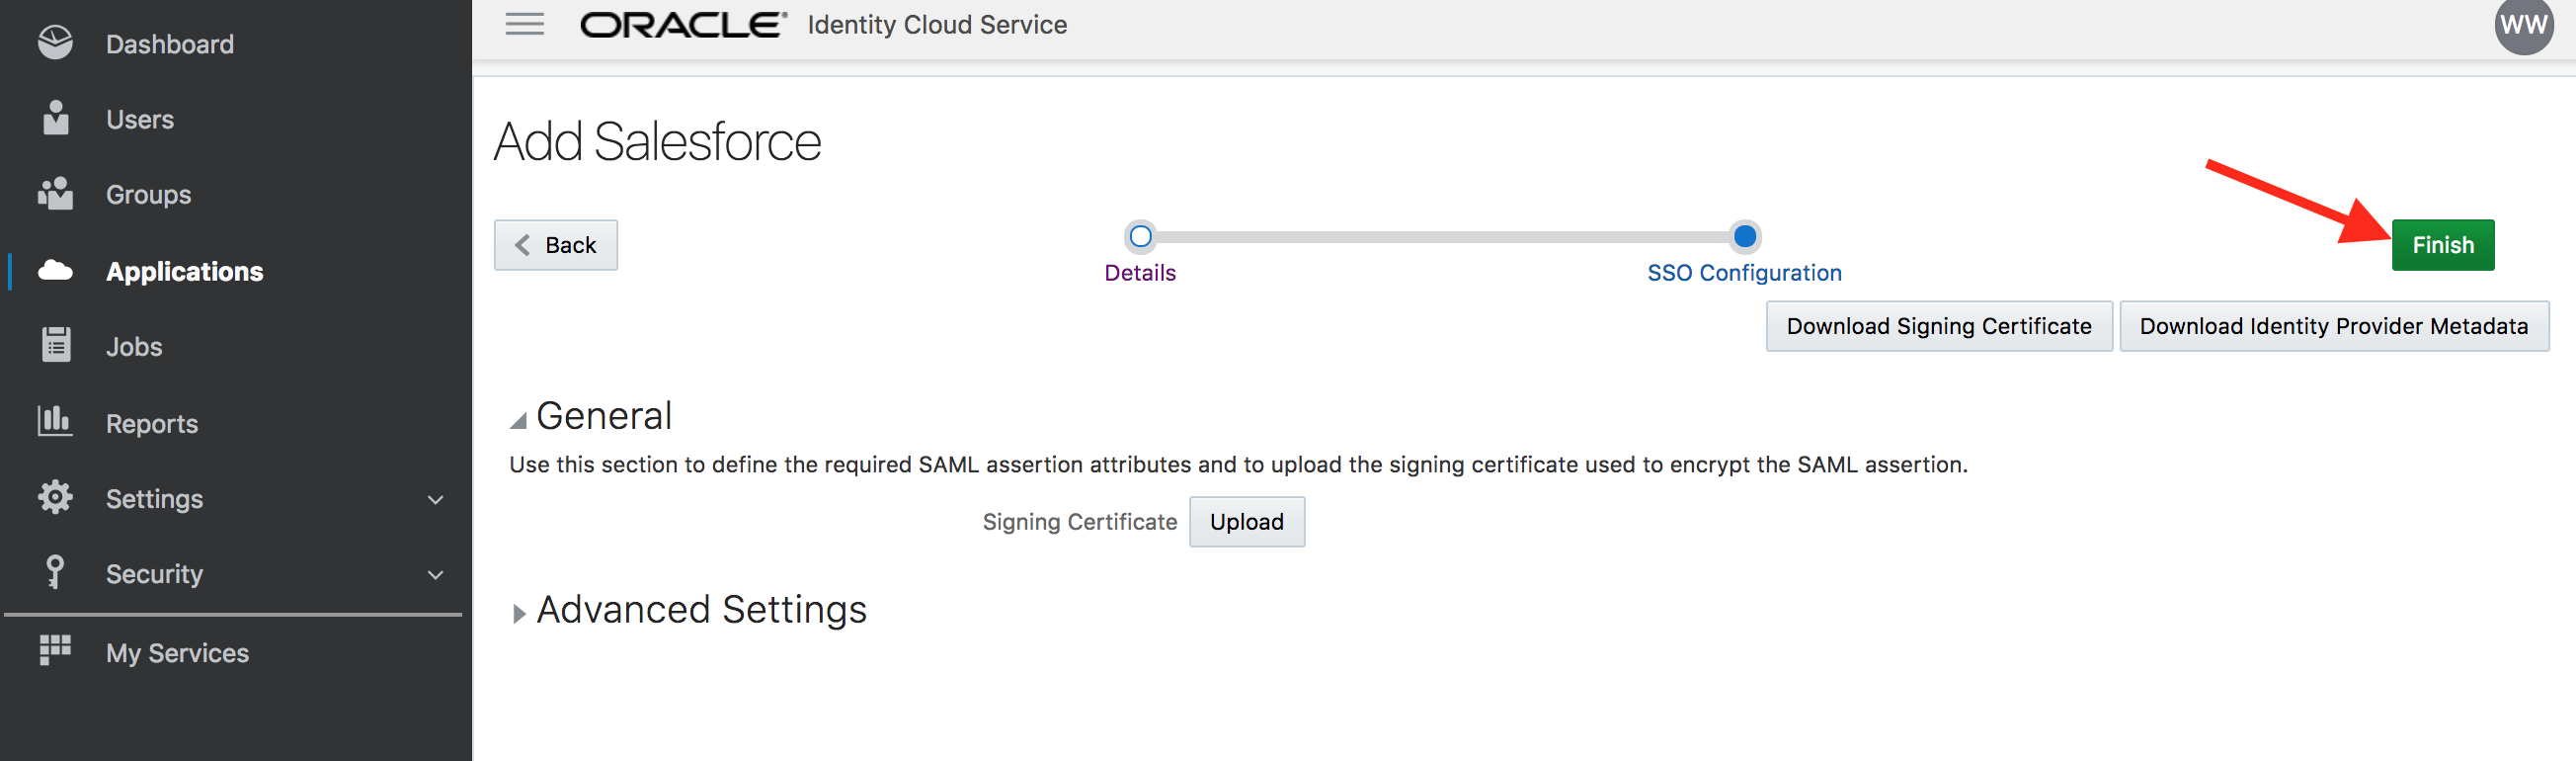
- Activate the application
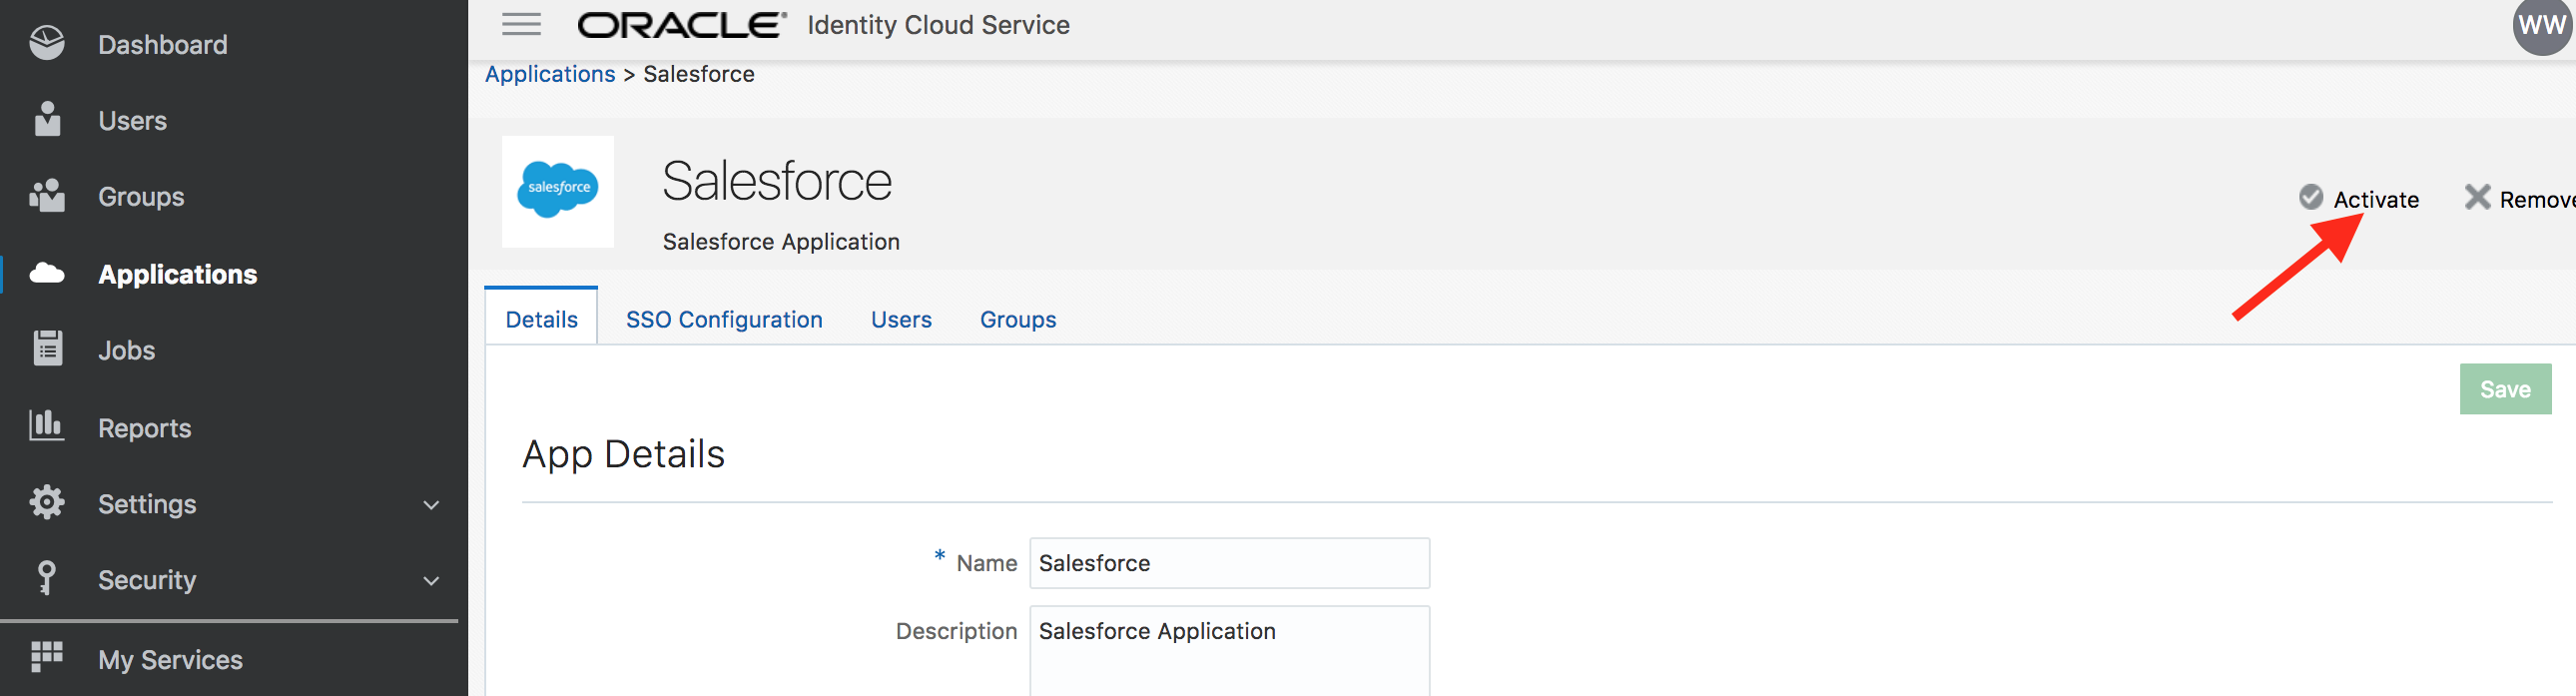
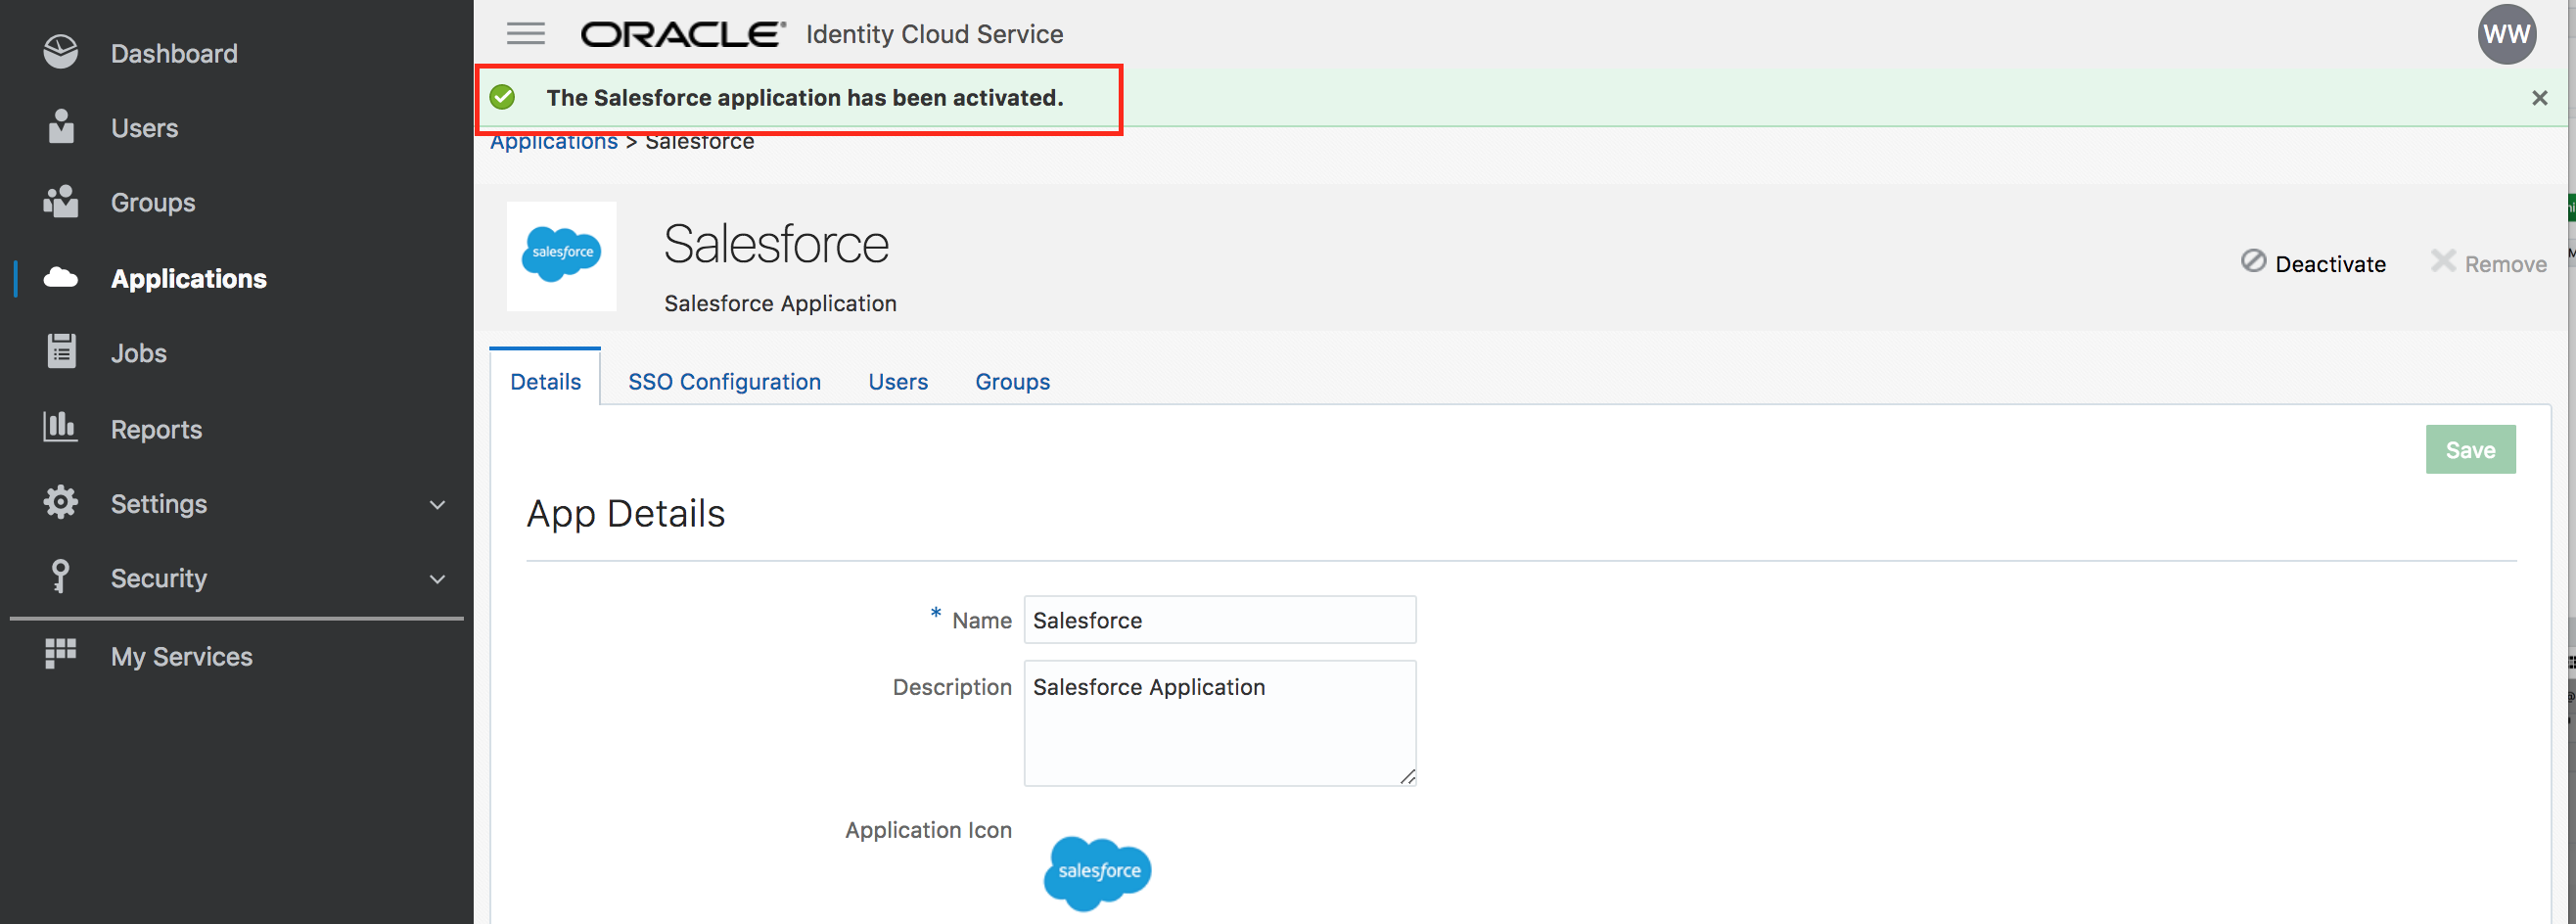
Congratulations, you successfully added and activated an application in IDCS.
Grant app to group - (Persona: Administrator)
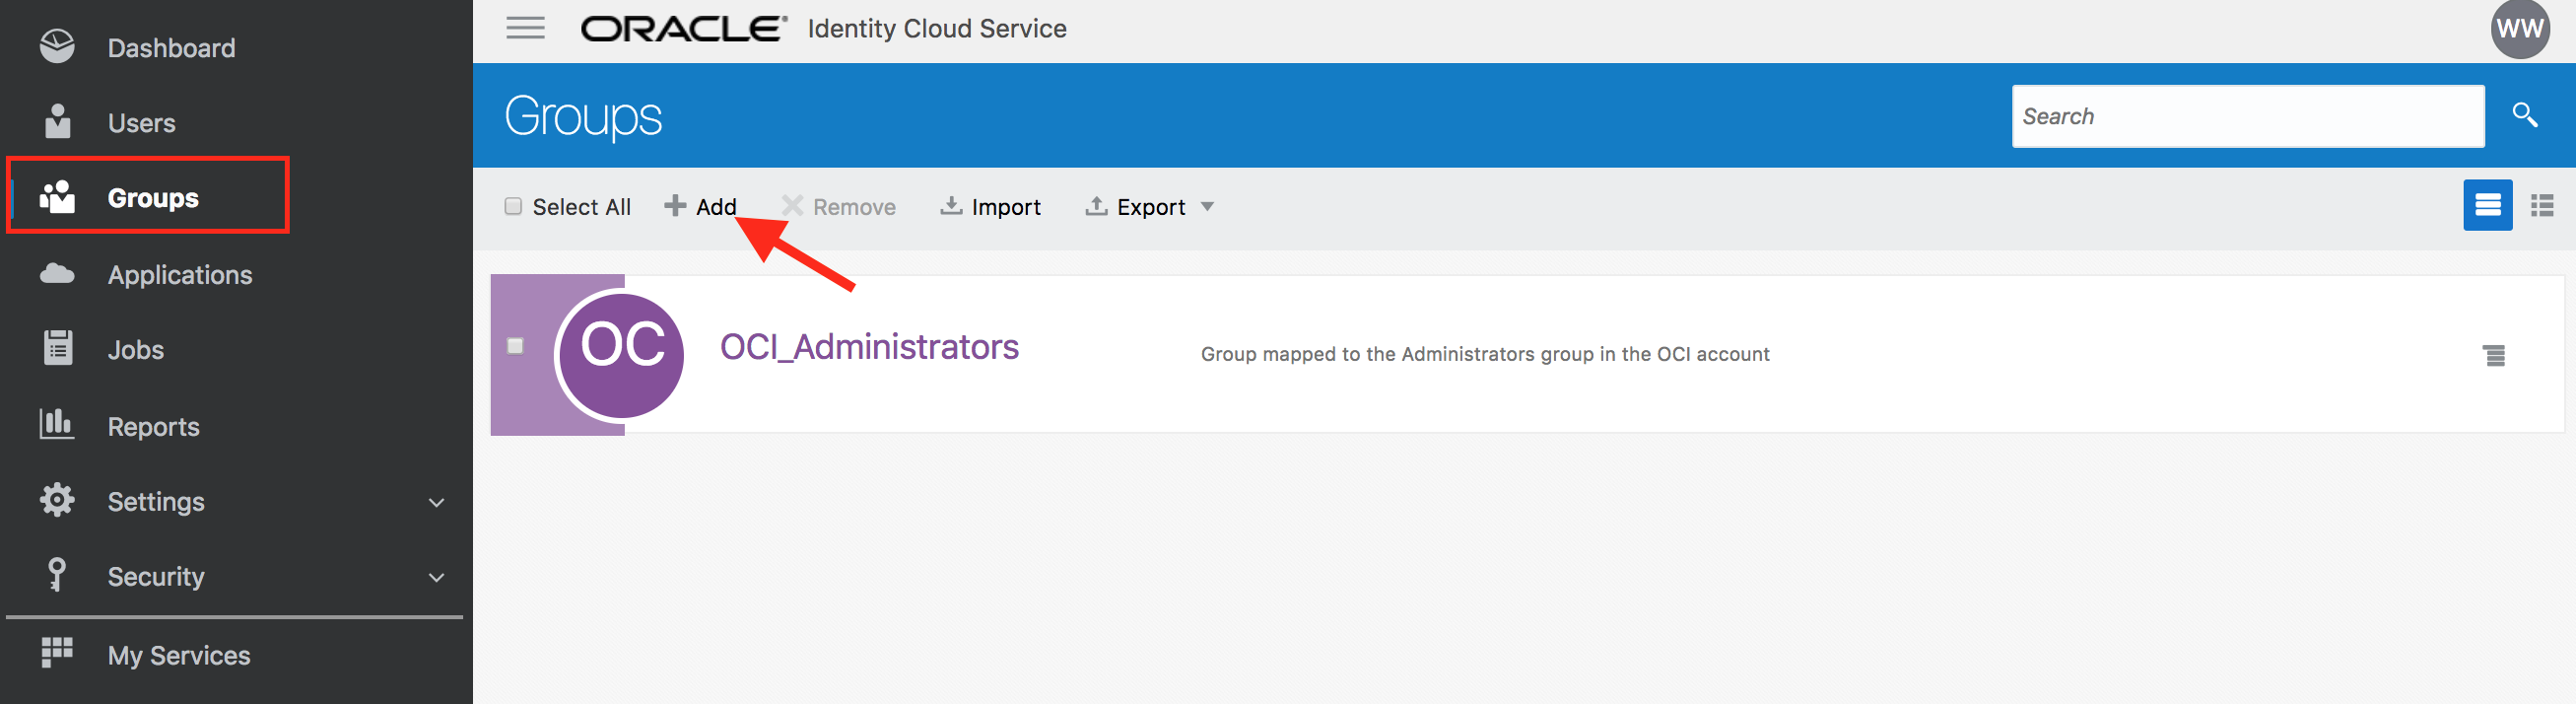
- Go to IDCS admin console -> Groups menu
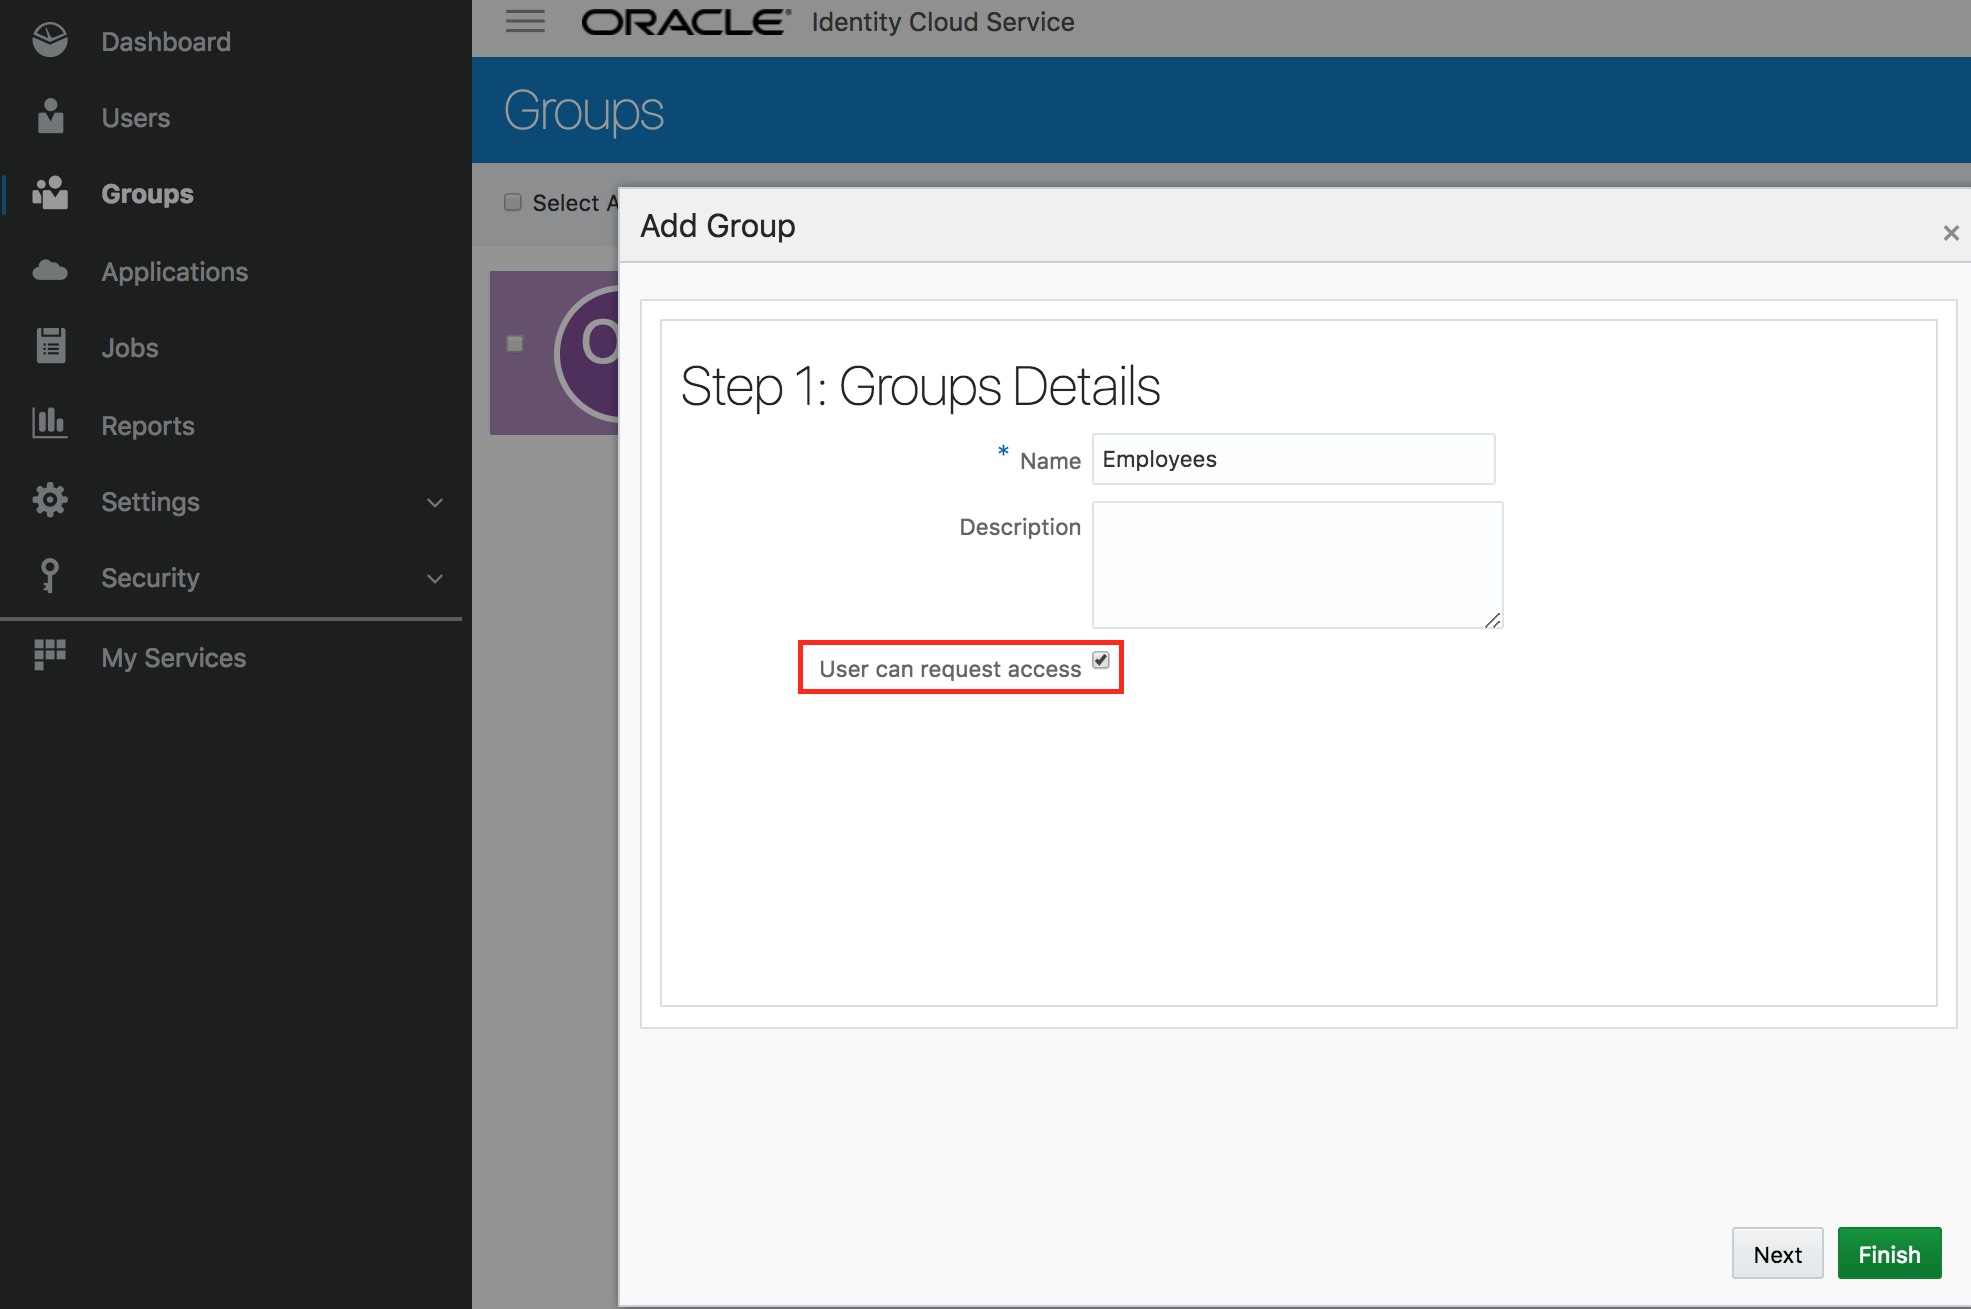
- Add group Employees. Check the box
User can request access. Click on Finish
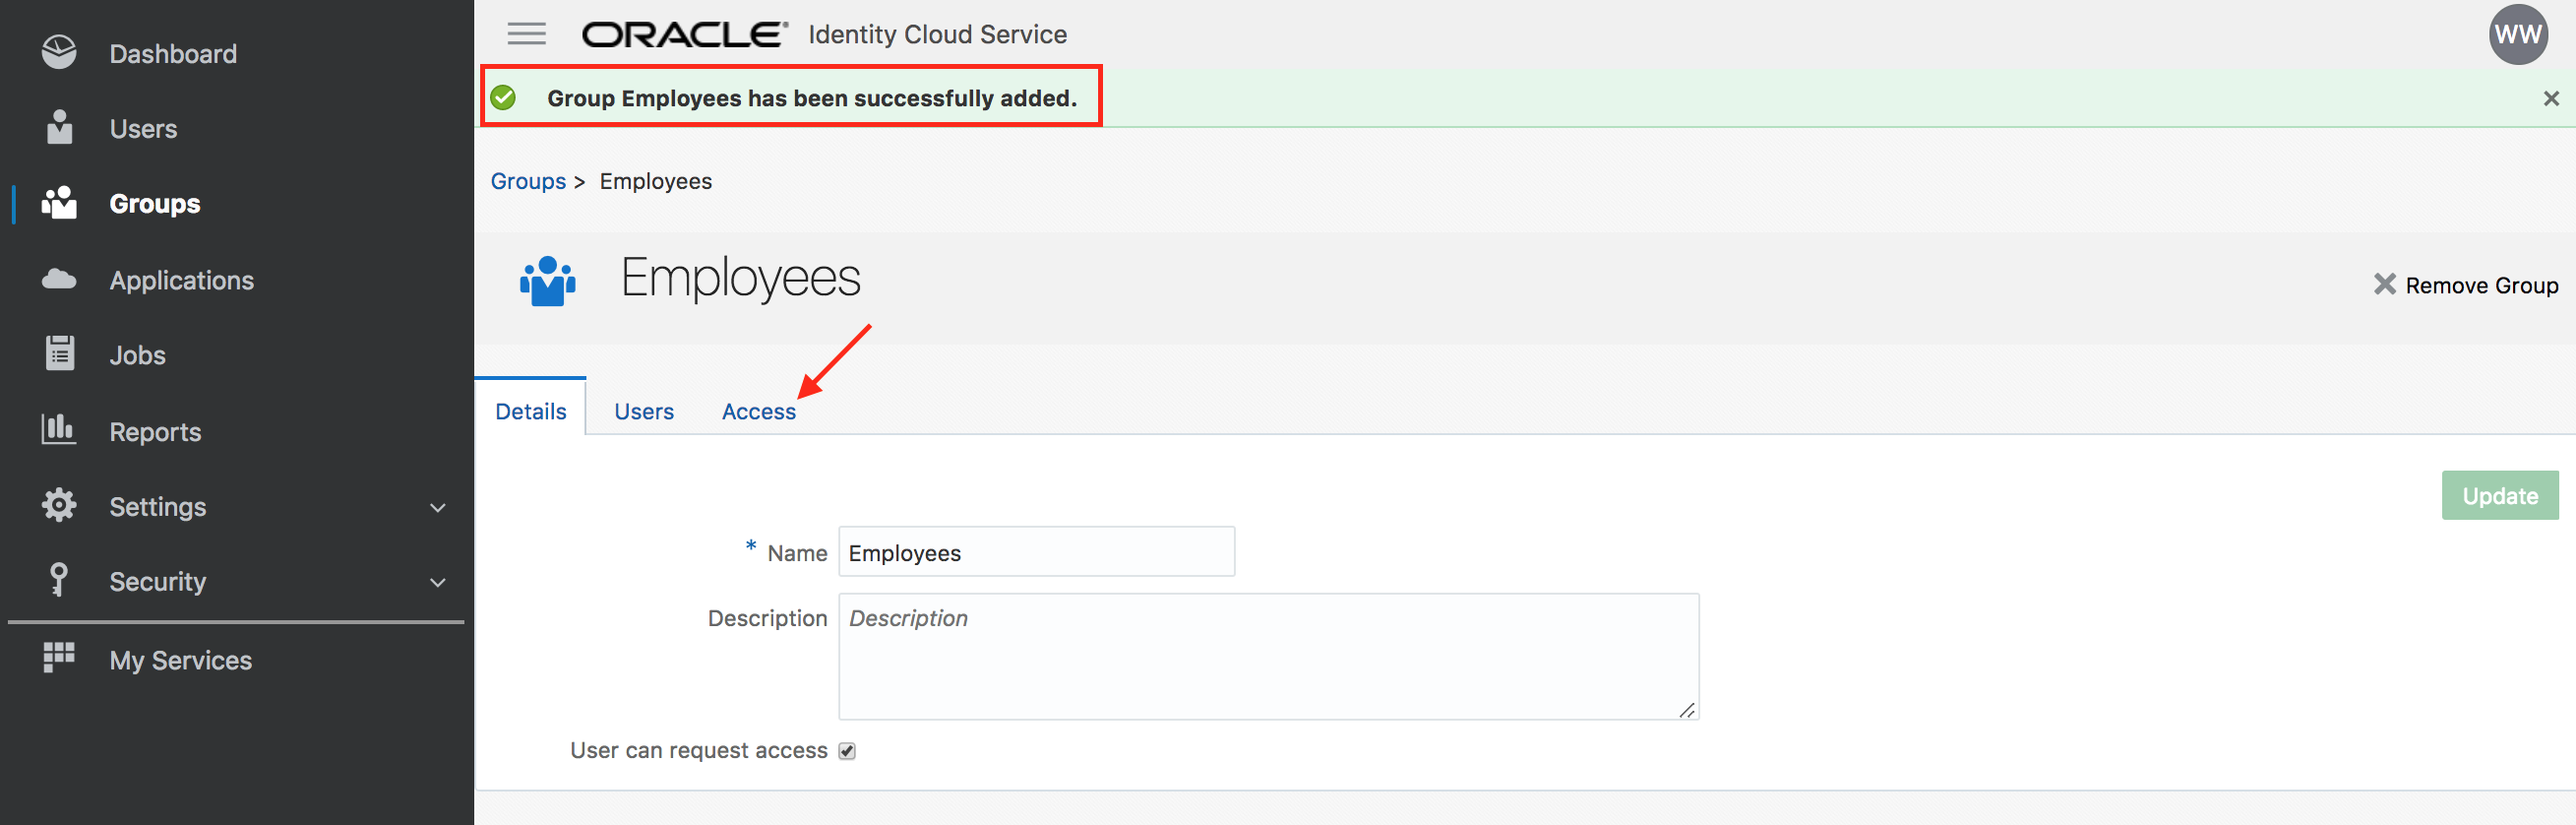
- Go to the Access tab. Click on Assign.
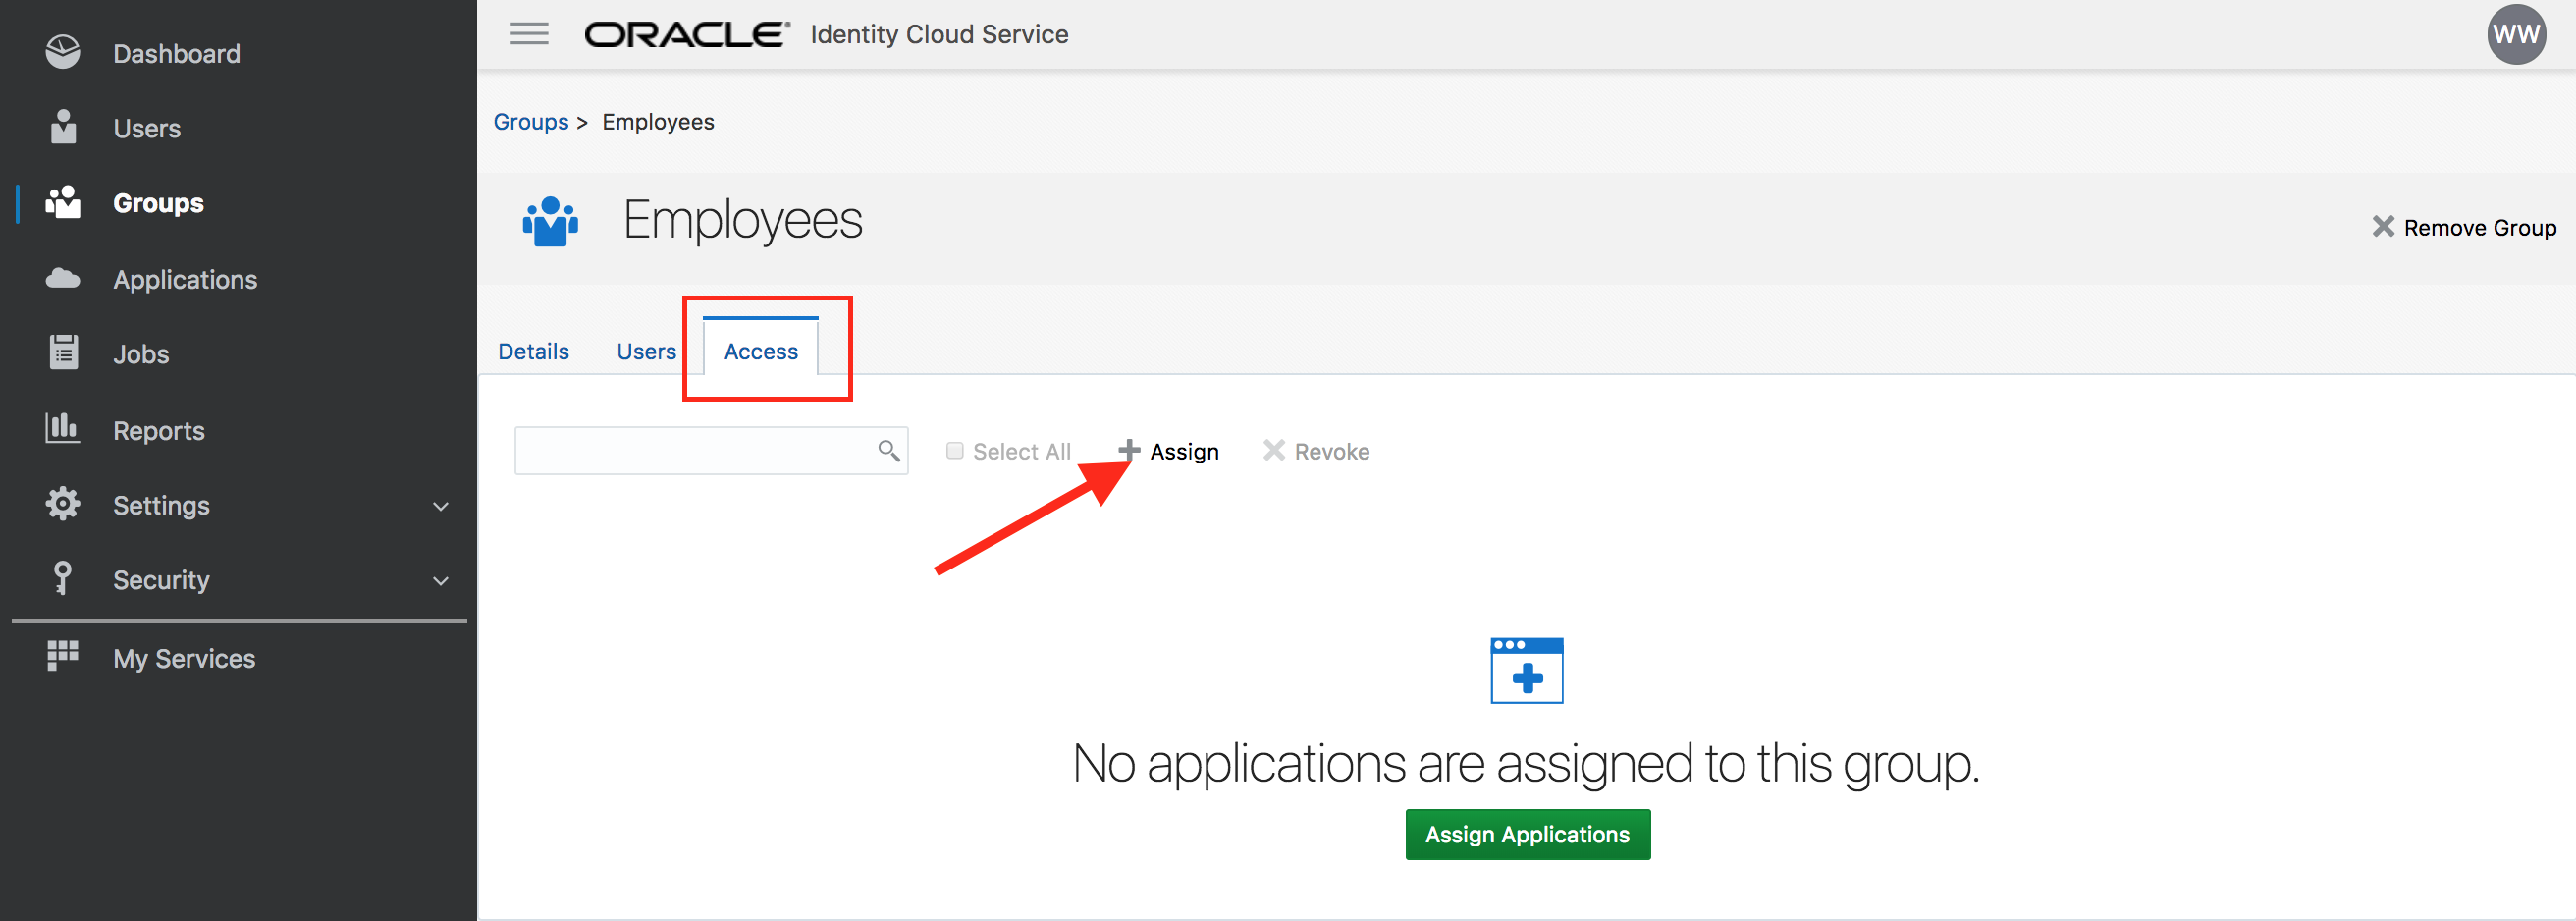
- Select Salesforce and confirm
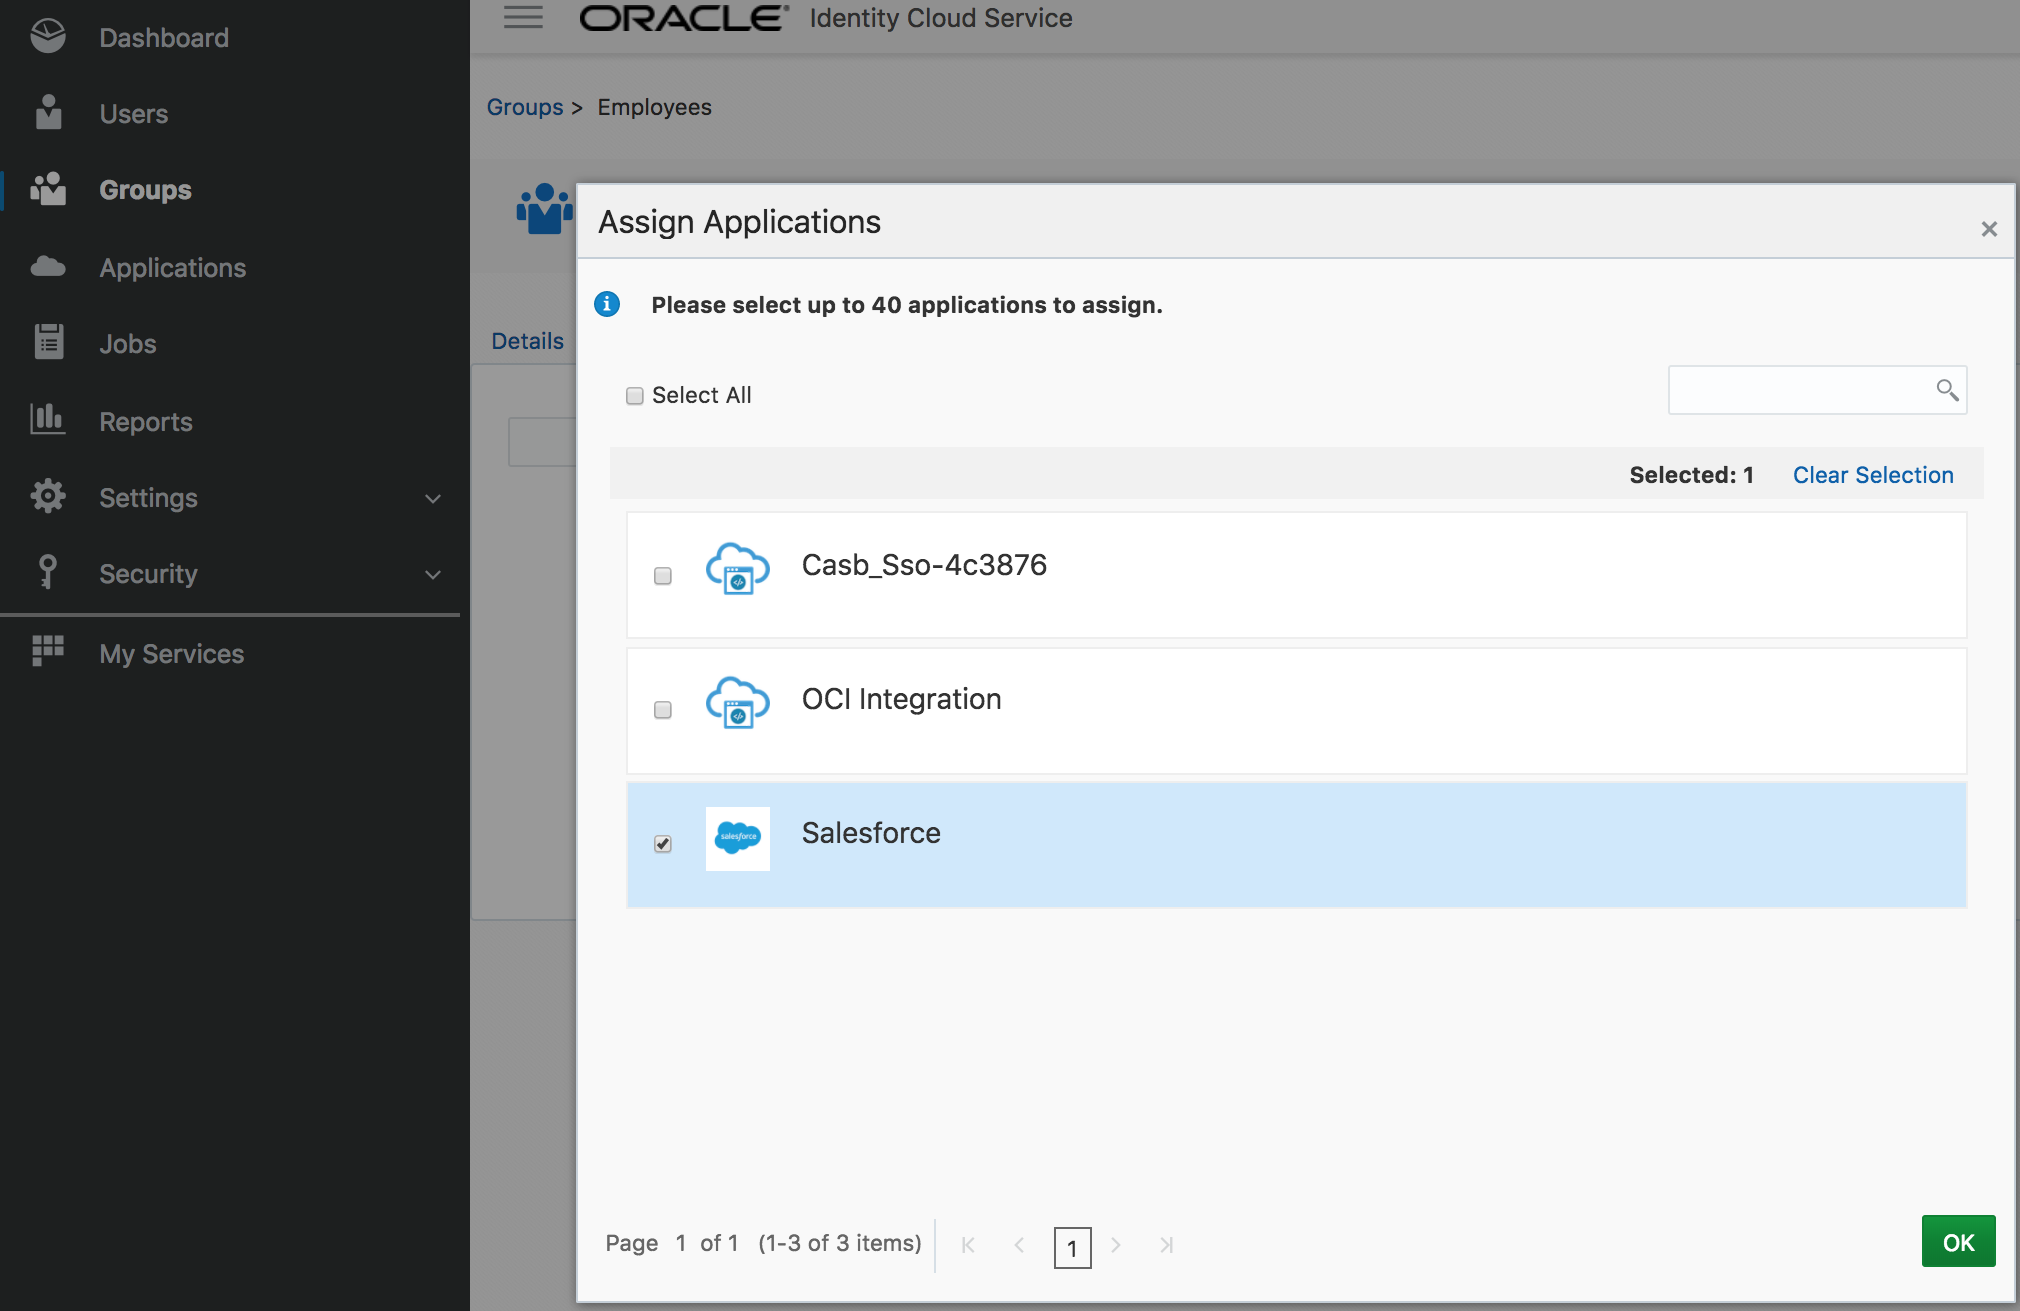
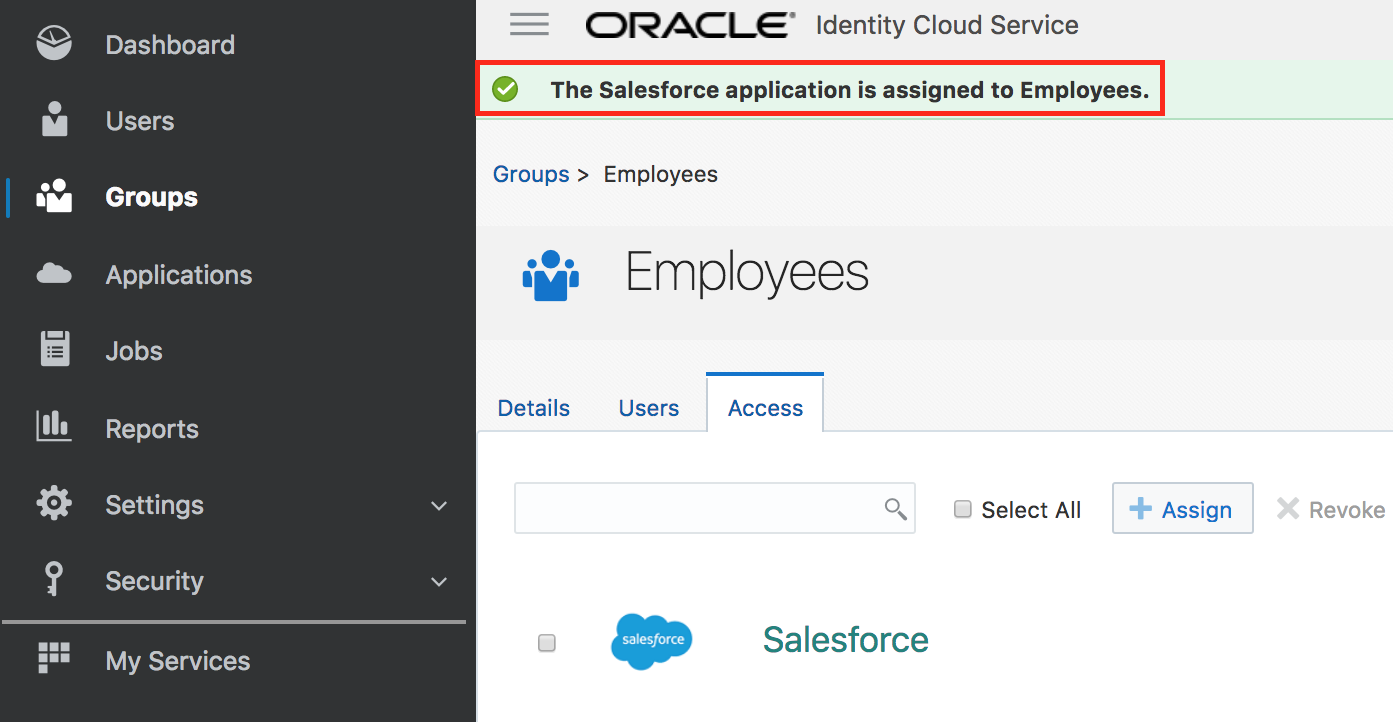
- Congratulations, you successfully created a group and assigned an application to it.
Request group - (Persona: End-User)
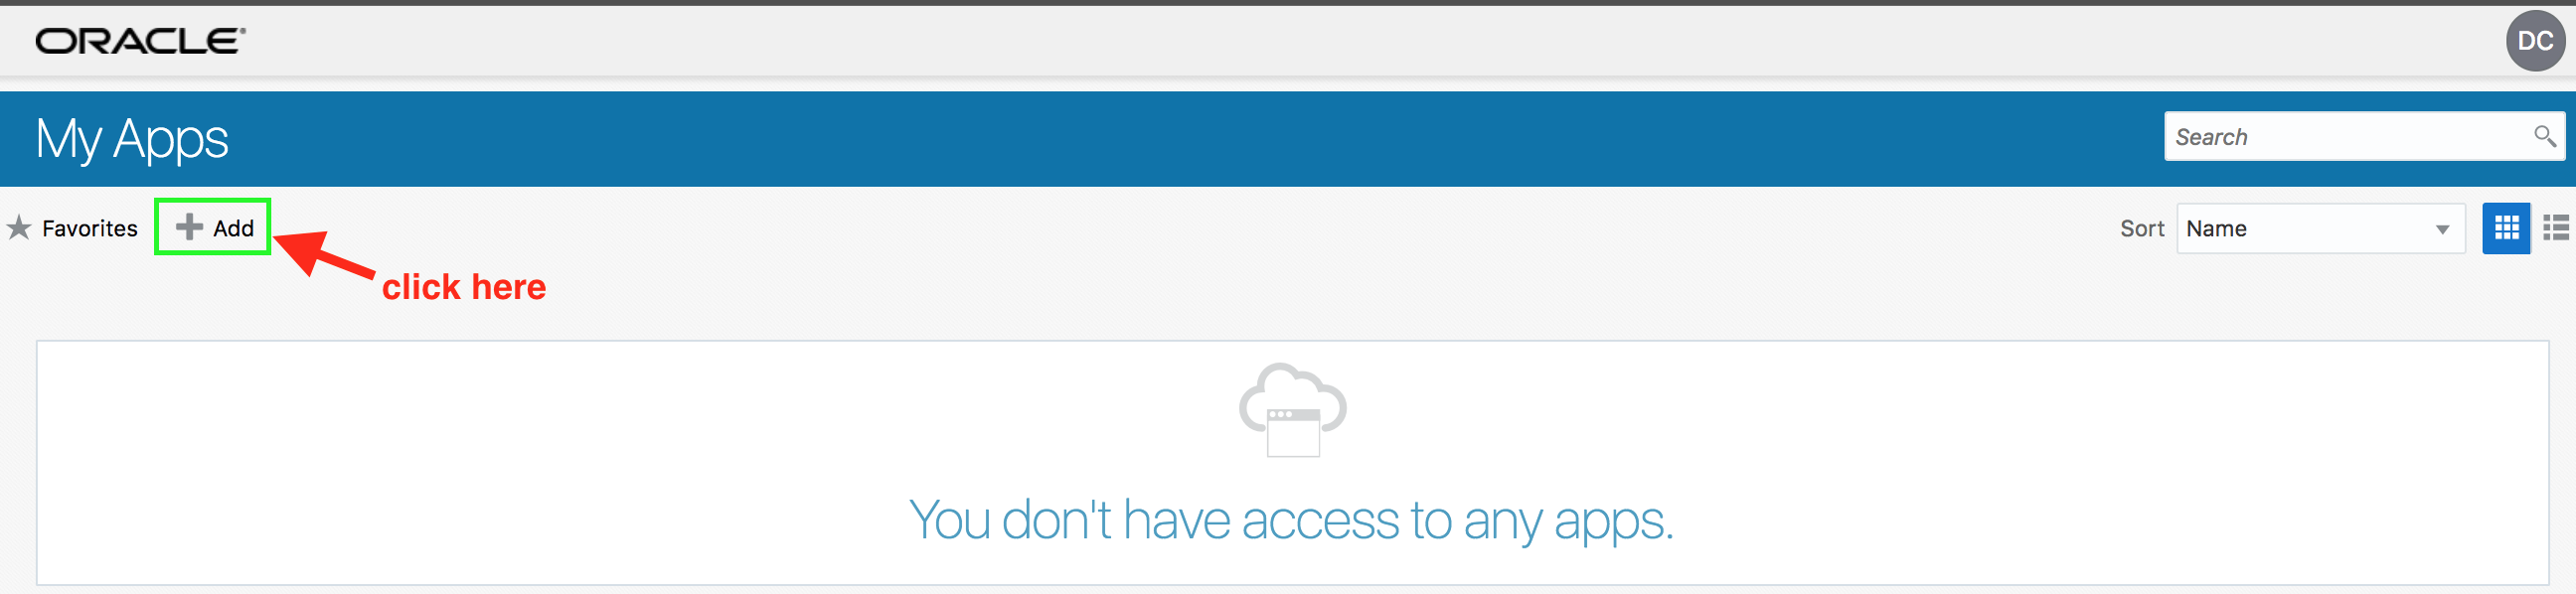
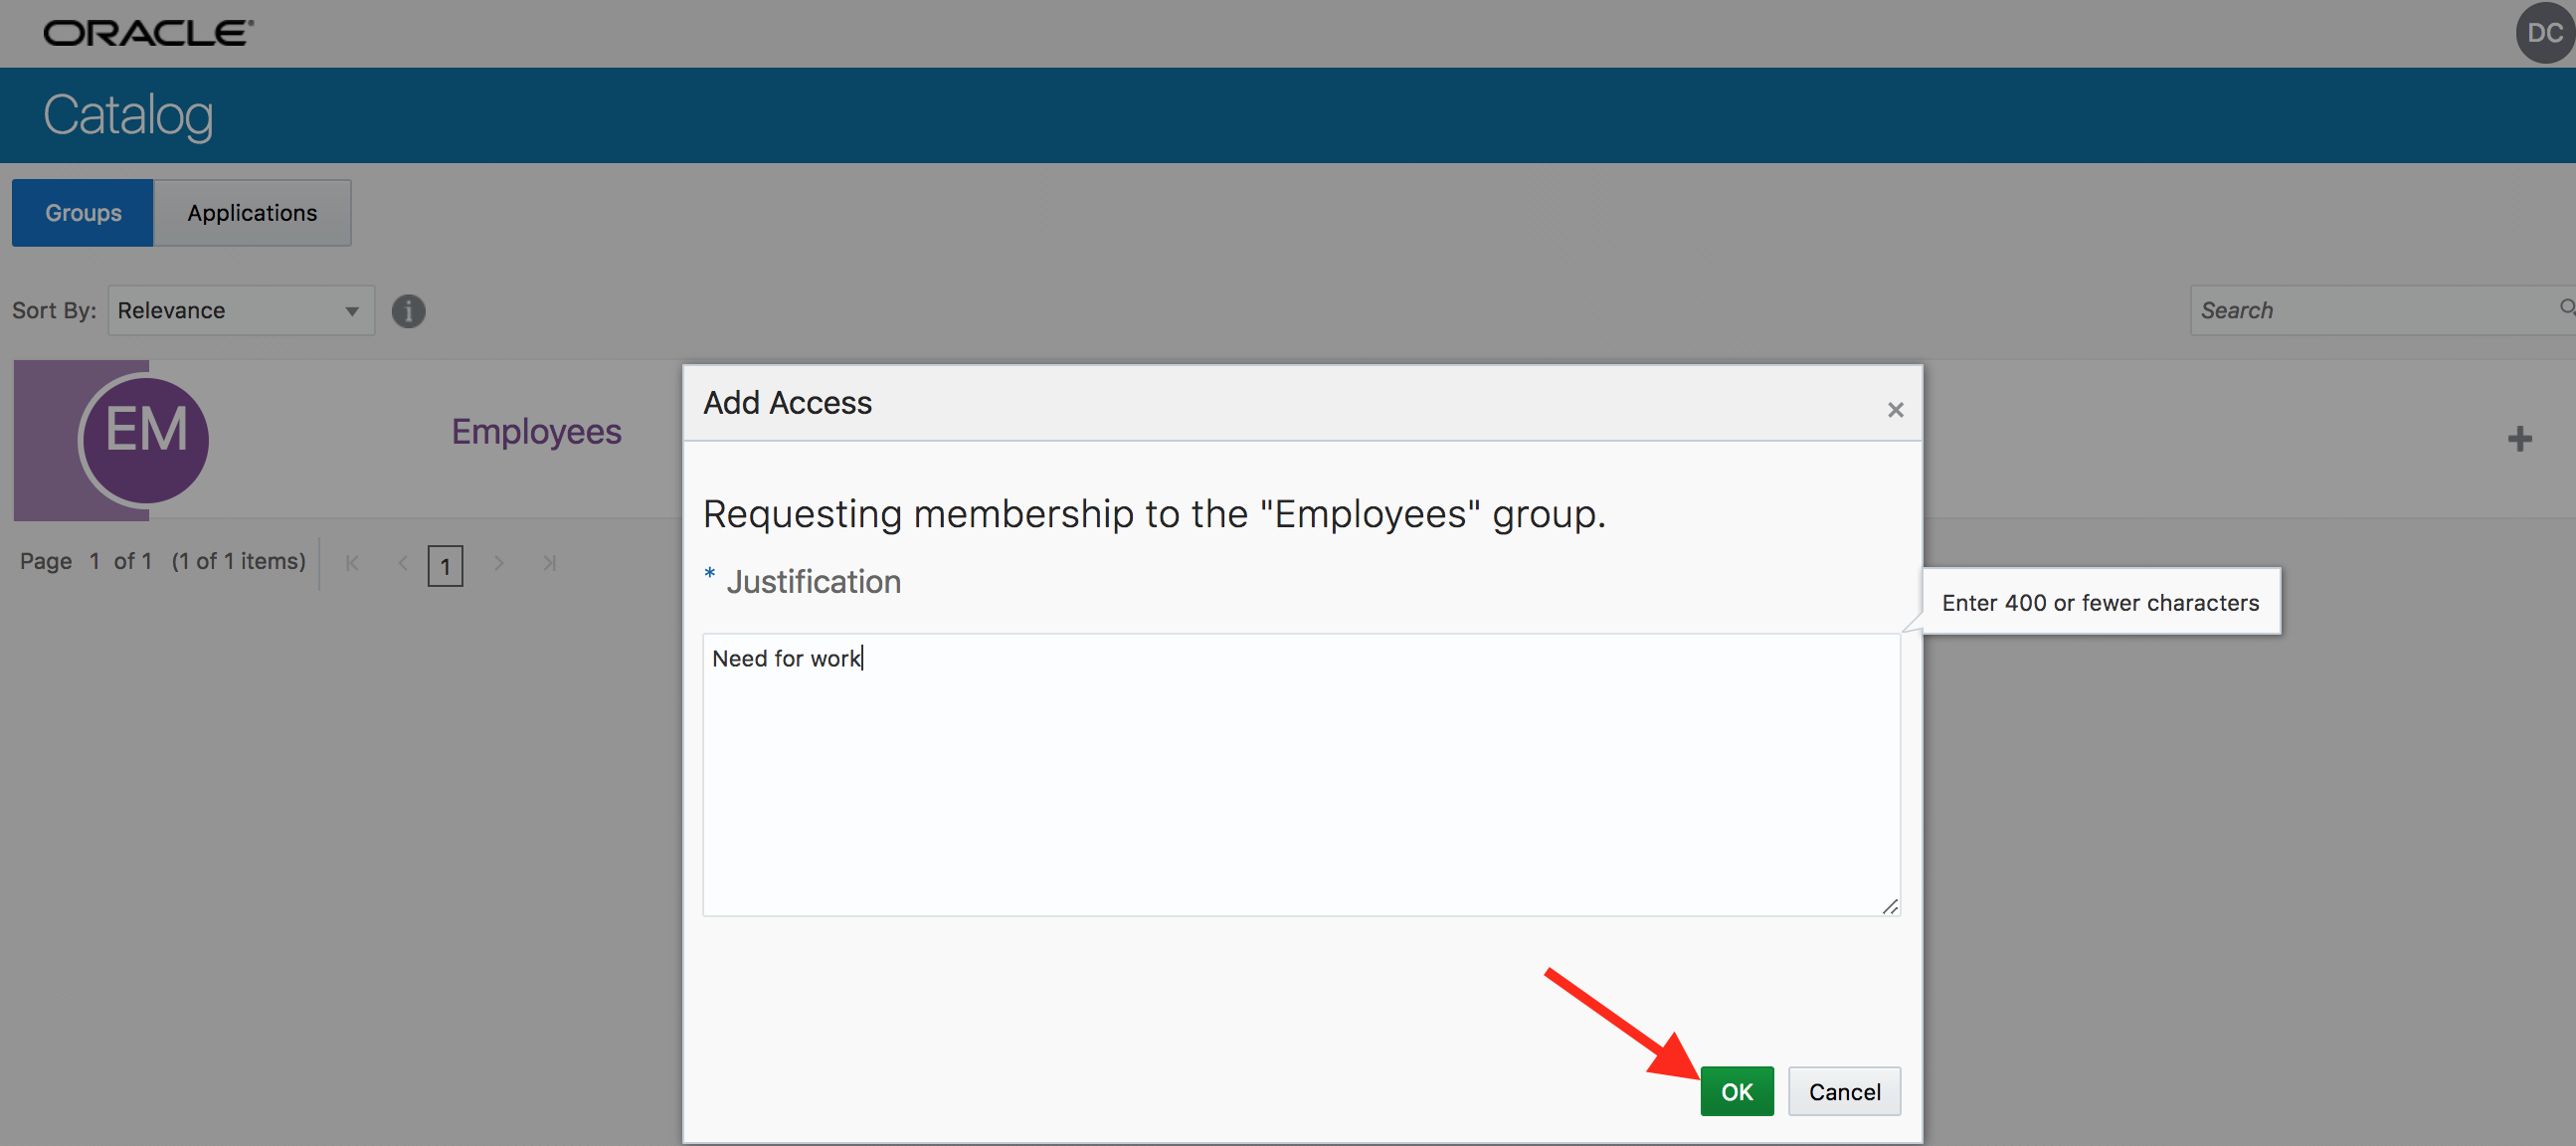
- From MyApps page click on Add access request button.
- Verify that Employees group is available on the Groups tab. Click on
+sign to request access to the group.
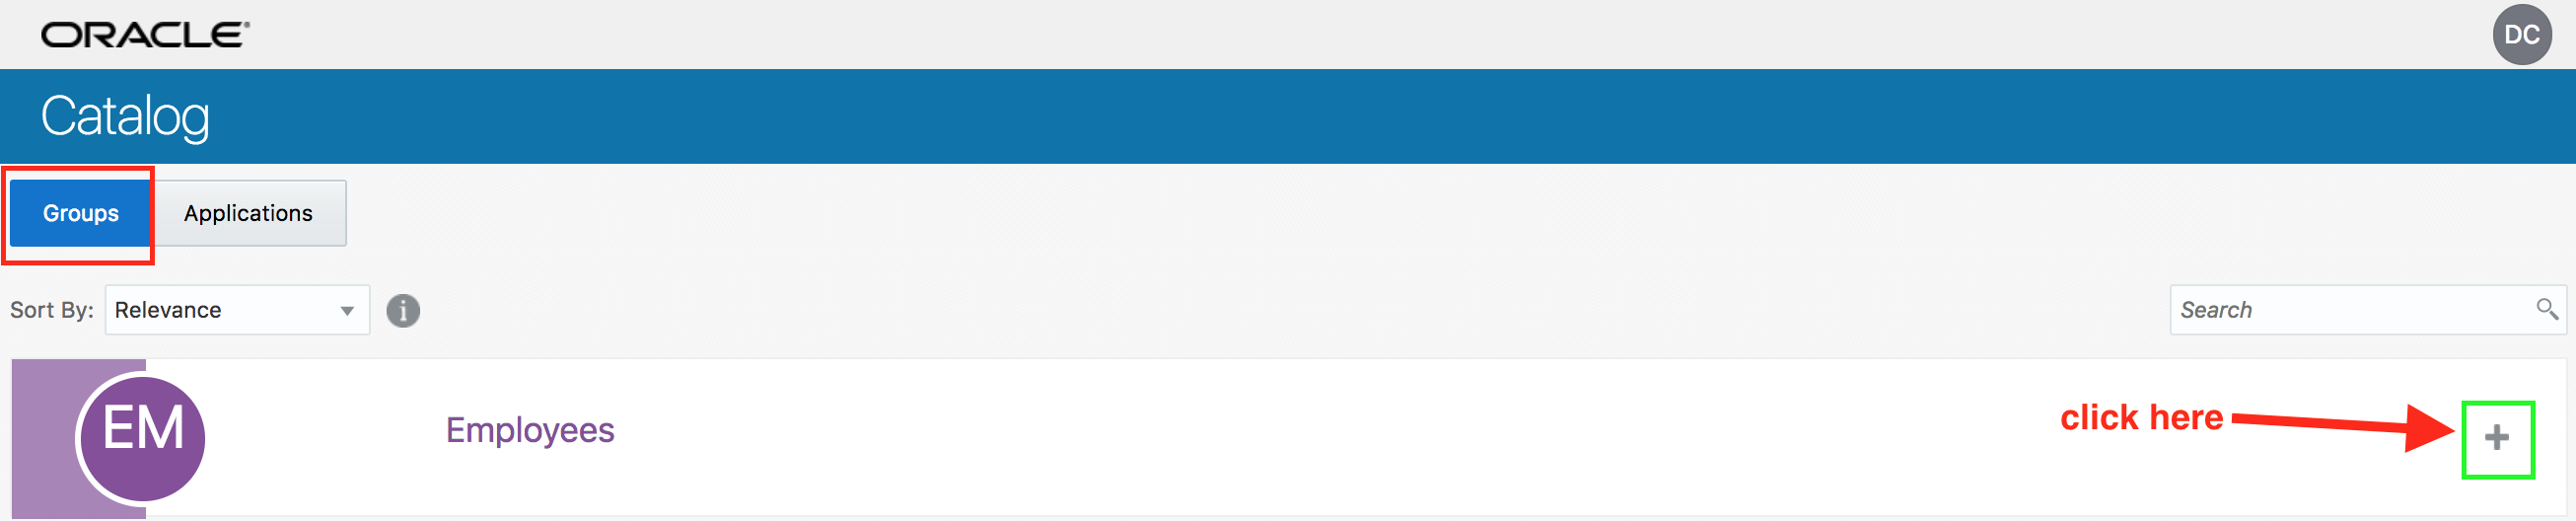
- Provide justification on the resulting popup page. Click on OK.
- Go to My Profile section from menu located top-right.
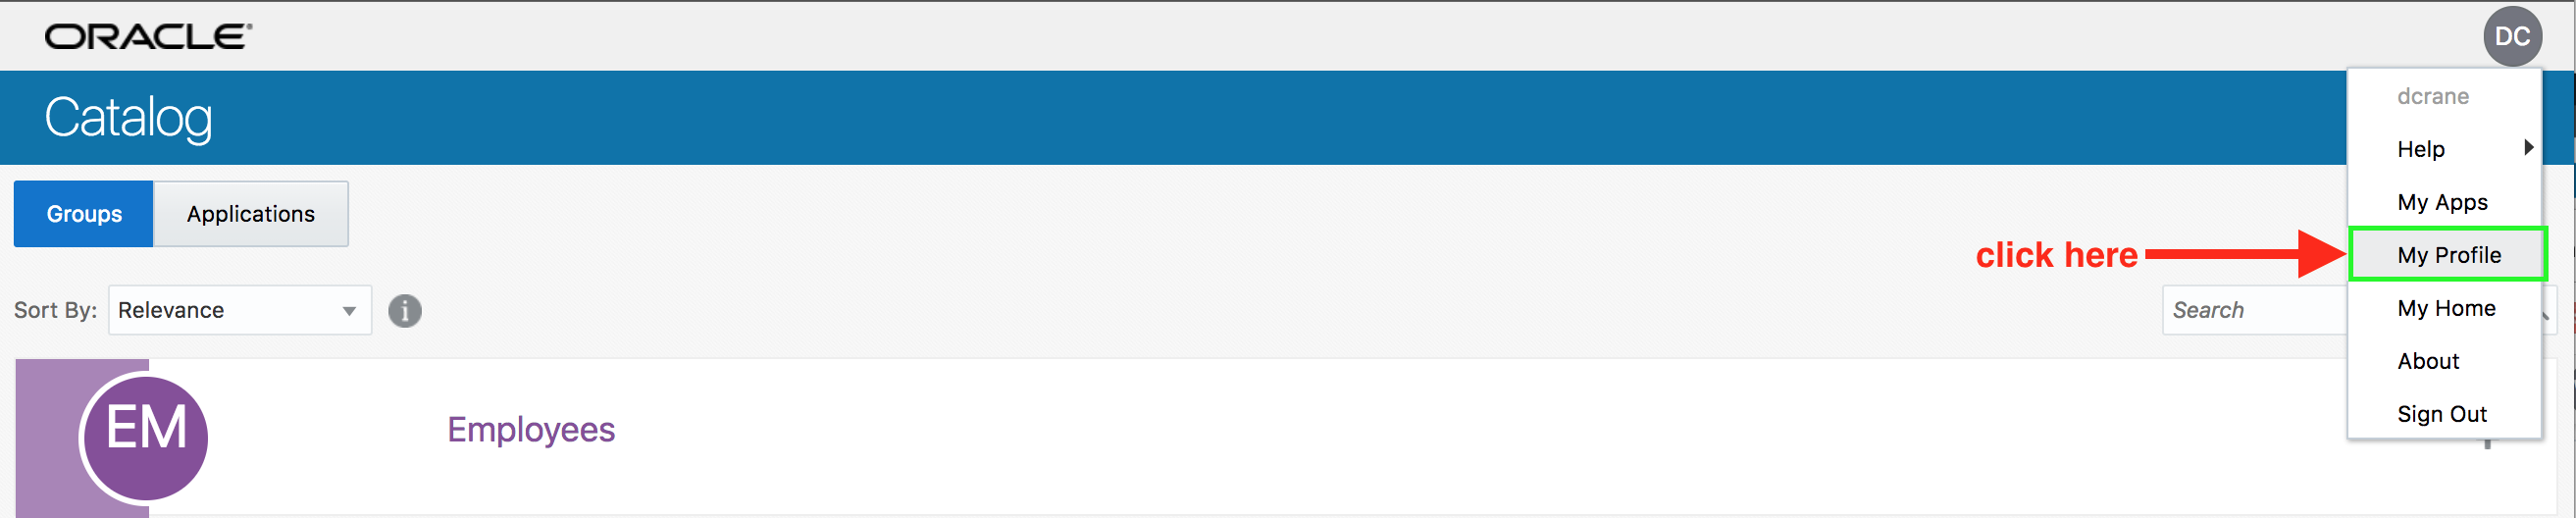
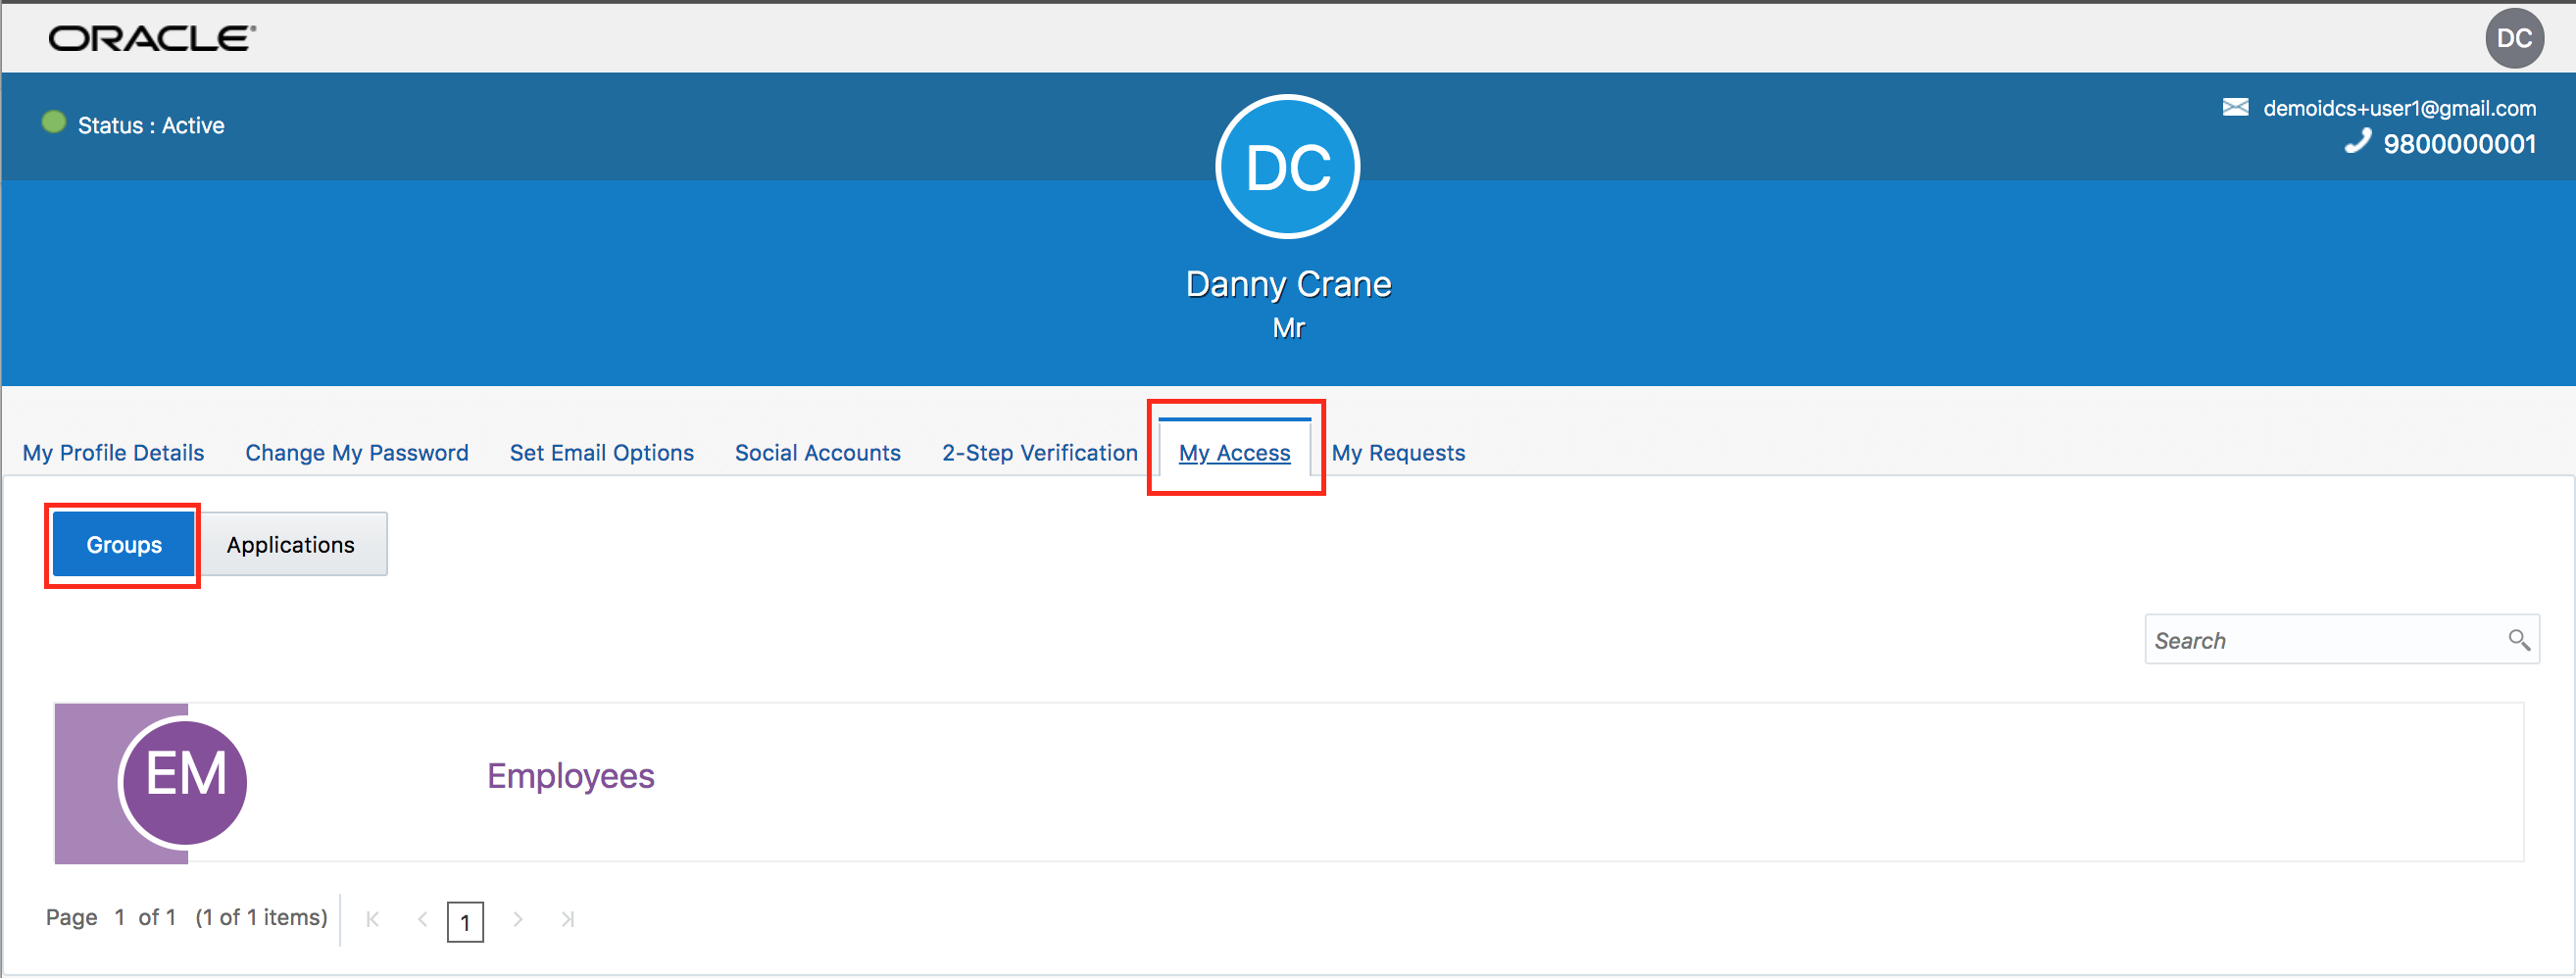
- Ensure that Employee group is visible under My Access tab.
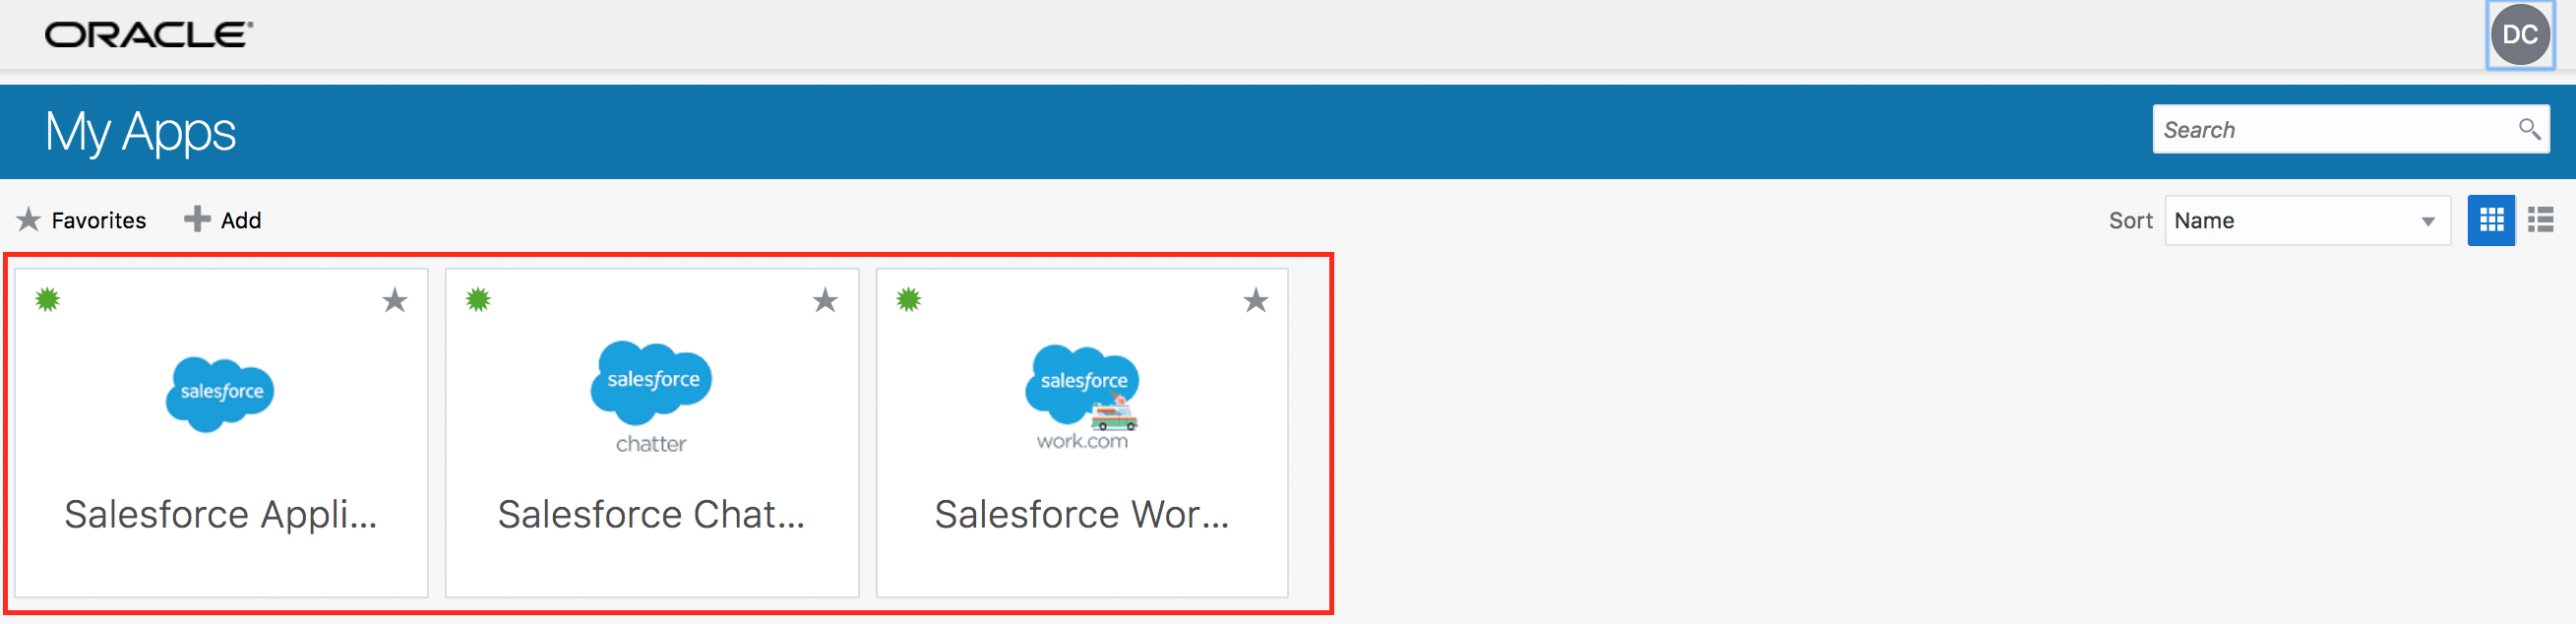
- Go to My Apps section from menu located top-right.

- Ensure that Salesforce applications are visible now on the My Apps page.
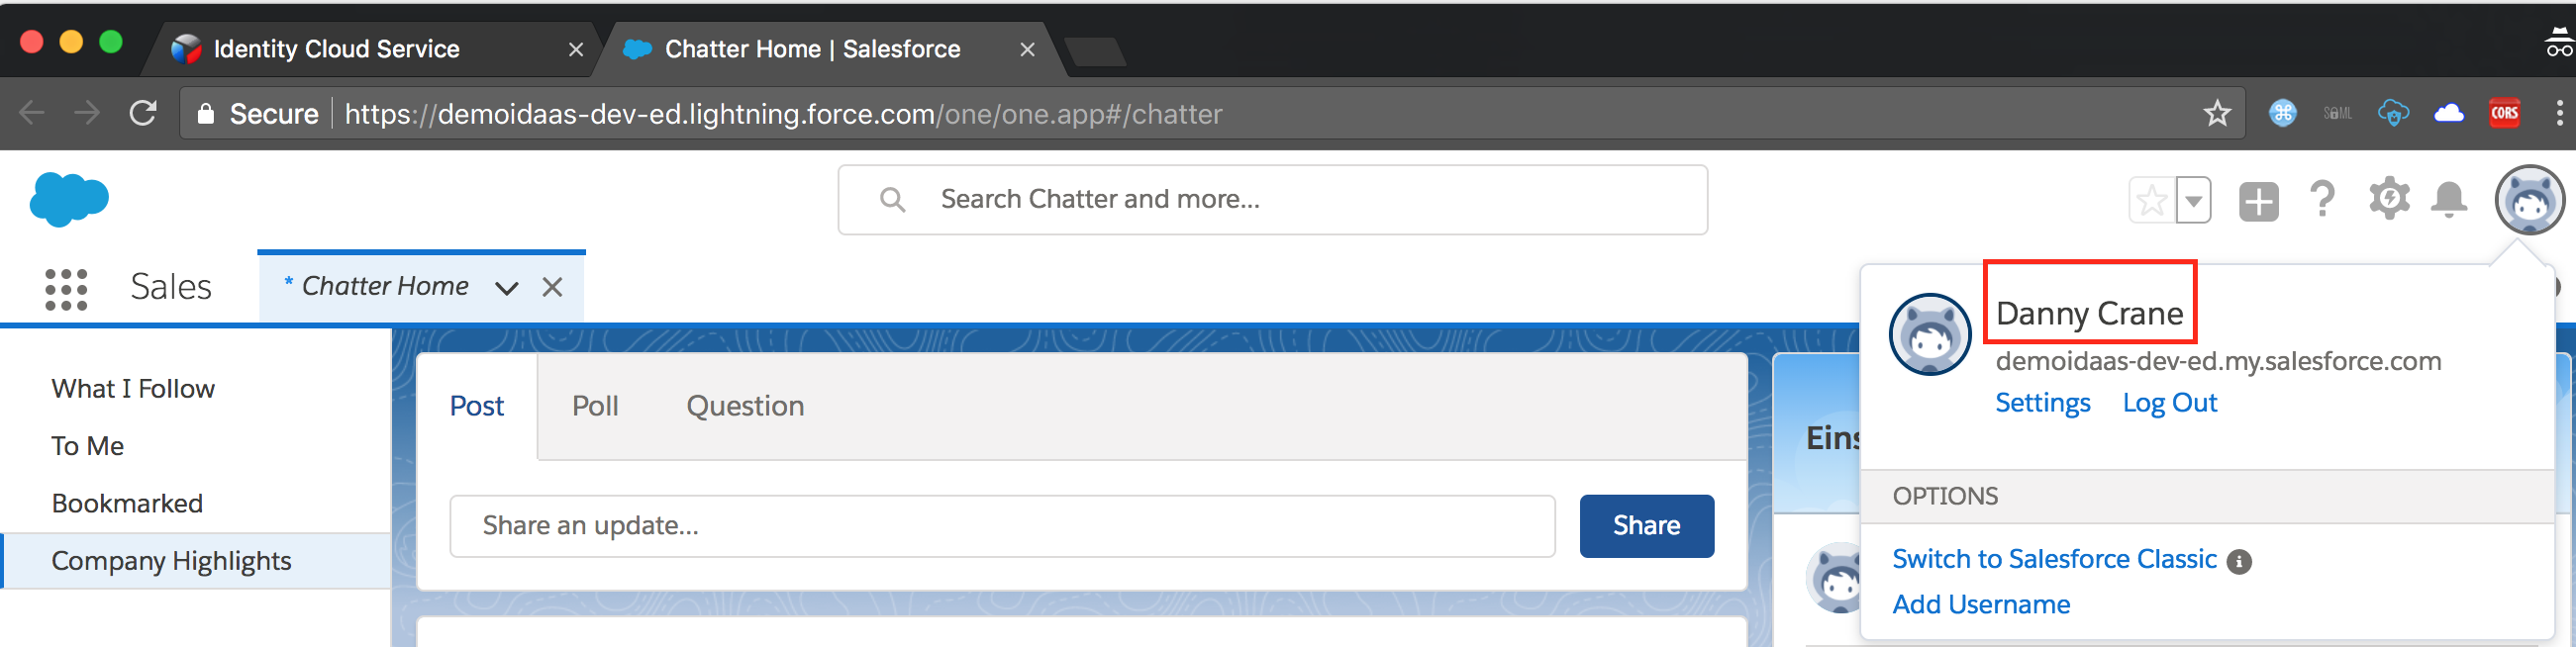
Verify SSO - (Persona: End-User)
- Click on the Salesforce Chatter app.
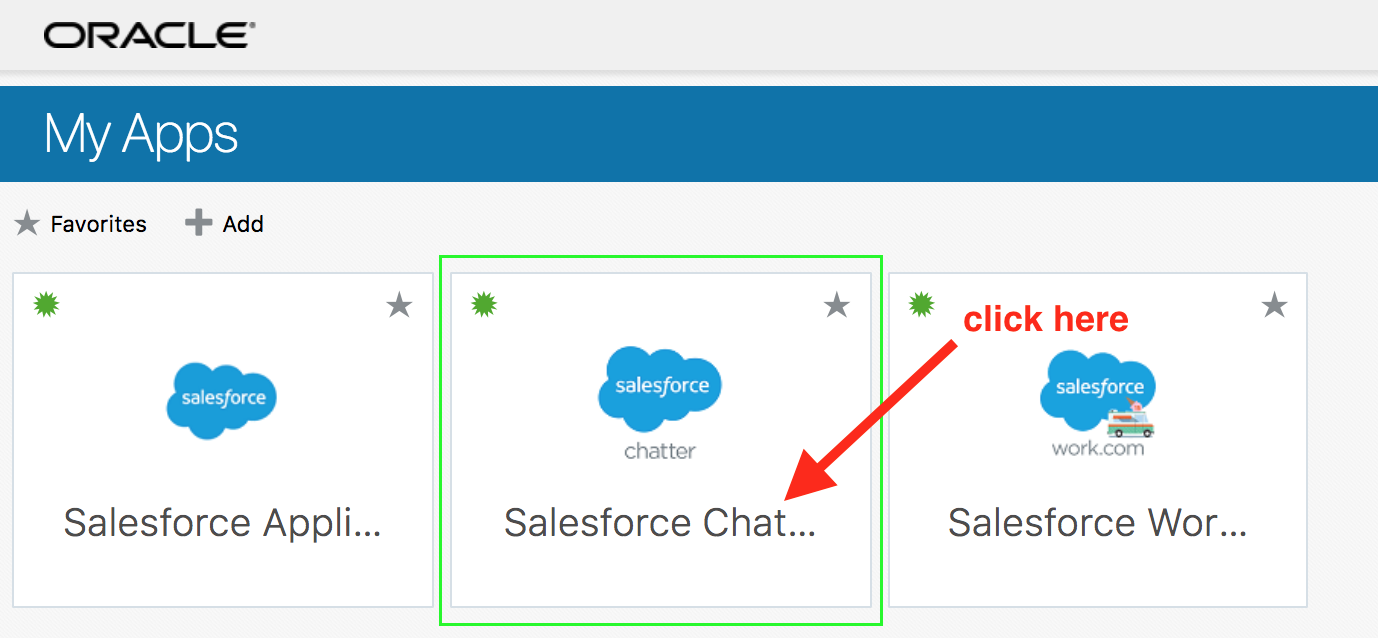
- Ensure that user is automatically logged-in to Salesforce Chatter (SSO)
- Congratulations, you completed the IDCS advanced hands-on lab.